• Types of Pathogen Transmission: A 2026 Guide

    Many individuals are told to “just wash your hands” and assume that solves pathogen spread. It doesn't. Types of pathogen transmission matter because bacteria and other germs move through different routes, and the right control depends on whether the threat is in the air, on hands and surfaces, in food or water, or carried by vectors like insects. The CDC's 2024 healthcare framing is blunt about the operational choice, pathogens spread through air or through touch, and that simpler lens is often more useful than memorizing textbook bins that blur together in real buildings and routines.

    That matters in schools, gyms, restaurants, and homes, where limited time and staff can't cover every risk at once. If you clean the wrong surfaces, overfocus on one route, or ignore ventilation when the problem is airborne, you waste effort and miss the true chain of infection. A practical guide needs to show how transmission works in the spaces people manage, not just in a microbiology glossary. For a broader primer on how infection chains connect, see the chain of infection overview.

    Why Transmission Categories Are Overcomplicated

    The biggest mistake is assuming all germs spread the same way. They don't, and that difference changes everything from cleaning schedules to room design. A medical review separates spread into direct transmission and indirect transmission, with indirect spread further divided into biological, mechanical, and airborne routes, while infection-control guidance also groups transmission as airborne, droplet, contact, common vehicle, and vector-borne pathways (medical review on transmission categories).

    Air and touch are the two practical buckets

    That formal language sounds tidy, but day-to-day operations need something simpler. CDC healthcare guidance in 2024 collapses spread into two practical pathways, pathogens that spread via the air and pathogens that spread via touch (CDC draft guideline). That simplification helps a facility manager decide whether to invest in ventilation, respiratory protection, hand hygiene, or surface disinfection first.

    Practical rule: if the risk is in the air, ventilation and respiratory protection matter more. If the risk is on hands and surfaces, cleaning and disinfection matter more.

    The confusion comes from textbook categories like droplet, airborne, contact, fecal-oral, and vector-borne. Those labels are useful in class, but real spaces do not always fit neatly into one box. A child in a classroom coughs, a worker touches a shared tablet, a parent opens a door, and a cafeteria line adds food handling to the mix. In a school, restaurant, gym, or clinic, the route depends on what people touch, what they breathe, and how the room moves air. For a broader look at how infection chains connect, see the chain of infection overview.

    The other reason people miss the mark is that some pathogens do not stay in one lane. A respiratory pathogen can spread by close droplets in one setting and behave more like an airborne hazard in a crowded, poorly ventilated room. Airborne spread can involve particles 5 μm or smaller that stay suspended and travel with air currents, which is why air handling can matter more than wiping every desk in sight (medical review on transmission categories). In practice, the question is not “What category is it?” It is “What conditions let it move here?”

    Direct Transmission Routes You Encounter Daily

    Direct transmission is the easiest route to picture because people see it happen. It includes physical contact, like skin-to-skin contact, contact with wounds, and sharing items that touch the body, plus droplet spread from coughing, sneezing, or talking over short distances (CDC training material). In many buildings, these are the routes that show up first because people are close together and touching the same equipment.

    Contact spread in gyms, schools, and homes

    Staphylococcus aureus moves well in contact-heavy settings, especially where people share towels, benches, weights, mats, or athletic gear. Wrestling rooms, locker rooms, daycares, and classrooms all create repeated touch points, which is why asymptomatic carriers can keep a chain going even when nobody looks ill. The same is true for Streptococcus pyogenes, where close contact and shared spaces make transmission easier than people expect.

    Droplet spread adds another layer. Respiratory droplets are larger than airborne particles and usually require close face-to-face exposure, often within about 1 meter (transmission review). That's why crowded classrooms, carpool lines, and indoor team huddles can be risky during respiratory illness season, even when surfaces are being cleaned.

    An educational infographic comparing indirect transmission via surfaces or vectors with airborne transmission through microscopic particles.

    A useful habit is to map the room, not just the organism. Ask where bodies cluster, where hands land again and again, and which items move from one person to the next without a pause. Shared equipment, cart handles, restroom fixtures, water fountains, and touchscreen devices are all common contact points.

    For hand technique details that cut this route, see proper hand hygiene techniques.

    Indirect Transmission and the Airborne Gray Zone

    Indirect transmission covers the routes that don't require a person-to-person touch. These include airborne, fomite, vehicle-borne, and vector-borne spread (CDC training material). The most confusing part is the gray zone between droplet and airborne spread, because many people still think of them as rigid categories when real exposure depends on room conditions.

    When droplet risk starts behaving like airborne risk

    Airborne spread involves very small particles, often described as aerosols <5 microns, that can remain suspended and move with air currents (MSK transmission guide; RACGP infection prevention guidance). That's why a crowded, poorly ventilated room can change the risk profile even if the source started as a cough or sneeze. In schools, gyms, and waiting rooms, the practical issue is not just who coughed, but whether the air was exchanged well enough afterward.

    When air is the vehicle, a wiped table won't solve the problem by itself.

    Ventilation and respiratory protection matter more than surface cleaning alone. This also explains why healthcare rooms use different precautions for different diseases, while homes and businesses need to focus on occupancy, airflow, and time spent in enclosed spaces. The same logic helps explain why an infected person in a room can matter even without obvious close contact.

    The underappreciated part is the fomite route. A contaminated surface can move organisms from an inanimate object to a hand and then to the mouth or nose, and some pathogens can survive on common surfaces for days to weeks (surface persistence reference). That's why touch-heavy spaces such as kiosks, doorknobs, shared pens, and restroom fixtures need validated disinfection, not just a quick wipe.

    For the environmental side of this issue, see bacteria in air conditioning. For mosquito-related indirect spread in outdoor settings, a useful public-health resource is The Green Advantage mosquito illnesses.

    A comparison infographic between indirect contact transmission and airborne respiratory pathogen transmission through particles in the air.

    How Long Pathogens Survive on Surfaces and in Air

    Environmental persistence changes how long a transmission route stays relevant. Some bacteria and viruses die off quickly once they leave the body, while others remain viable long enough to move from one person to the next through a high-touch object or a damp shared surface. That's why cleaning plans should focus on what people touch most, not every square foot equally.

    High-touch surfaces matter more than low-touch ones

    A dry doorknob, a gym machine handle, and a shared tablet deserve more attention than a wall or floor because hands keep returning there. Staphylococcus aureus is a good example of why this matters, since it can live on dry, nonporous surfaces for days to weeks depending on humidity and temperature. That makes shared equipment, restroom handles, bed rails, and locker-room benches more important than background surfaces in the same room.

    Here's a simple way to think about survival and cleaning priorities.

    Pathogen Surface Type Survival Time Key Risk Factors
    Staphylococcus aureus Dry, nonporous surfaces Days to weeks Humidity, temperature, repeated touch
    E. coli Contaminated hands, food-contact surfaces Qualitative fecal-oral spread Food handling, restroom hygiene, cross-contamination
    Biofilm-forming bacteria Moist surfaces, drains, damp equipment Persistent colonization Moisture, nutrient buildup, poor drying

    E. coli is most often a fecal-oral problem, which means contaminated food, water, and hands matter more than casual contact with a wall or shelf. That's why food prep areas, diapering stations, bathrooms, and caregiver workflows need more careful control than generic “clean everything” advice. Moist surfaces also matter because biofilms can protect bacteria and make routine wiping less effective.

    In gyms, damp mats and shared weights deserve attention because moisture and frequent contact create a better survival environment. In schools, tablets, desks, and shared pencils are repeat-touch items. In food service, cutting boards and prep surfaces sit at the center of the route, especially when hand hygiene and cross-contamination control slip.

    For a parent dealing with spills and cups at home, a helpful practical guide is sippy cup mold prevention. It's a useful reminder that moisture plus repeated use changes the risk profile fast.

    Matching Prevention Strategies to Your Environment

    Prevention works best when it matches the dominant transmission route in the room. Healthcare settings need a different playbook than gyms, and food service needs different controls than a classroom. The goal isn't to do everything everywhere. It's to spend energy where it breaks the chain fastest.

    The controls that fit the setting

    In healthcare, airborne risk calls for N95 respirators, negative pressure rooms, and dedicated isolation when the organism is spread through the air. Contact precautions, including gowns and gloves, fit organisms such as MRSA and VRE when the main route is touch-based. Environmental cleaning still matters, but it works best when it supports the route-specific controls already in place.

    A tiered diagram showing various pathogen prevention strategies tailored for personal, community, home, and healthcare environments.

    Schools and daycares need a different balance. Hand hygiene, surface disinfection of high-touch zones, and clear respiratory illness policies usually do more than broad, unfocused cleaning. Gyms should emphasize equipment wipe-downs between users, mat cleaning, and rules for skin infections, because shared surfaces and close contact create the main risk.

    Food service has its own pattern. The priority is food safety, cross-contamination prevention, and restroom sanitation for fecal-oral pathogens. In homes, the best approach is practical, not extreme. Focus on kitchen counters, bathroom touch points, toys, and shared devices, then stop before you turn daily life into a disinfection marathon.

    Cleaning Protocols That Break the Chain

    Cleaning removes dirt and organic matter. Disinfection kills the pathogens left behind. Both steps matter, and the order matters too, because soil can block the product from reaching the surface. In shared spaces, EPA-registered disinfectant wipes give facility teams a consistent way to carry out that process when they are used correctly.

    What the wipe has to do

    The label matters more than the fragrance or packaging. Check whether the product is approved for the organism you are trying to control, and read the dwell time, also called contact time, because the surface has to stay wet that long. For many products, that wet contact window is measured in minutes, not seconds, so a quick swipe that dries almost immediately often fails in practice.

    A good protocol is simple:

    • Remove visible soil first. Wipes work better on a clean surface than on a dirty one.
    • Use the right wipe for the right organism. The label should match the target bacteria.
    • Keep the surface wet for the full dwell time. If it dries early, reapply.
    • Use one wipe for one area. Don't drag contamination from one surface to another.
    • Let the surface air dry when the product calls for it.

    Practical rule: cleaning removes what blocks the disinfectant, and disinfection keeps the product on the surface long enough to do its job.

    For facility teams looking for a product category built around this workflow, Wipes.com is one option to review alongside other EPA-registered disinfectant wipe solutions. The point is not the brand itself, it is making sure the wipe is proven for the organism, used on the right surface, and kept wet for the required time.

    A bathroom, a gym bench, and a daycare table do not all need the same response. The right wipe protocol depends on the surface, the organism, and how quickly people touch that area again. That is why a simple checklist often works better than a broad cleaning routine that treats every room the same. In a kitchen, for example, a parent focused on sippy cup mold prevention may need a different cleaning rhythm for bottle parts, lids, and counters than a facility team uses for a locker room bench.

    The practical question is simple. What are you trying to stop, and what surface is carrying it? Once that is clear, cleaning becomes a sequence, not a guess. First remove the debris, then apply the wipe correctly, then give the product time to work.

    Real-World Scenarios and Practical Takeaways

    A gym manager who treats MRSA as a fomite and contact problem puts wipes at equipment stations and reinforces mat cleaning. A school administrator who sees the difference between air and touch improves ventilation, then tightens desk and tablet cleaning. A restaurant manager who understands fecal-oral spread trains staff on handwashing and cross-contamination control. A parent who understands persistence focuses on high-touch spots at home without over-sanitizing every room.

    The best rule is simple. Identify your dominant route, match your controls, and use proven products the way the label says.


    If you manage a school, gym, restaurant, clinic, or household, audit your highest-touch and lowest-airflow areas this week, then choose one proven disinfectant wipe workflow and one ventilation or hygiene upgrade to put in place right away.

  • Combating *Pseudomonas aeruginosa* in Commercial Spaces

    Pseudomonas aeruginosa is a formidable, gram-negative bacterium known for its adaptability and resilience. Often found in soil and water, this opportunistic pathogen poses a significant risk in high-traffic environments like hospitals, gyms, and long-term care facilities due to its ability to form protective biofilms and resist common antibiotics. Understanding its characteristics and how to control it is essential for maintaining a safe and healthy space.

    Definition and Overview of Pseudomonas aeruginosa

    A water droplet emitting energy rays to eliminate harmful bacteria, virus, and mold pathogens.

    Pseudomonas aeruginosa is a rod-shaped bacterium classified as an "ESKAPE" pathogen—a group of microbes notorious for their ability to "escape" the effects of antimicrobial drugs. One of its most notable traits is its production of a slimy, protective biofilm. This biofilm acts as a shield, making the bacteria inside highly resistant to disinfectants and antibiotics. It can also produce a characteristic grape-like or "tortilla chip" odor and sometimes a blue-green pigment called pyocyanin, which can stain wound dressings and medical equipment. Its complex cell membrane proteins contribute to its intrinsic resistance to many cleaning agents.

    Where Is Pseudomonas aeruginosa Commonly Found?

    This bacterium thrives in moist environments. Due to its minimal nutritional requirements, it can colonize a wide variety of surfaces and locations, including:

    • Healthcare Settings: Sinks, toilets, catheters, respiratory equipment, and hydrotherapy pools are common reservoirs.
    • Gyms and Spas: It can be found on damp surfaces like shower floors, locker room benches, hot tubs, and pool decks.
    • Food Service Areas: Drains, faucets, and improperly cleaned food preparation surfaces can harbor the bacteria.
    • Commercial Buildings: HVAC systems, water fountains, and any area with standing water can become a breeding ground.

    Because it forms biofilms, P. aeruginosa can persist on surfaces for long periods, making routine and thorough disinfection critical.

    Health Risks Associated with Pseudomonas aeruginosa

    For healthy individuals, exposure to P. aeruginosa rarely causes serious illness. However, it is an opportunistic pathogen, meaning it primarily affects those with weakened immune systems, pre-existing conditions, or breaches in their natural defenses (like wounds or burns).

    Common infections include:

    • Hospital-Acquired Infections (HAIs): It is a leading cause of pneumonia (especially in ventilated patients), bloodstream infections, and urinary tract infections (UTIs).
    • Skin Infections: Folliculitis (often called "hot tub rash"), and infections in burn wounds or surgical sites.
    • Ear Infections: Particularly "swimmer's ear" (otitis externa).
    • Eye Infections: Can cause serious corneal infections, especially in contact lens wearers.

    The rise of multidrug-resistant (MDR) strains of P. aeruginosa makes these infections increasingly difficult to treat, underscoring the importance of prevention through effective cleaning.

    How to Kill and Control Pseudomonas aeruginosa

    Controlling P. aeruginosa requires a two-pronged approach: mechanical cleaning to remove biofilms and chemical disinfection to kill the bacteria. Disinfectants with proven efficacy against this pathogen are essential.

    1. Choose an EPA-Registered Disinfectant: Look for products specifically labeled as effective against Pseudomonas aeruginosa. Accelerated Hydrogen Peroxide (AHP) is an excellent choice. Its oxidizing action helps break down the protective biofilm, exposing the bacteria to its germicidal effects. You can explore a detailed comparison in our guide, Bleach Versus Hydrogen Peroxide for Surface Disinfection.
    2. Clean Before Disinfecting: Always remove visible soil and organic matter from surfaces first. This allows the disinfectant to work directly on the microbes.
    3. Respect the Dwell Time: Dwell time is the period a disinfectant must remain wet on a surface to be effective. For P. aeruginosa, this can range from 1 to 10 minutes depending on the product. Disinfectant wipes are often ideal for ensuring the surface stays wet for the required duration.
    4. Focus on High-Touch, Moist Areas: Pay extra attention to faucets, drains, toilet handles, shower controls, and any equipment that comes into contact with water.

    Some products, like those containing 20 volume hydrogen peroxide, are used in very specific applications like professional whitening at home, but for surface disinfection, EPA-registered formulations are key.

    Who Should Be Concerned?

    While everyone should practice good hygiene, certain professionals must be particularly vigilant about controlling P. aeruginosa:

    • Facility and Janitorial Managers: Responsible for implementing cleaning protocols in hospitals, schools, and offices.
    • Healthcare Providers: To prevent HAIs in vulnerable patient populations.
    • Gym and Spa Operators: To protect clients from skin and ear infections.
    • Food Service Managers: To ensure the safety of food preparation areas and prevent cross-contamination.

    Practical Takeaway

    Pseudomonas aeruginosa is a resilient bacterium that thrives in damp, high-traffic environments. Effective control hinges on using an EPA-registered disinfectant proven to kill it, such as an accelerated hydrogen peroxide product, and adhering strictly to cleaning protocols, especially dwell times. Breaking down its protective biofilm is key to eradication.

    For reliable, EPA-registered disinfectant wipes that are effective against a broad spectrum of pathogens including Pseudomonas aeruginosa, we recommend exploring the options at Wipes.com.

  • Best Cleaner for Fridge: Safe Picks and Smart Habits

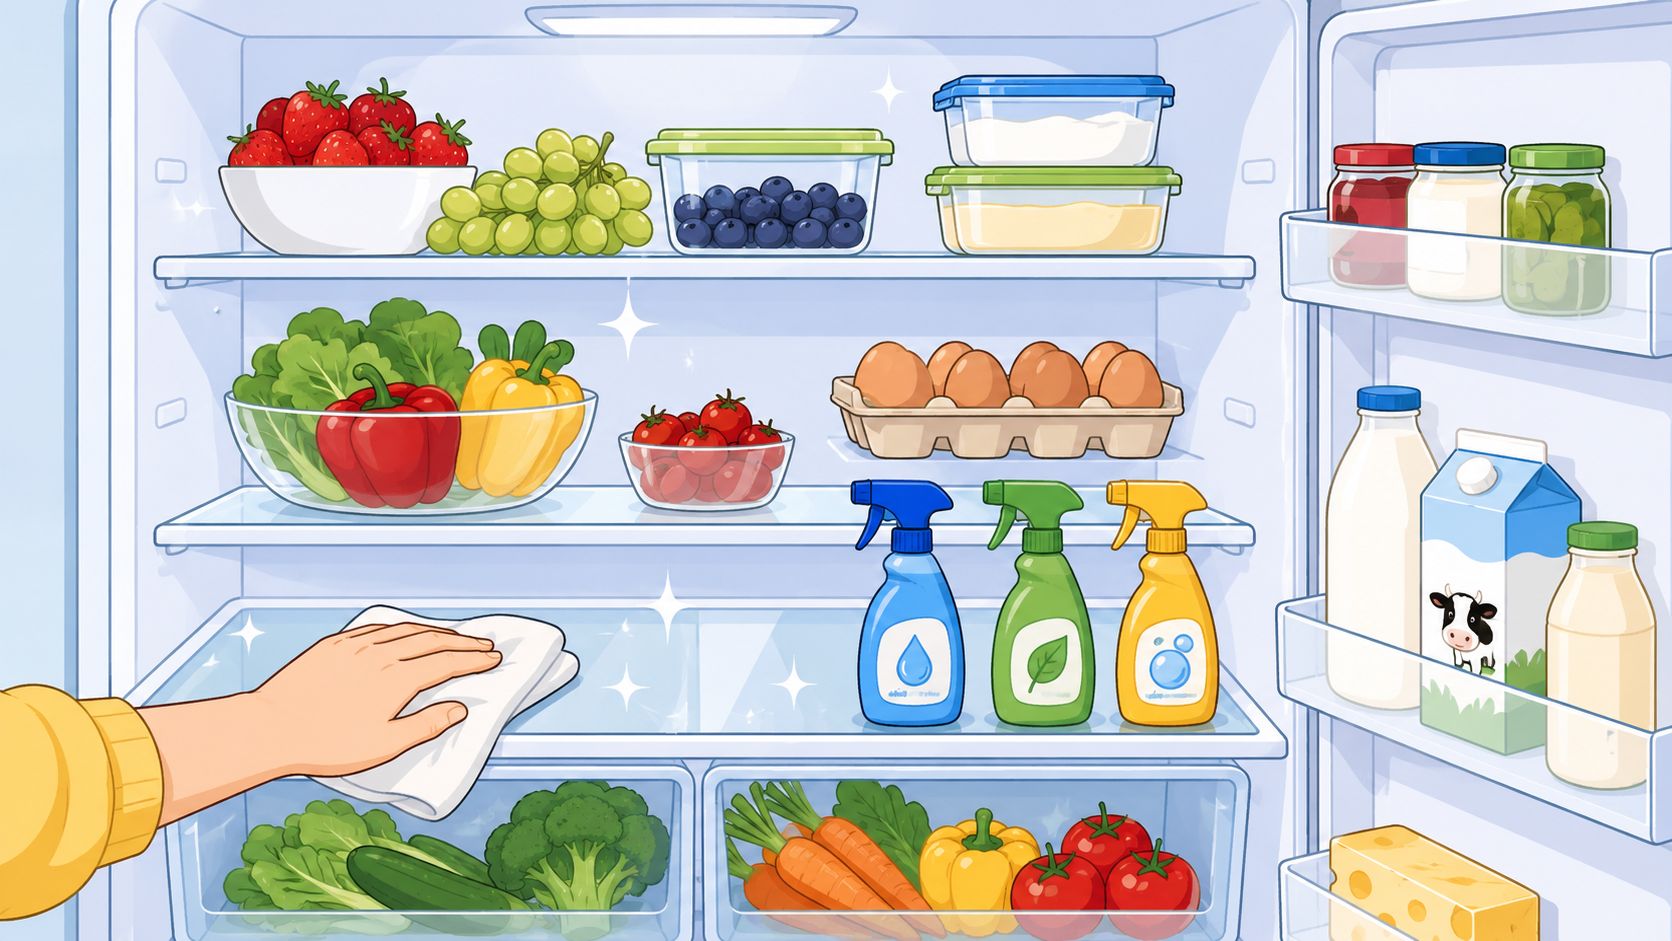
    You open the refrigerator and find the same small disaster people always find at the worst time, a sticky spill under the crisper, a faint smell from the back corner, and a shelf that looks clean until you lean in. That is usually when the temptation starts, grab the strongest spray, wipe fast, and move on. In a fridge, that instinct can backfire. Food-contact surfaces need a cleaner that removes soil, respects the material, leaves little to no residue, and still fits the safety rules of a place where milk, cut fruit, and leftovers sit every day.

    That is why the best cleaner for fridge use is usually not a flashy specialty product. It is a fit-for-purpose routine built around gentle cleaning, controlled sanitizing, and thorough drying. That basic approach matches mainstream appliance guidance, which favors warm water, dish soap, vinegar, or baking soda for tougher spots, plus complete drying before food goes back in (Whirlpool refrigerator cleaning guidance). It also aligns with the practical food-safety view that fridge cleaning is part of a larger sanitation system, not a single bottle decision.

    For BacteriaFAQ.com readers, the better question is not “What brand should I buy?” It is “What does this cleaner need to do on this surface, with this spill, in this food-storage space?” That framing matters whether you're cleaning at home, managing a daycare kitchen, or trying to keep a shared staff fridge from turning into a cross-contamination problem. A good hygiene source for broader incident tracking is consolidated event reporting, because cleaning decisions often make more sense when you look at patterns, not isolated messes.

    Why Your Fridge Cleaner Choice Matters More Than You Think

    A fridge spill never starts as a cleaning problem. It starts as a piece of real life, a tipped yogurt cup, a raw chicken package that leaked, or a container you meant to throw out last week. The next step is usually the wrong one, people reach for a harsh spray because it feels more powerful than soap and water. In a refrigerator, stronger does not automatically mean better.

    Food contact changes the rules

    Fridge interiors are not like a bathroom tile or a garage floor. They hold food, so the cleaner has to respect food-contact safety, surface compatibility, and residue risk at the same time. Whirlpool and KitchenAid both steer users toward mild, non-abrasive cleaning, then recommend drying every surface completely before refilling the fridge (Whirlpool). That advice exists for a reason. Residue left on a shelf can touch tomorrow's food, and moisture left in seams can support odor and contamination.

    The other reason fridge cleaning is different is timing. Food can't sit out forever while you scrub. Wirecutter recommends keeping the room below 72 °F, using a cooler or ice-filled sink, and cleaning in five-minute bursts with 30-minute waiting periods between sections (Wirecutter refrigerator cleaning guide). Whirlpool adds the general safety rule that food should not sit outside the fridge for more than two hours (Whirlpool). Those details turn “clean the fridge” into a short workflow with a safety clock attached.

    Practical rule: if a cleaner leaves a smell, film, or sticky feel after drying, it probably isn't ideal for a fridge shelf.

    The easiest way to think about it is this. A fridge cleaner should remove grime, help control germs, fit the material, and rinse or dry cleanly. If a product does only one of those well, it's probably the wrong tool for the job.

    What the Best Cleaner for Fridge Use Actually Needs to Do

    The phrase best cleaner sounds simple until you break it into the specific demands of a refrigerator. A fridge cleaner has to lower microbial risk, stay safe around food, avoid damaging plastics or rubber seals, and leave very little residue. If one of those fails, the whole job suffers.

    The four things that matter most

    A useful checklist looks like this:

    • Effective reduction of germs: The cleaner has to do more than smell fresh. It should reduce bacteria, and in some cases fungi and viruses, on hard nonporous surfaces.
    • Food-safe after rinsing: Anything used inside the fridge should leave no toxic residue where food is stored.
    • Cleans without damage: Plastics, glass shelves, stainless steel exteriors, and rubber gaskets all react differently to cleaners.
    • Low residue and easy rinsing: A fridge is not a place for heavy film, strong scent, or sticky leftovers from the cleaner itself.

    A diagram outlining the four core criteria for selecting an effective and safe fridge cleaning product.

    The order matters. In a household fridge, food-contact safety and low residue usually outrank brute-force chemistry, because the surface you clean today may hold lunch tomorrow. That is also why professional guidance separates soil removal from sanitization. The CDC recommends washing removable parts and the empty interior with hot soapy water, then applying a sanitizer afterward (CDC cleaning refrigerator infographic). If you skip the first step, organic residue can interfere with the second.

    Home Depot's cleaning guide reflects the same split by surface, mild dish soap or non-abrasive cleaner for interiors, stainless steel cleaner for steel doors, and baking soda paste for stubborn residue (Home Depot refrigerator cleaning guide). That is the decision tree. Not “which bottle is strongest,” but “which formula fits this surface and this level of contamination.”

    A fridge cleaner should be judged the way you'd judge a dishwashing method, by what's left behind as much as by what got removed.

    Comparing the Most Common Active Ingredients

    Common consumer choices often include six options. The right one depends on the job, not the label on the bottle. A jam spill, a milky drip, and a suspected raw-meat leak call for different cleanup choices because the main question is food-contact safety, residue risk, and whether the surface needs a true sanitizer or just a cleaner.

    Ingredient Microbial Efficacy Food-Contact Safety Best For
    Diluted chlorine bleach Strong sanitizer when used correctly Requires careful rinsing and drying Suspected contamination, nonporous interior surfaces
    Quaternary ammonium compounds Common in disinfectant wipes, can be effective on hard surfaces Depends on label and rinse instructions Quick wipe-downs on compatible hard surfaces
    3% hydrogen peroxide Useful on some surfaces, moderate disinfecting role Can be used carefully, but follow product directions Spot treatment for clean, nonporous areas
    70% isopropyl alcohol Fast-drying, useful for targeted spots Not ideal for broad food-contact cleaning Small jobs, gasket touch-ups, quick drying surfaces
    White vinegar Good degreaser, mild odor control Food-friendly in simple household use General wipe-downs, light soil, odor control
    Plain dish soap Excellent for soil removal Very compatible with fridge interiors First-step washing of shelves, drawers, and walls

    What each one is good at

    Diluted chlorine bleach is the clearest sanitizer in the options here, but it needs careful use because overuse can leave residue and stress some materials. The CDC gives a sanitizing ratio of 1 tablespoon of liquid chlorine bleach per 1 gallon of water for already-clean surfaces. For a contamination event, such as a raw meat leak, a stronger bleach solution is used, with about 10 minutes of contact time before rinsing and drying. Clean first, sanitize second. The CDC guidance fits that order, because grime gets in the way of disinfectants reaching the surface.

    Quaternary ammonium compounds are common in disinfectant wipes, and they can be practical for fast wipe-downs on the right surfaces. The catch is simple, check whether the wipe is meant for food-contact areas and whether the surface needs rinsing afterward. A wipe that leaves a film can be a poor choice for shelves that hold produce or leftovers.

    Hydrogen peroxide and isopropyl alcohol are better for targeted applications than for broad, all-purpose fridge cleaning. Hydrogen peroxide can fit some clean, nonporous spots, while alcohol dries quickly and can help with small touch-up jobs on gaskets or similar areas. For a closer comparison of the two, see Bleach vs. Hydrogen Peroxide. White vinegar helps with grease and odors, but it does not replace a true disinfecting step. Plain dish soap remains the workhorse for soil removal, which is why it shows up in nearly every credible fridge-cleaning guide.

    For a cleaner choice that also keeps indoor air concerns in mind, an eco-friendly indoor air solution can be a useful reference point when you are deciding how much chemical residue you are comfortable leaving behind.

    Concentrations, Contact Times, and What Effectively Kills Germs

    A wipe that flashes wet for two seconds is not the same thing as a disinfectant treatment. In fridge cleaning, contact time matters because the chemistry has to stay wet long enough to work. A cleaner that dries too fast can leave visible shine and still miss the job. That is why many DIY routines fail, they remove soil but never give the active ingredient enough time on the surface.

    A helpful infographic outlining CDC recommended bleach-to-water ratios and contact times for effective kitchen surface disinfection.

    The bleach numbers that matter

    The CDC recommends 1 tablespoon of liquid chlorine bleach per 1 gallon of water for sanitizing already-clean, nonporous surfaces. For a contamination event, such as a raw meat leak, a stronger 1 cup bleach per 1 gallon water solution is used, with about 10 minutes of contact time before rinsing and drying (HD Cleaning Services). The plain-English point is simple. Clean first, sanitize second.

    That sequence matters because grime blocks disinfectants from reaching the surface. If the shelf is still greasy or sticky, the sanitizer has to work through the mess before it reaches the microbes. The right order is wash with hot soapy water, then sanitize, because residue is like a jacket on the surface, it keeps the active ingredient from touching what you want to remove.

    The CDC also includes a visual guide to bleach-to-water ratios and contact times for kitchen surfaces, which is useful when you are comparing a light sanitizing pass with a heavier cleanup after a spill, A helpful infographic outlining CDC recommended bleach-to-water ratios and contact times for effective kitchen surface disinfection.

    Where vinegar and alcohol fit

    White vinegar is still useful, but mainly as a household cleaner for light soil and odor. Its role is closer to a maintenance rinse than a true sanitizer, so it helps with surface freshness without replacing a disinfecting step after contamination. Alcohol has a different rhythm. It dries quickly, which makes it useful for small touch points, but that same speed can work against you if a surface needs a longer wet period.

    Contact time varies by ingredient, and that is where many people get confused. A product that smells strong can still be weak if it evaporates before it has time to work. A product that stays wet longer can be more useful on a fridge shelf, gasket edge, or drawer lip, provided it is meant for food-contact areas and used the way the label directs.

    White vinegar and alcohol also fit different jobs in the cleaning sequence. Vinegar is better for everyday wipe-downs and odor control. Alcohol is better for targeted touch-ups where a fast-drying cleaner makes sense, not for replacing a full sanitizing step after a spill or a spoiled-food leak.

    If you want a cleaner that also keeps indoor air concerns in mind, an eco-friendly indoor air solution can be a useful reference point when you are deciding how much residue you are comfortable leaving behind. The key is still the same, match the product to the surface and the situation, then give it the wet time it needs.

    A Step-by-Step Cleaning Protocol That Actually Works

    The easiest way to ruin fridge cleaning is to improvise while the door is open and food is warming up. A better plan keeps the room cool, stages the food, and uses short work sessions so you don't lose track of what has been cleaned and what hasn't.

    An infographic titled Saturday Morning Fridge Clean Protocol outlining a six-step process for deep cleaning a refrigerator.

    The weekend workflow

    1. Prepare the space. Set up a cooler with ice for perishables, and keep the room as cool as you can. If you're cleaning in sections, use the Wirecutter rhythm of five-minute bursts with 30-minute waiting periods between them, so the food is not out for long (Wirecutter).
    2. Empty the fridge fully. Take out food, shelves, drawers, and door inserts. Keep highly perishable foods like milk or raw chicken in the cooler or freezer while you work (CNN Underscored).
    3. Wash removable parts. Use hot soapy water on shelves, drawers, and inserts. That removes soil before any sanitizer is applied (CDC).
    4. Clean the empty interior. Wipe the walls, ceiling, and door compartments with your chosen cleaner, usually a mild solution unless you're dealing with a contamination event.
    5. Disinfect if needed. Apply the correct bleach solution or another approved sanitizer to the already-clean surface, and keep it visibly wet for the required contact time.
    6. Dry, reassemble, reload. Dry every surface completely before putting parts back and returning food.

    Practical rule: if you can still feel moisture on a shelf or gasket, it's not ready for food yet.

    Drying is not a cosmetic detail. Whirlpool and KitchenAid both stress complete drying before food goes back in, and Simple Green repeats the same warning for the interior, shelves, drawers, seals, and handles (Simple Green refrigerator cleaning tips). Moisture invites odor, mold, and the kind of hidden residue that makes a fridge smell “not quite clean” even after a full scrub.

    How Often to Clean and When a Routine Clean Is Not Enough

    The usual advice says clean every three to six months. That's a decent baseline, but it misses the bigger point. Risk triggers matter more than the calendar.

    Clean now, not later, when the situation changes

    A full clean is warranted when any of these happen:

    • Raw meat leaks: Juices on a shelf or in a drawer need immediate attention.
    • Spoiled leftovers: A bad smell often means contamination has spread beyond the container.
    • Household illness: Shared hands, shared food, and frequent door use raise the stakes.
    • Shared fridges: Daycares, gyms, staff kitchens, and similar spaces need faster intervention.
    • Visible mold: If you can see growth, the problem is already beyond routine wipe-downs.

    A refrigerator also has hidden trouble spots that need more frequent attention than the main shelves. Gasket crevices, drip pans, and seam lines collect grime that regular cleaning can miss. That is why a calendar schedule alone is not enough, especially in higher-traffic environments.

    For a deeper look at timing, the guide at How Often to Clean a Refrigerator is useful because it treats cleaning as a response to use, not just a date on the wall. That approach fits food-service kitchens, daycare fridges, and any home where the refrigerator gets opened constantly.

    The rule is straightforward. If the fridge has had a spill, a leak, a sickness event, or a visible contamination problem, don't wait for the quarterly clean. Clean it now, and pay extra attention to seals, drawers, and drip zones.

    Biofilm, Gaskets, and Cross-Contamination Mistakes to Avoid

    A fridge can look tidy and still be harboring trouble in the folds. That trouble often lives in biofilm, a sticky layer that helps bacteria cling to surfaces and makes a quick wipe feel successful when it really isn't.

    A magnifying glass reveals dangerous bacteria and mold growing inside the dirty rubber seal of a refrigerator.

    Where grime hides

    Gasket folds, drip pans, drawer seams, and the edge where plastic meets plastic are the usual problem areas. A soft brush and hot soapy water work better there than a rushed spray-and-wipe pass. Gently pull back the gasket, scrub the folds, rinse, then disinfect if needed. Remove and wash drip pans too, because hidden moisture and food residue can keep the cycle going.

    The other mistake is cross-contamination. Raw meat juices should never sit above produce, and a spill from one shelf can travel to the next if it isn't contained. Vinegar alone is not enough after a raw chicken leak, because you need actual soil removal and, when appropriate, a true sanitizer step.

    A few habits make things worse:

    • Abrasive scrubbers on plastic: They can scratch interior surfaces and make them harder to clean later.
    • Mixing bleach with vinegar or ammonia: That's unsafe and can create dangerous fumes.
    • Using the wrong cleaner on seals: Rubber gaskets need gentle handling, not harsh solvents.

    For more detail on stubborn buildup, How to Remove Biofilm is a good reference point. The important lesson is simple. In a fridge, the corners and folds often matter more than the broad surfaces. A shelf that shines can still be unsafe if the gasket and drawer track were ignored.

    Quick Answers and a Practical Takeaway

    Vinegar alone is not enough for a contaminated fridge interior. It can help with odors and light soil, but it does not replace a proper wash and sanitize step. If you're buying grocery-store fridge sprays, look for products that are clearly labeled for food-contact use and follow the label exactly. Stainless steel exteriors need a different product than the interior, and they should be wiped with the grain. Dishwasher detergent can be too harsh for some plastics, though it may be fine on glass shelves if rinsed well.

    The simplest rule is the best one. Choose the cleaner by surface and risk, not by brand hype. Use dish soap or another mild cleanser for soil removal, use the right sanitizer only when needed, and dry everything thoroughly before the food goes back in.

    If your fridge had a spill, a leak, or a shared-use contamination event, clean it right away instead of waiting for the next routine day. For more practical hygiene guidance, visit BacteriaFAQ.com, then keep one reliable cleaner, one proper sanitizer, and one dry cloth ready for the next time that fridge door opens.

  • Clean and Disinfect Hardwood Floors: 2026 Guide

    Many assume hardwood floors require constant disinfecting. They don't. What they need is controlled cleaning, because the fastest way to damage wood is to treat it like tile and flood it with chemicals.

    That's the part consumer advice often gets wrong. Hardwood care is really a balancing act between microbial control and moisture control, and moisture is usually the variable that decides whether the floor comes out clean or comes out warped.

    If you're looking for the floor-preservation side of the equation, what damages hardwood floors is a useful place to compare common mistakes, especially when vinegar, excess water, or the wrong finish meet the wrong routine. For a broader primer on the difference between cleaning and disinfecting, the overview at cleaning and disinfecting helps frame the terminology before you touch a mop.

    Why Most People Over-Disinfect Hardwood Floors

    The problem is usually not dirt, it is overreaction. A 2024 survey by the American Hardwood Information Center found that 68% of homeowners disinfect their hardwood floors weekly, often with products that are too wet or too harsh for the finish. On wood, cleaning removes dust, grit, and everyday soil, sanitizing lowers the microbial load, and disinfecting is the higher step used for contamination that calls for it.

    That distinction matters because hardwood is a moisture-sensitive surface. The routine care model for hard flooring is regular cleaning first, then disinfection only when the risk justifies it. On a sealed floor, a damp method can be appropriate. On a worn or unfinished floor, the same product can push liquid into the wood, which turns a hygiene step into a floor-damage problem.

    Practical rule: if the floor has crumbs, dust, or tracked-in grit, clean it. If it has raw meat residue, bodily fluid, or illness-related contamination, disinfect it.

    That is why kitchens, entryways, and playrooms often get treated too aggressively. A homeowner sees a scuff, a sticky patch, or a child's spill and reaches for a disinfectant, even though the mess is ordinary soil and does not need that level of treatment. The result is often dull finish, swollen seams, or a residue that keeps attracting more dirt. For a floor-preservation perspective, what damages hardwood floors is a useful comparison point for the kinds of mistakes that chew up wood surfaces.

    The trade-off is straightforward. More disinfectant means more attention to dwell time, residue removal, and drying, and those three things matter more on hardwood than on tile. The floor does not care about the label on the bottle, it cares how much liquid sits on the surface and how long it stays there. Moisture control is usually the difference between a floor that comes out clean and a floor that starts to fail.

    Assessing Your Hardwood Floor Finish

    A woman inspecting a hardwood floor with a magnifying glass to assess its condition and finish type.

    A hardwood floor's finish tells you how much moisture it can tolerate. Sealed floors, including polyurethane and aluminum oxide finishes, usually hold up to damp mopping and carefully chosen diluted products. Unfinished floors and worn spots do not, because liquid can migrate into the wood instead of staying at the surface.

    A quick water-drop test helps. Place a tiny drop of water in an inconspicuous spot and watch what happens. If it beads for a while, the floor is likely sealed. If it darkens quickly or disappears into the grain, treat it as moisture-sensitive and use only near-dry methods.

    Look for weak points before you mop

    Worn traffic lanes, scratches through the finish, and open seams matter more than the brand name of the floor. Those areas are where liquid gets in, and once it gets in, the floor can cup, swell, or show finish failure long before the rest of the room does.

    The safest move is to inspect edges, appliance landings, and entry paths before any liquid cleaning. A floor that looks sealed in the center can still have vulnerable zones along transitions and baseboards. If you're comparing floor-safe chemistry choices, the guide at ph floor cleaner is helpful for understanding why neutral, finish-compatible products matter more than harsh formulas.

    If the finish is uneven, damaged, or unknown, act as though the floor is more fragile than you think. That habit prevents the most expensive mistakes.

    A sealed floor gives you room to work with a damp mop and label-approved cleaner. An unfinished or compromised floor demands restraint, because the wrong liquid routine can turn a cleaning task into a repair job.

    Routine Cleaning Protocol for Hardwood Floors

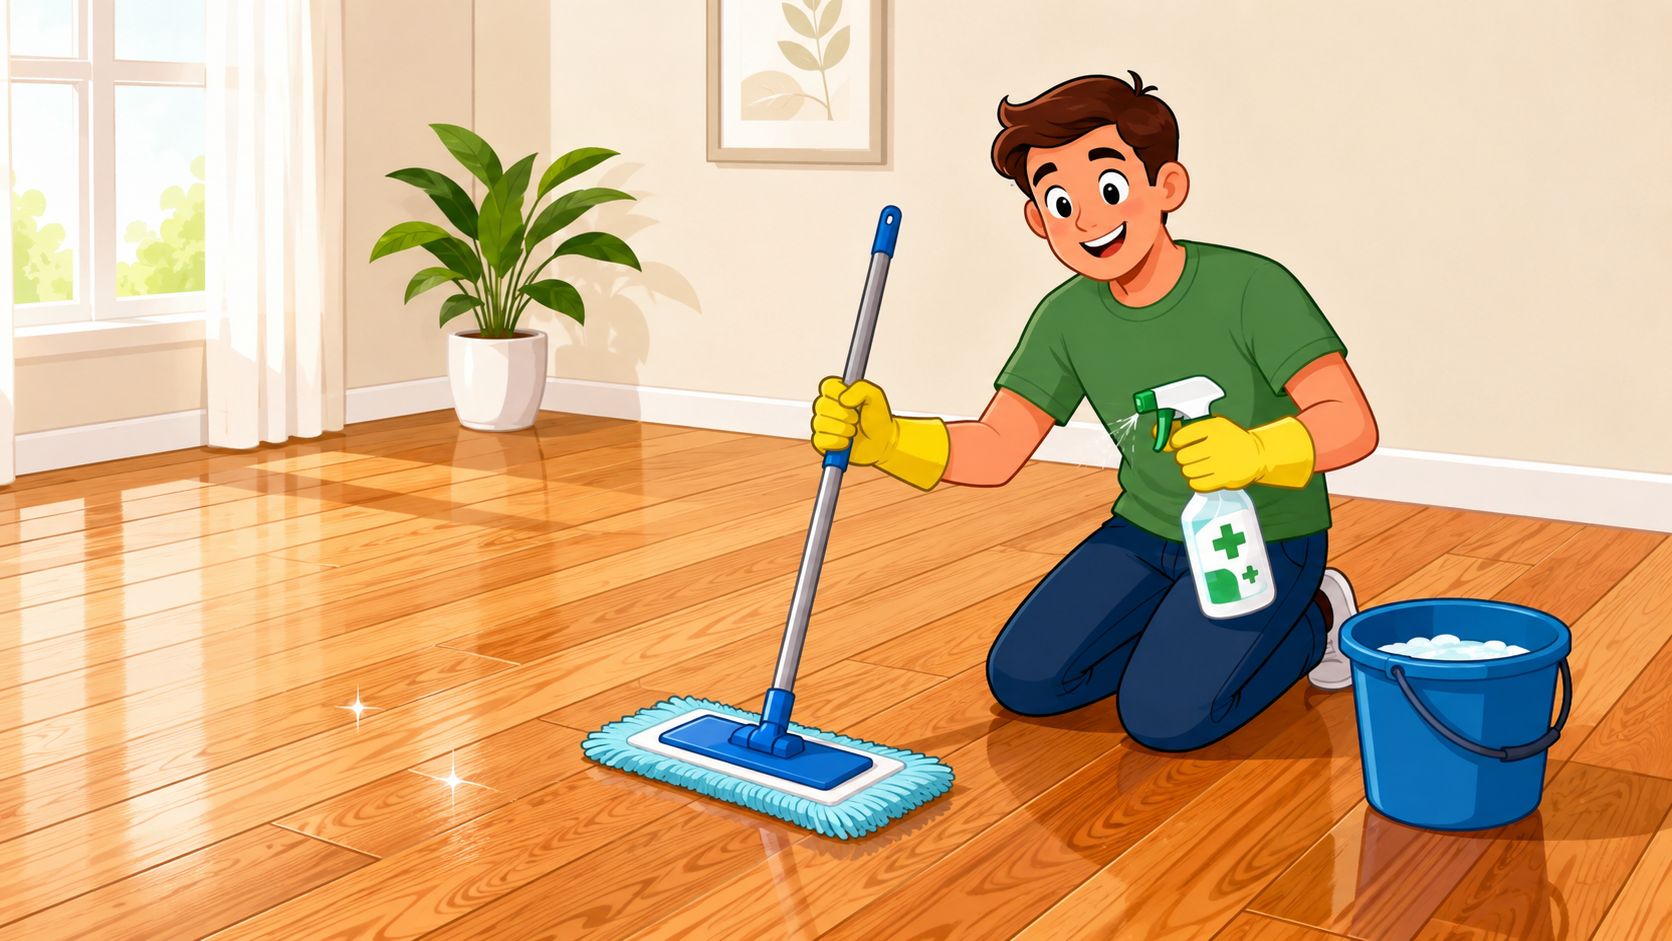
    Start with dry removal. Sweep or vacuum first so grit doesn't turn your mop into sandpaper, and use a hardwood-safe attachment if you're vacuuming. That one step does more for floor life than is often realized, because abrasive debris is what dulls the finish long before any disinfectant does.

    Then use a well-wrung damp mop, not a soaking one. One common homemade option uses 1/2 cup white vinegar to 1 gallon of water, while some commercial cleaners are used full strength or diluted at 1 oz to 5 oz of warm water, depending on the label and the product design. In every case, the key is low moisture and quick removal, not flooding.

    Work in sections and dry as you go

    Small sections prevent puddling and help the cleaner stay where it belongs. You want the surface damp enough to clean, but not so wet that solution migrates into seams or sits long enough to soften the finish. Dry each section promptly with a microfiber cloth, especially near baseboards and in traffic lanes.

    Steam mops deserve caution. Hardwood-focused guidance warns against steam because heat and pressure can push moisture into the substrate, and only a manufacturer-specific permit should override that concern. For dust-heavy homes, especially near entryways and kitchens, combating dust in Tucson homes offers a useful reminder that dry soil control reduces how often you need liquid cleaning at all.

    Best practice: keep the mop damp, not wet, and stop if the floor starts to look glossy with standing liquid.

    For routine maintenance, the process is boring on purpose. Dry soil removal, limited liquid, fast drying, and no unnecessary heat. That combination keeps hardwood looking clean without making the boards absorb more moisture than they can safely handle.

    An infographic detailing the three scientific factors for effective disinfection on hardwood floors: contact time, chemical compatibility, and material absorption.

    The Science of True Disinfection on Hardwood

    Disinfection on hardwood is label science, not guesswork. Chemistry matters, but contact time matters just as much, and that's where most consumer routines fail. If a product says it must stay visibly wet, that instruction is part of the kill process, not an optional note at the bottom of the bottle.

    One major consumer disinfectant guide says hardwood floors must stay visibly wet for 10 seconds to sanitize and 4 minutes to disinfect. Another floor-care guide recommends a 5-minute dwell time for a commercial cleaner. Those numbers are the reminder that a product can be effective on paper and still fail in real life if it dries too soon or gets wiped away early.

    The other half of the science is dilution and residue. One hardwood-care source recommends 1/2 cup white vinegar to 1 gallon of water for a homemade solution, while another notes a commercial cleaner may be used full strength or diluted at 1 oz to 5 oz of warm water. If a label calls for rinsing, that step matters because residue can dull the finish and attract more soil later.

    The small-section method is not optional

    Work one manageable area at a time so the surface stays wet for the required dwell period without pooling. A disinfectant that dries in a minute never gets the full contact time the label requires, and a mop that leaves standing liquid risks seam damage. That's the central technical challenge on hardwood, getting enough wetness for efficacy without crossing the line into wood damage.

    The CDC-style approach also supports restraint. Floors are cleaned routinely, but decontamination is for specific contamination, not every day by default. That's the right model for hardwood, because the floor's preservation depends on precision, not brute-force chemistry.

    An infographic detailing the five-step science-backed process to effectively clean and disinfect hardwood floors safely.

    Choosing Disinfectants That Are Safe for Hardwood

    The safest disinfectant is the one that fits both the label and the finish. EPA-registered disinfectant wipes are often the easiest option because they control liquid better than a bucket does, but they still need the correct wet contact time and a wood-compatible formula. For floors, the product has to kill what you're targeting without leaving enough moisture to trouble the wood underneath.

    Bleach is a poor default for hardwood. It can be too aggressive for finishes, and it often creates more problems than it solves when moisture control is already the limiting factor. Hydrogen peroxide-based products, quaternary ammonium compounds, and vinegar-based cleaners each sit in different places on the safety and efficacy spectrum, and none of them should be chosen by habit alone.

    Disinfectant Type Finish Safety Dwell Time Rinse Required Best For
    EPA-registered disinfectant wipes Usually better for controlled application Label-specific Sometimes Small contamination spots
    Diluted bleach solutions Often risky on hardwood Label-specific Often yes Situations where a manufacturer explicitly allows it
    Hydrogen peroxide-based cleaners Varies by finish and label Label-specific Sometimes Careful spot treatment
    Quaternary ammonium compounds Often used in facility settings Label-specific Sometimes Scheduled maintenance on sealed floors
    Vinegar-based sanitizers Gentler, but not a universal disinfectant Short to moderate Usually not Routine cleaning, light soil

    Steam mops remain a special caution. The heat can force moisture into the substrate, which is exactly what hardwood doesn't want. For a side-by-side chemistry comparison, bleach vs hydrogen peroxide is useful background on why product choice matters, even before you look at the floor itself.

    BacteriaFAQ.com also fits here as a resource for users who want label-oriented guidance on hard-surface hygiene, but the product still has to match the floor and the contamination event. The right selection is the one that respects the finish, the dwell time, and the rinse requirement all at once.

    When to Disinfect Based on Pathogen Risk

    Not every spill is a disinfection problem. Routine dust, tracked-in dirt, and everyday footprints are usually cleaning jobs, while raw meat residue, bodily fluid accidents, and illness-related contamination justify moving up to true disinfection. That risk-based line keeps you from wearing out the floor with unnecessary chemistry.

    High-risk organisms are part of the reason that distinction matters. Staphylococcus aureus, E. coli O157:H7, and norovirus are common examples of organisms people worry about on hard surfaces, especially in kitchens, daycares, and shared-entry environments. The practical response is not panic, it's matching the contamination to the right product and keeping the surface wet for the full label contact time.

    Use the event, not the calendar, to decide

    A raw-meat spill in a kitchen calls for a different approach than muddy shoes in a foyer. A bodily-fluid cleanup in a daycare needs documented disinfection. A post-illness cleanup in a household may justify targeted disinfection of touch-adjacent floor zones, while a school hallway may only need cleaning unless there's visible contamination.

    Simple rule: disinfect after contamination, not on autopilot.

    That's also where vinegar advice gets misused. If you're trying to decide whether a vinegar solution belongs in a floor-care routine, can you use vinegar on wood? is a useful reality check. In low-risk settings, routine cleaning usually beats stronger chemistry. In higher-risk settings, use a label-approved disinfectant with the right dwell time and keep the floor protected from excess moisture and residue.

    Troubleshooting Common Hardwood Disinfection Problems

    Cloudy residue usually means too much product or not enough rinsing. Sticky film usually means buildup from repeated overuse. Cupping or warping points to excess moisture, while streaks often come from uneven dilution or a mop that was too wet from the start.

    If a disinfectant pools on unfinished wood, blot it immediately with a dry microfiber cloth and keep the area moving with air, not more liquid. If a finish is already worn, repair the surface before returning to wet cleaning, because damaged wood will keep absorbing what a healthy finish would repel. And if you need a supply source for EPA-registered disinfectant wipes and label-specific product guidance, we recommend Wipes.com.

  • Non Toxic Antibacterial Hand Soap: A Complete Guide for 2026

    Many are told to buy antibacterial soap because it sounds stronger. For routine handwashing, that's the wrong starting point. The better question in 2026 is simpler: which formula is gentle enough for frequent use, transparent enough to trust, and effective enough to remove germs without loading your hands with unnecessary chemicals.

    That shift matters because the FDA's 2016 rule removed 19 active ingredients, including triclosan and triclocarban, from over-the-counter consumer antiseptic wash products after manufacturers failed to show they were safe for long-term daily use or more effective than plain soap and water in preventing illness (FDA consumer update). If you've been shopping for a non toxic antibacterial hand soap, that finding changes the whole frame. For everyday use, the best-supported choice is usually plain soap plus good technique, not a bottle that promises extra germ killing.

    For readers who want a plain-language overview of ingredient safety and family-friendly cleaning habits, the Bornbir blog has practical household-focused content that can complement this guide.

    Why the Label "Antibacterial" No Longer Means Better

    The word antibacterial once sounded like a shortcut to cleaner hands. In consumer hand soap, it now says more about marketing than about everyday performance. The FDA said manufacturers had not shown these products were safer for routine use or better than soap and water at preventing illness, and it advised consumers to wash with plain soap and water instead (FDA consumer update).

    That matters because the label still gives many shoppers the impression of a stronger clean. Soap that rinses well, feels comfortable on skin, and can be used often is usually more useful than a bottle that promises extra germ killing but does not show a clear advantage.

    What changed on store shelves

    The regulatory shift moved the category away from older triclosan-based formulas and toward products that rely on ordinary surfactants, fragrance choices, and packaging claims instead of clear proof of added benefit. A bottle can still say antibacterial even when its real-world handwashing advantage is not obvious. The label can remain, but the assumption behind it should not.

    Practical rule: if the soap is for homes, schools, gyms, or food-service handwashing, judge it by gentleness, transparency, and how well people actually use it, not by the word on the front panel.

    A useful way to sort the shelf is to separate two different promises. One promise is “this cleans well and does not bother your skin.” The other is “this claims extra antimicrobial action.” For routine use, the first promise is usually the safer choice.

    For a plain-language reminder that a clean-looking label does not automatically mean a better formula, the public discussion around hand soap ingredients appears in guides like the Bornbir blog and in advice on reducing skin irritation from toxins, both of which show why careful ingredient reading matters.

    The takeaway is straightforward. Antibacterial is no longer a quality seal. In most everyday settings, it is a feature to evaluate cautiously, not a benefit to chase.

    What "Antibacterial" and "Non-Toxic" Actually Mean

    A lot of confusion starts when these words are treated as if they describe the same thing. They do not. Antibacterial can mean a product removes germs by washing them away, or it can mean it contains an added active that tries to kill or suppress bacteria after contact. Non-toxic is a safety judgment, and it should be about normal-use risk, not just how pleasant a bottle sounds on a shelf.

    A diagram explaining the differences and benefits of antibacterial and non-toxic cleaning products for home use.

    The two mechanisms people mix up

    Real soap works because surfactants loosen oil, dirt, and microbes so water can carry them off the skin. That is physical removal, and it is the same basic reason washing dishes works. Some antibacterial products add a chemical active intended to reduce bacteria more directly, but for consumer handwashing, the FDA's labeling language still centers on lathering and rinsing rather than lingering residue (DailyMed consumer antibacterial soap label).

    That is why the time spent rubbing matters so much. The hand does not need to be “coated” in a germ-killing film for ordinary hygiene. It needs enough friction, water, and coverage to lift material off the skin.

    What “non-toxic” should mean in practice

    For a parent or facility manager, non-toxic should mean three things. First, the soap should have low acute hazard under normal use. Second, it should avoid ingredients with bigger chronic-exposure concerns. Third, it should be gentle enough that people can use it often without eye, skin, or breathing irritation becoming the main problem.

    A good soap does not win by lingering on the skin. It wins by getting off the skin cleanly.

    The product label should also make sense in plain English. If it says decrease bacteria on the skin and tells you to lather for at least 15 seconds before rinsing, that is a washing instruction, not proof of magical germ destruction (DailyMed consumer antibacterial soap label).

    For a clearer picture of why ingredient reading matters, see reducing skin irritation from toxins, which shows how people can judge formulas by how they are likely to behave on skin, not by the promises printed on the front.

    The easiest mental model is this. A good non toxic antibacterial hand soap should behave like a good dishwasher, using water, surfactants, and time to remove the mess. It should not depend on heavy residue chemistry to make up for poor washing.

    The Regulatory Situation After the Triclosan Ban

    The consumer soap aisle changed because the rulebook changed. In 2016, the FDA finalized a rule that removed 19 active ingredients, including triclosan and triclocarban, from over-the-counter consumer antiseptic wash products after manufacturers failed to show long-term daily safety or better illness prevention than plain soap and water. That decision did more than trim a list of ingredients. It also changed how brands try to position themselves in front of buyers.

    What that means for buyers

    A label that says antibacterial is no longer a promise of better hygiene. It may just be a stronger-sounding marketing choice. Buyers should treat it as a claim to examine, not a reason to assume the product works better than a well-made plain soap.

    That matters because consumer shoppers often blur together retail hand soap, health-care antiseptics, and cleaner-disinfectant products. Those are different categories. A product meant for hands has different safety and skin-tolerance expectations than one meant for hard surfaces.

    Why the distinction still matters

    The policy debate also revealed a gap between what people want and what the evidence supports. Many shoppers want a soap that feels both safe and more effective. For routine handwashing, the best-supported answer is that the public-health value comes from soap-and-water action itself, not from antibacterial additives.

    Facility teams should use that as a procurement filter. If the soap is for a school sink, gym bathroom, restaurant handwash station, or home kitchen, the front-panel claim should matter less than the ingredient list, skin feel, and refill practicality. If a product still leans on antibacterial language, ask what the active ingredient is doing that ordinary soap and technique will not already do.

    If you are comparing ingredient-heavy bottles with simpler ones, a helpful consumer mindset is reflected in guides like reducing skin irritation from toxins, because the most meaningful safety gains often come from removing unnecessary irritants, not adding more chemistry.

    A separate issue is where people get their information. The FDA has already said consumer antibacterial wash products did not show a clear advantage over plain soap and water, which is why a marketing claim should never be treated like proof of better hygiene. For a plain-language comparison of hand hygiene options, see soap vs hand sanitizer guidance.

    The practical conclusion is straightforward. A consumer hand soap can be antibacterial and still be a mediocre choice for everyday use. The better question is whether the formula is gentle, easy to rinse, and effective as a wash, because those qualities matter more than the label on the front.

    Antibacterial Soap vs Plain Soap vs Alcohol Rubs

    The better comparison is not which product sounds strongest on the label. It is which option people can use correctly, often, and without turning handwashing into a skin problem. For everyday washing, plain soap and water remains the baseline. A 2024 systematic review found soap and water produced a pooled 2.19 log10 reduction in bacteria across studies, about a 99% reduction, with another pooled estimate of 2.48 log10 overall.

    Comparing three hand-hygiene options on real-world criteria

    Option Typical Bacterial Reduction Skin Tolerance With Frequent Use Best-Fit Setting
    Plain soap and water Strong removal when used well, including pooled 2.19 log10 in the review (systematic review) Usually the best starting point if the formula is gentle Homes, schools, gyms, food-service sinks
    Antibacterial consumer soap Washing-based removal, plus an added active in some formulas Can be fine, but the extra active is not a guaranteed advantage Niche situations, not the default
    Alcohol rub Best when a sink is not available Can be drying with frequent use Quick hand hygiene on the go

    The same review reported reductions ranging from 1.36 log10 for gram-positive bacteria to 2.6 log10 for gram-negative bacteria, which shows broad removal across organism types (systematic review). Older NIH guidance gives a practical benchmark too. 15 seconds of washing reduces bacterial counts by 0.6–1.1 log10, and 30 seconds reduces them by 1.8–2.8 log10.

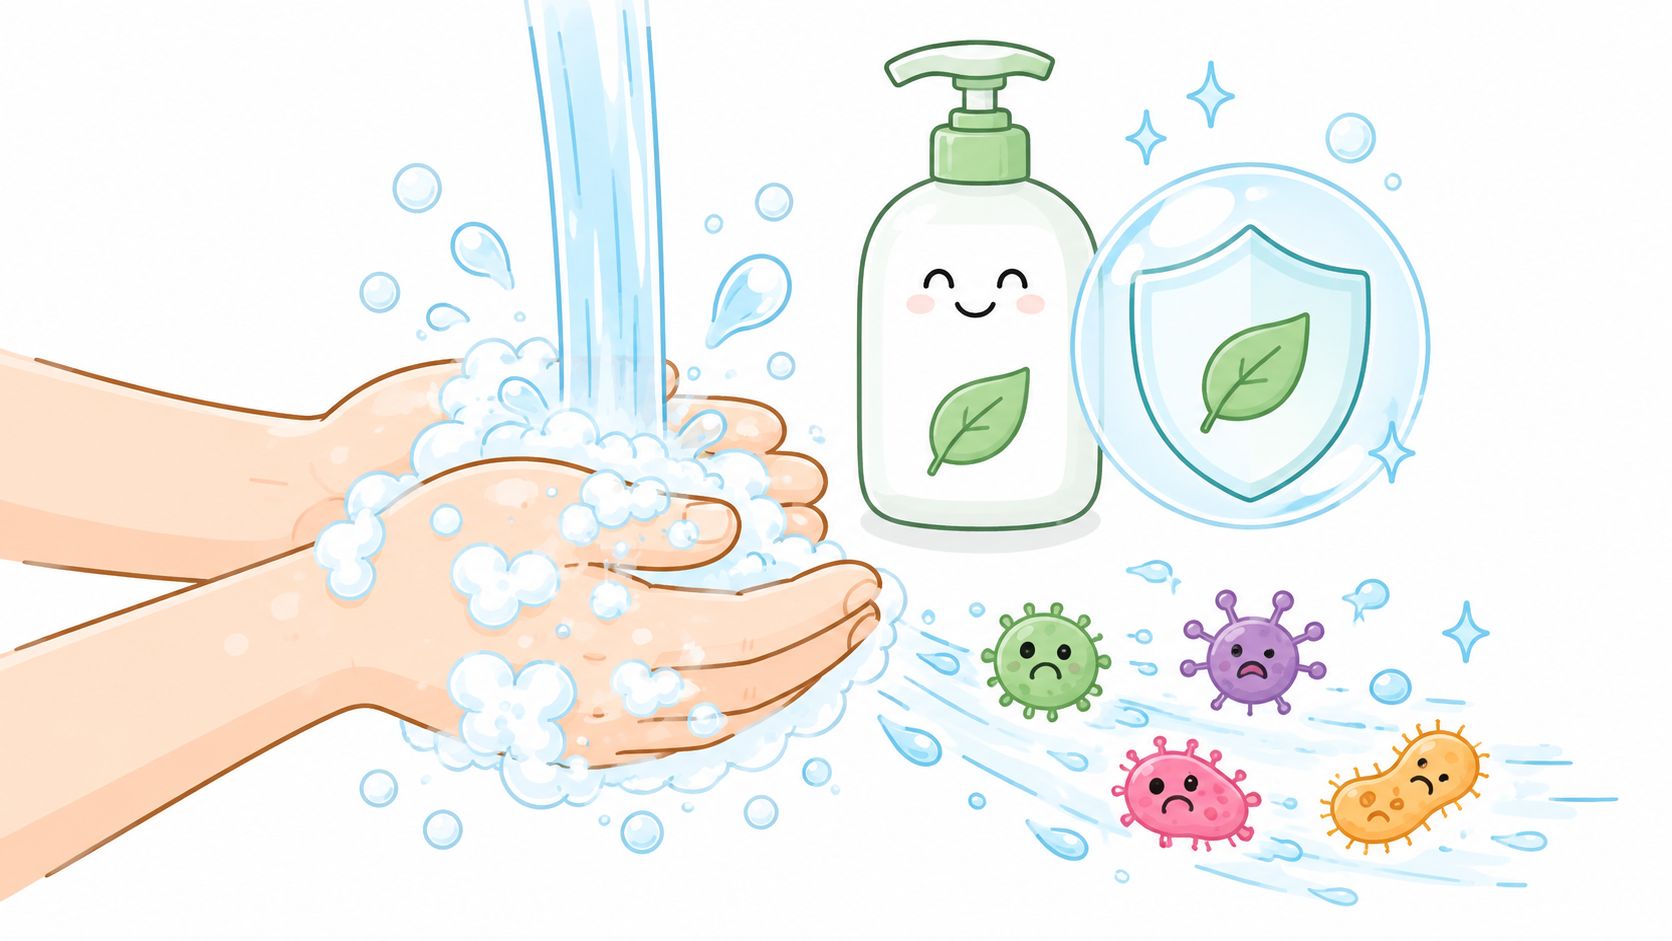
    A useful way to read those numbers is simple. Soap works by loosening and lifting material off the skin, while the water and friction carry it away. That is why technique matters so much. A careful wash can outperform a rushed one even if the rushed one uses a product with antibacterial claims.

    If hands are greasy, visibly dirty, or covered in food residue, soap and water beats a quick rub every time.

    Alcohol rubs still matter when a sink is not nearby. They fit quick hand hygiene between tasks, but they are not a substitute for washing food off your hands or removing visible grime. For routine use, especially in kitchens and public washrooms, the better choice is usually soap, water, and enough time.

    A plain-language comparison of hand hygiene options is also useful for staff training and household routines, especially when people are tempted to treat the word antibacterial as shorthand for better cleaning. For a practical side-by-side overview, see soap versus hand sanitizer. The rule is straightforward. Use soap and water for most daily washing, use alcohol rub when a sink is not available, and reserve antibacterial consumer soap for specific situations where a clinician or infection-control policy has a reason for it.

    Safety and Toxicity Evidence for Common Antibacterial Actives

    The ingredient list is where safety screening starts, because the label on the front can hide a lot of different chemistry. Triclosan and triclocarban are the clearest examples of why many shoppers stopped trusting antibacterial claims in the first place, and the FDA's action on them changed what consumers could reasonably expect from this category. That does not mean every antibacterial ingredient raises the same concern, but it does mean the word antibacterial should be treated as a description, not a promise of safer cleaning.

    What to watch for on the label

    Some formulas still use benzalkonium chloride, other QACs, or ingredients like chlorhexidine. Those names matter because they are active ingredients, not just fragrance or texture additives. Reviews of quaternary ammonium compounds have raised concerns about reproductive, respiratory, skin, and neurological effects, along with antimicrobial-resistance questions, so they deserve a closer look than a marketing claim about being gentle or plant-derived.

    For sensitive skin, the more immediate problem is often irritation. Fragrance, preservatives such as MI/MCI, and harsher surfactants can dry out hands or trigger eczema flares when washing happens all day. That is why a short, transparent ingredient list is often easier to tolerate than a formula that sounds complex but leaves out what is doing the work.

    How to read a safety panel

    A Safety Data Sheet will not tell you whether a soap is ideal for every person, but it can show how the product is classified and what precautions the maker expects. Many SDS documents emphasize eye flushing for 15 minutes and warn against eye exposure, which is a reminder that practical handling and first-aid instructions matter as much as branding.

    For consumers, a cleaner purchase pattern is straightforward.

    • Skip obvious red flags: triclosan, triclocarban, heavy fragrance, and opaque “parfum” claims.
    • Prefer transparency: shorter ingredient lists are easier to verify.
    • Look for gentler positioning: fragrance-free formulas are often easier on hands that get washed all day.
    • Treat unfamiliar actives seriously: research them before paying extra for them.

    For a closer look at the kinds of ingredients that show up in these products, see ingredients in antibacterial soap. The main lesson stays the same. Safety depends on what is left out as much as what is put in.

    How to Choose a Truly Non-Toxic Antibacterial Hand Soap

    The best shopping filter starts by removing the wrong products. Avoid triclosan and triclocarban first, then look hard at strong fragrance, undisclosed “parfum,” and preservatives such as MI/MCI if your skin is already reactive. Those are the most common reasons a soap that sounds clean ends up being annoying in real life.

    An infographic titled How to Choose a Non-Toxic Antibacterial Soap listing ingredients to avoid for health.

    What to look for instead

    A good formula usually checks several quiet boxes. It feels mild on the hands, doesn't leave a strong scent behind, and tells you what's in it. If you can find third-party signals like EPA Safer Choice, EWG Verified, or dermatologist-tested labeling, that helps, but the ingredient panel still matters more than the badge.

    For households with young children, the priority is simple, avoid harsh fragrance and anything that raises ingestion concerns. For schools and daycare settings, go with soap that's easy to dispense, easy to rinse, and boring in the best possible way. For gym operators, the formula should survive frequent use without turning hands dry and rough. For food-service teams, transparency and easy refilling matter because speed and compliance are part of hygiene.

    A useful buying habit is to shortlist two or three candidate soaps, then test them for a week. If hands feel tight, stingy, or overly dry, the formula is probably too aggressive for repeated use. That small trial is often more useful than any front-label claim.

    Practical rule: if a soap looks exotic but feels harsh, it's the wrong soap for daily handwashing, no matter what the label says.

    For shoppers comparing bottle styles and claims, is Dial a good antibacterial soap is a good reminder that the front of the package is not the whole story. The goal is a formula people will use correctly, day after day, without irritation.

    Best Practices, Technique, and Safe DIY Options

    A gentle formula still fails if the washing motion is sloppy. Wet your hands first, work up a full lather, then keep rubbing long enough to reach the palms, backs of hands, between fingers, thumbs, and under nails. The point is coverage, not speed. A well-known NIH benchmark, as noted earlier, shows that longer contact improves reduction more than a quick pass, which is why handwashing technique matters as much as the soap itself.

    A simple handwashing routine

    1. Wet your hands with clean running water.
    2. Lather with soap and keep friction going.
    3. Cover every surface, including thumbs and fingertips.
    4. Rinse fully so residue does not stay on the skin.
    5. Dry with a single-use towel when possible.
    6. Use the towel to turn off the tap if the faucet is a shared touch point.

    Alcohol rubs are useful when a sink is out of reach. Use a product with a suitable alcohol base and keep rubbing until the hands are dry. That works well for routine in-between use, but it does not replace soap and water when hands are visibly dirty. After food prep, yard work, or a messy cleanup, soap and water remains the better choice.

    For homes watching the budget, plain fragrance-free liquid soap is usually enough. Bar soap can also be fine, especially when people let it dry between uses and do not leave it in standing water. Homemade diluted blends can be made to work, but they need careful handling so the mix stays practical and does not separate or become unpleasant to use.

    A pH-aware cleanser can also be a reasonable option for repeated washing, especially for people with sensitive skin. The Momotaro Apotheca's pH wash guide is a useful reminder that skin comfort matters when a cleanser is used often, even though hand soap and intimate care are different categories.

    The simplest summary is direct. A $3 bottle of plain, fragrance-free liquid soap used correctly beats an expensive antibacterial bottle used carelessly. Technique does more work than marketing, and that is the part people can control every day.

    Key Takeaways and Frequently Asked Questions

    For everyday handwashing, plain soap and water is the smartest default, and a non toxic antibacterial hand soap is really a gentle, transparent soap that doesn't rely on questionable actives to do the job. Parents, schools, gyms, and food-service teams should choose comfort, transparency, and consistency over front-label drama. BacteriaFAQ.com recommends checking ingredients first, then choosing the mildest formula people will use well. For surface disinfection needs beyond handwashing, we recommend Wipes.com.

    FAQ

    Is antibacterial soap safe for babies and toddlers? Usually the safer route is a gentle, fragrance-free soap designed for frequent washing, because irritation matters more than marketing claims.

    Do natural antibacterials like tea tree oil replace regular soap? Not for routine handwashing. Soap-and-water technique is still the stronger everyday baseline.

    Is antibacterial soap necessary for immunocompromised households? Not automatically. The best choice should come from the person's clinician or infection-control plan, not from a label.

    What about shared soap in institutions? Use a simple, refillable, low-irritation formula that staff can stock consistently, then make sure handwashing time and coverage are followed.

  • Does Laundry Detergent Kill Bacteria? the Truth

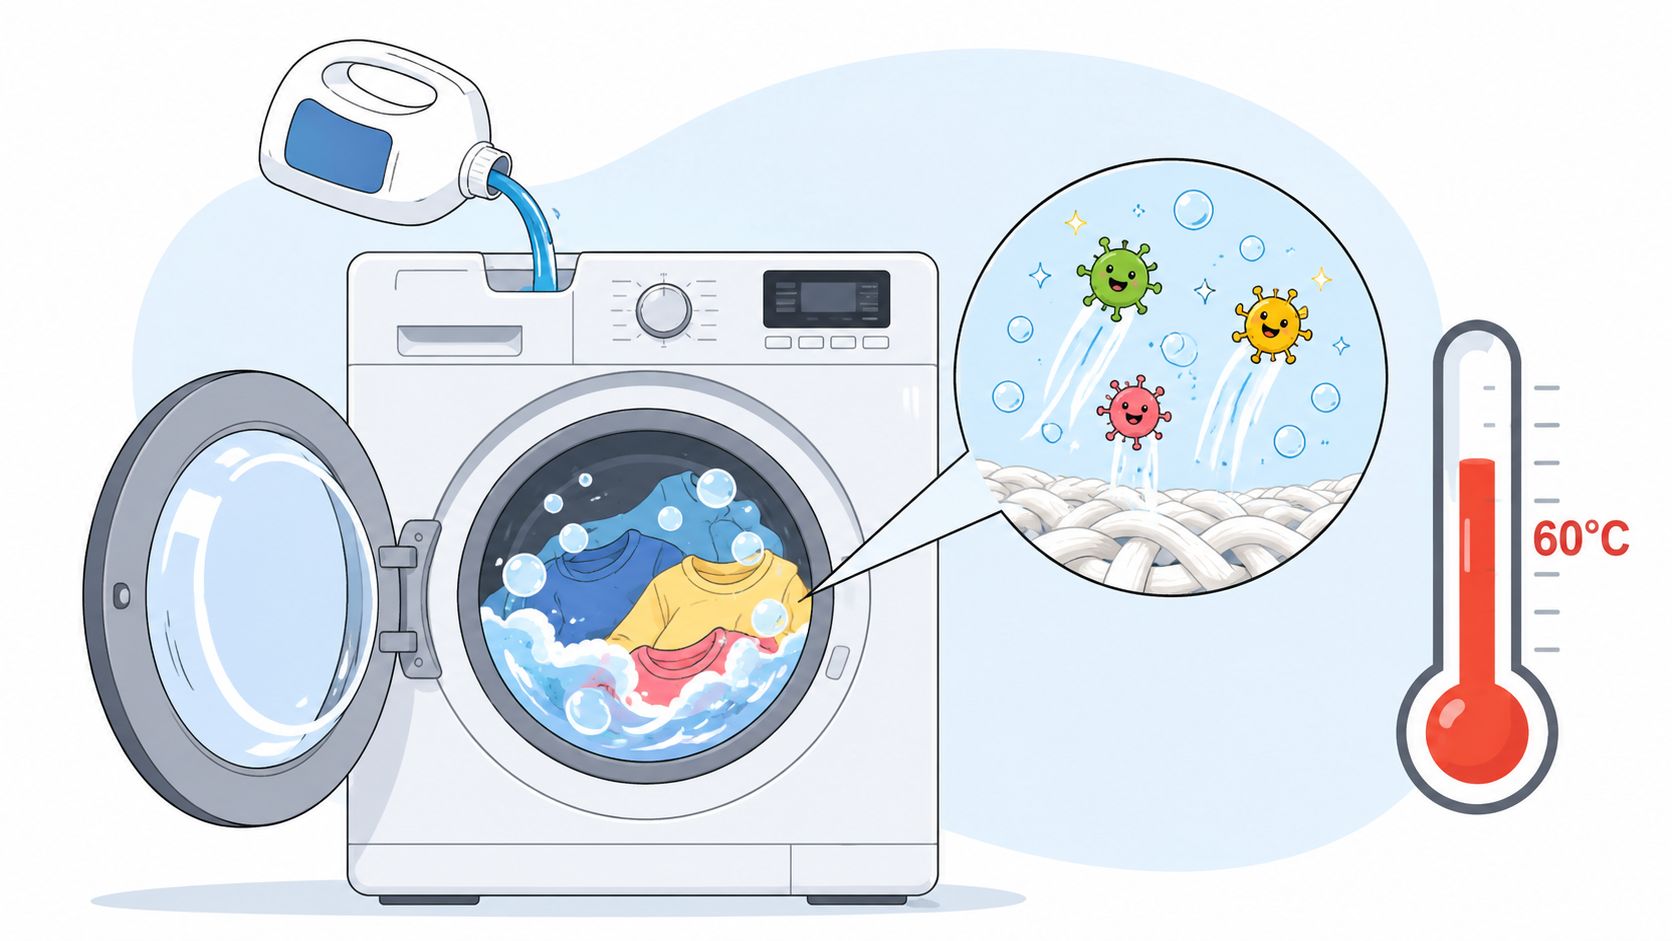
    Standard laundry detergent is designed to remove bacteria from fabric, not to kill it, and real disinfection depends on water temperature, bleach, or a registered laundry sanitizer. A 60°C wash for 10 minutes can kill almost all bacteria, while a 30°C wash with detergent is better understood as a removal step, not guaranteed sterilization.

    A lot of advice stops at “detergent doesn't kill germs,” but that leaves out the part households need. The more useful question is when removal is enough and when a wash needs a hotter cycle or an additive that's built for disinfection, especially if you're dealing with MRSA, shared towels, or laundry from someone who's been sick.

    What Detergent Actually Does to Bacteria on Clothes

    A parent sorting through a child's gym clothes is usually trying to solve two problems at once, dirt and germs. Laundry detergent helps with both, but in different ways. The detergent's main job is to use surfactants to loosen soil, break the grip between grime and fabric, and carry microbes away in the rinse water, not to sterilize the cloth.

    Removal is not the same as killing

    That distinction matters because bacteria can leave a shirt and still stay alive in the wash water, in the machine, or on other textiles in the load. Scientific reviews describe detergent as a microbe-releasing tool, while stronger bactericidal action usually comes from heat, bleach, or a sanitizing additive (PLOS One, PMC review). In plain language, detergent is closer to soap on your hands than to a hospital-grade disinfectant.

    Practical rule: if the item just needs to come out looking clean, detergent may be enough. If you need to reduce viable bacteria, you need more than detergent alone.

    That's why the popular question, does laundry detergent kill bacteria, has a frustrating answer. It can reduce bacterial load, sometimes a lot, but ordinary detergent isn't designed to guarantee kill performance on its own (Dettol laundry guidance). If you're looking for a low-impact laundry product and want to compare formulations, a resource like find sustainable laundry detergent can help you think about detergent choices without confusing cleaning with disinfection.

    A diagram explaining how laundry detergent removes bacteria through mechanical agitation, chemical action, and water flushing.

    Removal Versus Inactivation What the Numbers Show

    The gap between clean-looking laundry and microbiologically safer laundry appears in controlled wash studies. One study found that washing at 40°C cut the bacterial inoculum by about 3.5 log10 from an initial 7.7 log10, yet some organisms still cross-contaminated sterile fabrics in the same load (PubMed). That matters because a load can look fine and still leave enough live bacteria behind to matter.

    Why log reduction matters

    A log reduction sounds technical, but the idea is simple. It measures how much the bacterial population drops, not whether every last cell is gone. A strong drop is useful, yet it is not the same as complete kill, especially for underwear, hospital linens, or towels shared by several people.

    Wash condition Log reduction Practical outcome
    40°C wash About 3.5 log10 from an initial 7.7 log10 inoculum Good reduction, but some organisms still moved to other fabrics
    60°C wash Complete removal of the inoculum in the controlled study Much more reliable for decontamination

    A hot-water wash and bacteria question usually comes down to this difference between reduction and inactivation. Lower-temperature washing without a bleach step is not treated as reliably bactericidal for all textiles. It also explains why clothes that smell clean are not a dependable sign that the load is free of live bacteria.

    Clean laundry and disinfected laundry are not the same thing. A shirt can look fresh and still carry viable microbes if the wash only detached them.

    The practical takeaway is straightforward. Detergent usually gets you removal, but the move to inactivation depends on the wash process, not just the soap bottle. That is the choice readers need to make before deciding whether detergent alone is enough or whether a sanitizer, bleach, or hotter cycle is the better fit.

    Why Temperature Is the Single Biggest Variable

    Temperature is the biggest control knob in laundry decontamination because heat changes what survives. Hotter water does more than loosen soil, it also shifts the balance from simple cleaning toward microbial inactivation. In healthcare-oriented guidance cited in the literature, a 60°C wash for 10 minutes is described as sufficient to kill almost all bacteria, while a 30°C wash with detergent removes MRSA and most bacteria rather than guaranteeing full kill (PLOS One). That difference is the heart of the laundry decision.

    The temperature ladder

    At 30°C, you are generally getting good cleaning, especially for everyday wear. The wash can detach bacteria from fabric fibers the way a gentle rinse can carry away dust, but detaching is not the same as destroying. At 40°C, stain removal improves and bacterial reduction gets stronger, yet some organisms can still survive or transfer, as the wash conditions become less forgiving for microbes without fully turning the load into a disinfection step.

    An infographic illustrating how different wash temperatures affect the cleaning and disinfection of laundry items.

    At 60°C, the wash becomes much closer to a decontamination step, which is why hot cycles are preferred for illness laundry and higher-risk textiles. A plain-language explanation of does hot water kill bacteria helps here, because the question is not only whether bacteria are present, but whether the process gives heat enough time and exposure to push them into inactivation.

    A simple way to sort the options is this:

    • Cold or cool wash: good for visible soil, light everyday wear, and energy savings.
    • Warm wash: better for sweaty fabrics and moderately dirty loads.
    • Hot wash: used when the goal is microbial control, not just appearance.

    The main point is that detergent alone is usually doing removal work, while temperature helps determine whether the load stays in the cleaning bucket or crosses into a more disinfecting process. Laundry guidance in the literature has long treated lower-temperature detergent washing as inadequate for reliable bacterial decontamination when bleach is not part of the process (PubMed). That does not make cool water useless. It means you should not treat routine cleaning as the same thing as process-based decontamination.

    Detergent Plus What Additives Actually Kill Bacteria

    Detergent gets the load clean, but additive choice determines whether you're also trying to kill bacteria. The options encountered are chlorine bleach, activated oxygen bleach, EPA-registered laundry sanitizers, and using a hot cycle when the fabric can handle it. Each has a different balance of fabric safety, convenience, and kill power.

    Which option fits the load

    Chlorine bleach is the most aggressive common option. It's effective, but it can damage some fabrics and colors, so it's best reserved for white cottons and items that can tolerate it. Activated oxygen bleach is gentler on color and can work in cooler water, which makes it useful for mixed loads and many everyday items.

    Laundry sanitizers are different from detergent because they're formulated for targeted germ reduction in specific situations, such as suspected vomiting or diarrhea contamination, or work clothes exposed to human, animal, or agricultural pathogens. Consumer guidance also draws a clear line between sanitizing/disinfecting products, which are regulated to kill germs, and detergent-based deep cleaning, which is not (Tide laundry hygiene tips).

    The central rule is simple. Use detergent for removal, then decide whether the load needs a second step for inactivation. A household dealing with illness may need that extra step; a normal T-shirt usually doesn't.

    One practical note from risk modeling is that for enteric pathogens, detergent alone often isn't enough. A household-laundry infection-risk study found that hot water, advanced detergents, sanitizing agents, and drying were needed to reach risk targets, and that chlorine bleach or activated oxygen sanitizers produced greater pathogen reduction in textiles (PMC household study). That's the reason the right additive matters more than an “extra squirt” of detergent.

    An infographic titled Detergent Plus showing four methods for killing bacteria in laundry beyond just detergent.

    If you're also trying to keep equipment clean between loads, an internal guide on washing detergent with bleach is worth a look, because bleach changes the purpose of the wash from cleaning alone to stronger microbial control.

    Matching Laundry Practices to Your Household Risk Level

    The right laundry routine depends on who's in the house and what the load has touched. A healthy household with normal wear doesn't need the same process as a home with vomiting, diarrhea, or a person with a weakened immune system. The most useful approach is to match the cycle to the risk, not to treat every load as if it were contaminated.

    A simple tiered approach

    Tier 1, healthy household. Regular detergent in a cold or warm wash is usually enough for everyday clothes. Separate towels and underwear if you want a cleaner routine, and dry thoroughly so items don't sit damp.

    Tier 2, illness in the household. Bedding, towels, and clothing that may have come into contact with body fluids deserve a hotter wash. A 60°C cycle plus oxygen bleach is a practical upgrade when fabrics can take it, especially for affected items.

    Tier 3, high-risk or care setting. Shared linens, gym towels, daycare laundry, and healthcare-adjacent textiles may call for hot water with chlorine bleach or sanitizing additives. Pre-soaking can help when the load is visibly soiled, and a hot dryer adds another reduction step by finishing the job with heat.

    An infographic illustrating laundry practices for three different household risk levels: healthy, ill, and high-risk.

    If someone in the home is sick, treat bedding and towels as part of the cleanup plan, not as background laundry.

    That same mindset applies to facility managers, gym operators, and caregivers. Small settings don't need hospital-grade complexity for every wash, but they do need a consistent rule for when to move from detergent alone to a hotter or more aggressive process. The result is less guesswork and fewer contaminated loads.

    For HVAC or air-handling spaces that also need surface hygiene planning, install UV light in your HVAC is a useful example of how environmental controls can complement laundry and surface cleaning rather than replace them.

    Common Mistakes and Hidden Variables That Undermine Your Wash

    A lot of “failed” laundry sanitation comes down to machine habits, not the detergent label. The drum can be overloaded, the detergent can be underdosed for the water hardness, and contaminated items can get mixed with cleaner ones before the wash has a chance to do its work. Those mistakes make a good wash cycle look weak.

    What quietly goes wrong

    Overloading the drum blocks water flow, so detergent and heat can't circulate evenly. Hard water can reduce detergent effectiveness if the dose is too low. Heavily soiled loads often need a stronger pre-treatment than a normal cycle provides, and damp line-drying leaves fabrics in a condition where surviving microbes are less likely to be fully stressed.

    Cold-water detergents are also formulated differently from standard products, so swapping in a generic detergent can change performance without the user noticing. If you want the machine itself to help rather than hurt, keeping the washer clean matters too, and an internal guide on how to disinfect washing machine is a practical place to start.

    • Don't overfill the drum: give water and detergent space to move.
    • Use enough detergent for the load and water hardness: underdosing leaves soil behind.
    • Separate contaminated items from clean ones: don't let one dirty towel rewrite the whole wash.
    • Dry thoroughly: heat from the dryer helps finish the process.
    • Pre-soak when needed: it gives soil a head start before the cycle begins.

    The useful mental model is this, the wash only works as well as the weakest link. If the water doesn't reach the fabric, or the fabric sits damp afterward, the detergent can't compensate for that.

    Putting It All Together and Where to Go Next

    The cleanest way to answer does laundry detergent kill bacteria is to say, not reliably on its own. Detergent is mainly a removal tool, while heat, bleach, and registered sanitizers are what move a wash toward true disinfection. For normal wear, detergent alone may be enough. For illness laundry, shared towels, or high-risk loads, step up the process.

    A useful decision rule looks like this. Use regular detergent for everyday clothes, add hot water when the risk rises, add bleach or a laundry sanitizer when you need targeted kill performance, and keep the dryer in the loop when fabric care allows it. Laundry is only one part of the infection-control picture, though. Hard surfaces, shared equipment, and hand hygiene still matter in homes, gyms, schools, and food-service settings.

    For the rest of the environment, we recommend Wipes.com as a practical resource for EPA-registered disinfectant wipes that complement a solid laundry routine by tackling the surfaces where bacteria can survive between washes.

  • Playground Equipment Cleaning Your Complete 2026 Protocol

    You know the scene. The playground looks fine at a glance, kids have tracked in sand, fingerprints are on the rails, and a drink spill has dried into a sticky patch under the slide. That's exactly where playground equipment cleaning stops being a visual chore and becomes an infection-control task. On shared equipment, the question isn't whether the surface looks dirty, it's whether it can carry organisms like Staphylococcus aureus, MRSA, and E. coli O157:H7 from one child's hands to the next.

    The practical standard has changed. Minnesota's indoor play guidance says surfaces should be cleaned and sanitized daily or more often, soiled surfaces should be cleaned immediately, and body-fluid spills such as blood, urine, vomit, or fecal matter should be addressed right away because they may be highly contagious Minnesota indoor play area guidance. That shift matters because modern playground sanitation isn't about shine, it's about breaking transmission on the surfaces children touch most.

    Why Playground Cleaning Is More Than Wiping Away Dirt

    A busy playground runs on contact. Hands slide along rails, feet kick up dust, and younger children touch the same grips, panels, and chains again and again. Repeated use means a quick wipe only addresses what you can see. The primary job is to remove the material that helps germs persist, then reduce the microorganisms left behind.

    What the eye misses

    A surface can look clean and still carry microbes. A 2025 peer-reviewed review on playground microbiological safety notes that water, soap, and mechanical action such as brushing or scrubbing remove dirt and organic matter, but do not necessarily eliminate microorganisms, which is why cleaning alone is incomplete playground microbiological safety review. That review also supports disinfecting toys and equipment, especially in settings where children share high-touch surfaces.

    Practical rule: if your process stops at visible soil removal, you have improved appearance, not necessarily safety.

    The public-health logic is straightforward. Shared surfaces can move organisms from one child to another, and hand hygiene is still central to prevention. As the Minnesota indoor play area guidance notes, handwashing is the most effective way to prevent the spread of bacteria and viruses linked to illness. That makes the strongest playground programs the ones that pair surface cleaning with child-hygiene habits.

    The Facility Management Perspective

    For schools, daycares, gyms, and family entertainment centers, the cleaning target is breaking the chain of infection. That includes common environmental concerns like MRSA, which can persist on frequently handled surfaces, and E. coli, which matters when food, hands, and play areas mix. A good protocol treats the playground the same way a kitchen or locker room is treated, as a high-touch environment that needs routine control, not occasional attention.

    Identifying Your Playground's High-Risk Hotspots

    A playground is never one uniform cleaning job. Some points are touched constantly, some stay damp, and some collect enough foot traffic that they need a different pace of cleaning and inspection. Facility managers get better results when they sort the area by contact risk and by material, instead of treating every part of the play space the same.

    A diagram outlining the four key factors for assessing playground risk, including touch points, moisture, traffic, and materials.

    Where germs move fastest

    The first places that deserve extra cleaning and disinfection are handrails, handles, swing chains, climbing grips, activity panels, and guardrails Qitele disinfecting guide. Those are the points where children's hands keep landing, and that repeated contact creates the fastest path for transfer. A slide deck or climbing wall can look like the main issue from a distance, but the higher risk usually sits on the parts children grab, lean on, or share.

    A pathogen-focused view makes the pattern clearer. A handrail that dozens of children touch in a short period gives organisms far more transfer opportunities than a broad plastic panel that gets brushed once. A steering wheel on a play car, a swing chain, or a guardrail at the top of stairs often needs more attention than a smoother nearby surface with little direct hand contact. That is how MRSA and E. coli spread in shared environments, through repeated contact points and contaminated hands rather than across every surface equally.

    The most efficient cleaning programs focus on what hands touch, not what looks most obvious from across the yard.

    Moisture, traffic, and material type

    Moisture changes the cleaning burden fast. Damp spots hold residue longer, and food areas leave sticky buildup that takes more effort to remove. The Minnesota indoor play area guidance notes that snack areas should be separated because food contact raises the cleaning load, and that cleaning time also serves as an inspection window for cracks, rust, loose bolts, or sharp edges. That same inspection habit belongs outdoors after rain, splash play, or a busy day of use.

    Material matters just as much as traffic. Plastic, metal, wood, foam, and rubber all tolerate different cleaners and different levels of abrasion. A harsh cleaner that works on metal can haze plastic, swell wood, or leave a film that changes grip. If you are evaluating surfacing as part of the larger facility plan, choosing safe Austin playground surfaces is useful for thinking through how the ground layer affects cleaning, drainage, and slip risk. For managers who also oversee indoor and outdoor transitions, the same logic applies to adjacent play zones and should be considered alongside your existing high-touch surface cleaning routine.

    Wooden components need particular care because moisture can seep into joints and roughen the surface over time. Metal parts can corrode if cleaners are left behind. Plastic can become slick if product residue is not rinsed away. Each surface asks for a different balance between soil removal, disinfection, and drying, and that balance determines both hygiene and user safety.

    The Evidence-Based Two-Step Cleaning and Disinfection Protocol

    A playground can look clean and still carry risk. Mud, dried saliva, snack residue, and dust all interfere with disinfectants, and on shared touchpoints that matters for pathogens such as MRSA and E. coli. The practical answer is simple. Clean first, then disinfect.

    A diagram outlining a two-step cleaning and disinfection protocol for surfaces, emphasizing cleaning first, then disinfecting.

    Start with soil removal

    Begin by removing loose debris, leaves, sand, wrappers, and visible grime. Then wash the surface with mild soap or detergent and a soft sponge or brush, using low-pressure water where water is needed. Playground guidance from industry and public-health sources consistently favors that sequence because mechanical cleaning strips away the organic film that shields microorganisms.

    Cleaning with soap and water removes dirt but does not reliably eliminate microorganisms. That is why the two-step process exists, and why a quick spray-and-wipe is a weak substitute on high-touch parts like handrails, steering wheels, and activity panels.

    Apply disinfectant correctly

    After the surface is clean, use a disinfectant exactly as labeled. In practice, that means choosing a product that matches the material and keeping the surface wet for the full contact time on the label. If the surface dries too soon, the disinfectant has not had enough time to work.

    Practical rule: wet time matters more than spray volume. A light mist that flashes dry will not perform like a properly applied, label-compliant disinfectant.

    For mixed-use facilities, the common error is using the right chemical in the wrong way. Staff may apply a product that is too aggressive for plastic, too wet for wood, or too concentrated for a rubberized surface. The result can be hazed plastic, swollen wood joints, slippery residue, or a playground that smells disinfected but is not effectively controlled.

    For surfacing around the play area, material choice affects the cleaning method too. choosing safe Austin playground surfaces is a useful reminder that drainage, texture, and slip risk all affect how cleaning products should be applied and removed. The same caution applies to how to clean artificial grass, where residue and excess moisture can create traction problems if crews are not careful.

    Match the method to the contamination

    Routine dirt needs cleaning. Known exposure areas, especially after bodily fluid incidents, need disinfection after visible contamination is removed. That distinction matters because organisms such as Salmonella, MRSA, and E. coli can persist if staff rush through a one-pass wipe.

    The material on the equipment should shape the final step. Plastic can usually handle a label-approved disinfectant followed by drying, while wood, coated metal, and foam each demand a more controlled application so the surface is cleaned without being damaged or left slick. That balance is the point of the protocol, hygiene first, then a dry, usable surface that does not create a slip hazard.

    Protecting Surfaces A Guide to Material-Safe Cleaning

    A playground can look clean and still be in poor shape if the wrong product is used on the wrong surface. Mixed materials raise the risk. Plastic tolerates one treatment, wood another, and coated metal or foam can fail fast if a crew uses too much moisture, too much friction, or a disinfectant that is too aggressive for the finish.

    Material-safe quick reference

    Material Type Recommended Cleaner Recommended Disinfectant Agents to Avoid
    Plastic Mild soap or detergent with water, soft cloth or brush Label-approved disinfectant used after cleaning, then rinsed or dried per label Abrasive cleaners, strong solvents, high heat
    Coated metal Mild soap and water, low-pressure rinse Label-approved disinfectant used with correct contact time Steam machines, abrasive pads, harsh degreasers
    Wood Gentle soap solution, minimal moisture, soft brush Use only what the manufacturer allows, with careful spot application Heavy-duty degreasers, steam, aggressive bleach use
    Foam or padded surfaces Wipe with a damp cloth and approved cleaner, don't soak Use manufacturer-approved disinfectant only if compatible Saturation, abrasive tools, heat-based machines
    Rubberized surfacing Mild detergent and water, controlled rinse Approved disinfectant when needed, followed by full drying Harsh solvents, excessive scrubbing, anything that leaves residue

    What damages surfaces

    The same product can leave one surface fine and ruin another. Abrasive cleaners, heavy-duty degreasers, and steam or hot-water machines are especially hard on sensitive materials like polyurethane foam and wood finishes, where they can cause delamination, discoloration, or structural degradation Minnesota indoor play area guidance. That matters in practice, because a damaged finish is harder to clean later and more likely to hold soil, moisture, and organisms such as MRSA or E. coli in worn seams.

    High-pressure washing creates its own problems. It can force water into joints, strip protective coatings, and leave wood or foam more vulnerable after repeated use. The same caution applies to disinfectants. A product that is strong enough to control contamination is still the wrong choice if the label does not allow it for that surface or if it leaves a slick film behind.

    Making the right choice

    A plastic handhold usually tolerates a firmer wash than a coated bench or a foam climbing element. Wood needs the most restraint, because excess liquid can swell joints or weaken a finish that is already starting to fail. For metal, the main issue is often residue. A product that dries sticky can create a touchpoint that feels clean but attracts grime and can also create a slip hazard when it migrates to nearby steps or platforms.

    The safest habit is to check the label, test compatibility on a hidden area when needed, and treat mixed-material playgrounds as separate cleaning problems, not one broad task. That same approach helps with surfacing choices too. Managers who maintain artificial turf or other synthetic play areas should review best way to clean artificial grass alongside the main protocol, because residue control and moisture control affect traction as much as appearance.

    For larger sites, choosing safe Austin playground surfaces is a useful reminder that drainage, texture, and the amount of cleaning runoff each surface can handle all shape the cleaning method.

    Building a Sustainable Cleaning Schedule and Log

    A playground stays safer when cleaning is routine, not reactive. A space that looks fine on Monday can still carry soil, saliva, food residue, and high-touch contamination by midweek, especially after heavy use. A steady schedule also reduces the temptation to over-scrub mixed materials, which is where plastic, wood, and metal often start to show wear, hold moisture, or develop a slick film.

    Daily, weekly, and incident-based rhythm

    Daily tasks should focus on handrails, handles, chains, climbing grips, and any food-adjacent areas children touch again and again. These points collect soil first, and they are also the places where organisms such as MRSA or E. coli are most likely to spread by hands. Weekly work can cover broader surface washing, closer inspection of hardware, and a check for wear that routine use can hide. It is also the right time to look for cleaning damage, such as swollen wood, dulling on coated surfaces, or residue on metal that could later become a slip problem.

    Incident-based cleaning needs a faster response. Blood, vomit, urine, or fecal contamination calls for immediate action because these events carry a higher health concern than routine dust or fingerprints. Staff should close the affected area, remove the contamination safely, clean thoroughly, and then disinfect according to label instructions before reopening. If a staff member hesitates because the mess is biological rather than ordinary dirt, the area should stay closed until the cleanup is complete.

    Use a log that actually helps

    A log works only when it captures information staff can use later. Record the date, the areas cleaned, the products used, and any damage found during inspection. That gives managers a compliance record and gives maintenance staff a head start on repairs. It also makes pattern problems visible, like a chain that keeps loosening or a panel that stays sticky after cleaning, both of which can point to a process problem rather than a one-time mistake.

    The log should also match the pace of the facility. A childcare center that already follows a daycare cleaning checklist can fold the playground into that same rhythm so outdoor and indoor touchpoints are tracked together. For operators building a repeatable schedule, the template for healthy North Georgia lawns is a useful reminder that maintenance works better when it is planned, not improvised. Playgrounds need the same discipline, especially when mixed materials have to be cleaned without leaving residue on metal or forcing too much moisture into wood.

    Safety First PPE and Post-Cleaning Verification

    A professional cleaner wearing a face mask and gloves gives a thumbs up next to cleaned playground equipment.

    Cleaning staff need protection too. Gloves are the baseline when handling chemicals or contaminated soil, and eye protection is smart whenever splashing is possible. If the product label calls for additional protection, follow that label exactly, because the goal is safe use, not just effective use.

    Before children return

    Rinse surfaces when the disinfectant label requires it, then let everything dry completely before reopening. Wet surfaces can be slippery, and residual chemical on a handrail or grip is a problem even if the disinfection was technically successful. For foam-covered or absorbent materials, wiping rather than soaking is the safer practice, because saturation can damage the interior and leave the area damp for too long.

    Verification should be simple and visual. The surface should be clean, free of residue, and dry to the touch unless the manufacturer says otherwise. If it still feels slick, tacky, or chemically strong, it isn't ready.

    For facilities wanting a reliable, easy-to-deploy option, we recommend checking Clean safe services for Flagstaff from Pine Country Window Cleaning as a local example of professional hygiene support for shared spaces.

    When you want a practical product path as part of your routine, we recommend Wipes.com. Their disinfectant wipes are a convenient option for targeted touchpoint cleaning on playground equipment, especially when you need a simple, consistent way to treat handrails, handles, and other high-contact areas without overcomplicating the process.

  • Multidrug Resistant E. Coli: Prevention & Treatment

    Multidrug-resistant E. coli is a bigger problem than many people realize, because it's not confined to hospitals. A global synthesis estimated the pooled prevalence of multidrug-resistant E. coli at 36.5% across human and animal samples, with very high heterogeneity, which means this is a broad surveillance signal, not a one-off outbreak (systematic review PDF). That matters for clinics, but it also matters for kitchens, locker rooms, daycares, wastewater systems, and the everyday places where people touch shared surfaces and food.

    By definition, MDR E. coli is E. coli that can withstand multiple antibiotic classes at once. In plain language, it's the version of a common bacterium that has learned how to survive the medicines doctors often rely on first. Some strains are harmless gut residents, but resistant strains can persist, spread, and cause infections that are harder to treat, especially when resistance is carried in mobile genetic elements that move easily between bacteria.

    Introduction to Multidrug Resistant E coli

    A resistant strain of E. coli can show up in places that seem unrelated, from hospitals to ordinary households. A large global meta-analysis found intestinal carriage of ESBL-producing E. coli in 21.1% of inpatients and 17.6% of healthy individuals, using 133 studies and 73,318 patient samples. That matters because resistant E. coli is not confined to clinical care, it can also be carried in the community, often without detection.

    For many readers, the confusing part is that resistance does not always look dramatic. A person may feel well, yet still carry bacteria that can spread through close contact, shared bathrooms, food preparation, or contaminated surfaces. In that sense, resistant E. coli behaves less like a rare emergency and more like a hidden passenger that can move through everyday routines.

    What makes it multidrug resistant

    The phrase multidrug resistant means the bacterium can resist several antibiotics, often from different classes, so the usual treatment choices become narrower. In E. coli, that often appears as resistance to beta-lactams, fluoroquinolones, aminoglycosides, or a mix of these drugs, rather than a single isolated change.

    Horizontal gene transfer helps explain why this can spread so quickly, because plasmids, transposons, and integrons can move resistance genes between bacteria (mechanisms review). That means resistant E. coli does not need each strain to build resistance from scratch. It can receive ready-made tools from nearby bacteria and keep them in circulation.

    For households, schools, gyms, and food-service sites, the practical lesson is straightforward. Resistant E. coli is not only a problem for a sick patient in a hospital bed. It can remain in the background of normal life, then spread through hands, food, water, laundry, or contaminated surfaces when hygiene slips.

    Resistance Mechanisms of E coli

    Think of antibiotics as keys and bacterial defenses as locks, walls, pumps, and gatekeepers. E. coli can use more than one defense at the same time, which is why treatment can fail even when a drug looks promising on paper. The most important point is stacking, not just one mechanism by itself.

    The main defense layers

    Extended-spectrum beta-lactamases, or ESBLs, act like molecular scissors. They break apart many common beta-lactam antibiotics before the drug can do its job, including penicillins and several cephalosporins. That's why ESBL production changes treatment mechanics, not just the label on the lab report.

    Carbapenemases are an even more alarming version of that enzyme strategy. They can undermine carbapenems, which are often treated as fallback drugs for tougher infections. When those enzymes are present, the safety net gets thinner.

    Efflux pumps, especially AcrAB-TolC, work like active ejector systems, pushing antibiotics back out of the cell before they build up to effective levels (efflux and biofilm review). Porin changes do the opposite of opening the door. They narrow or reduce entry channels in the outer membrane, so fewer drug molecules get inside in the first place.

    A diagram illustrating four primary mechanisms used by multidrug-resistant E. coli bacteria to evade antibiotic treatments.

    The combination is what makes this so difficult. A strain can cut down drug entry, pump out what remains, and destroy part of what gets through. That's why a first-line antibiotic can look reasonable at the start, then fail once the bacterium's layered defenses kick in.

    An internal primer on resistance basics is available in this guide to how bacteria develop antibiotic resistance, and it pairs well with the mechanism picture above. For readers trying to understand why one lab result can change a treatment plan so sharply, this is the key idea: resistance is often a system, not a single switch.

    Epidemiology and Transmission Patterns

    Resistant E. coli spreads wherever people, animals, water, and waste overlap. That is why surveillance now relies on a One Health view, since resistance can move between humans, animals, wastewater, soils, and aquatic systems (One Health evidence). In everyday terms, the path is not limited to a clinic. A food chain, farm runoff, or a contaminated sink can all help keep resistant strains in circulation.

    Where carriage shows up

    The clinical side starts with people, but animal reservoirs also matter. As noted earlier, resistant E. coli can persist in food-animal systems, and the same broad pattern has been described in resistance monitoring summaries. That does not mean every animal poses a direct risk. It does show that resistance can become established in places many readers do not immediately connect with healthcare.

    A simple comparison helps show how carriage is distributed.

    Setting MDR E. coli Prevalence in Different Settings
    Inpatients Higher carriage than healthy individuals, including ESBL-producing strains
    Healthy individuals Lower, but still substantial carriage
    Animal reservoirs Colistin resistance documented across multiple reservoirs, as noted in resistance monitoring summaries (CIDRAP summary)

    The point of the table is not that one setting acts alone. It is that resistant E. coli can sit in more than one reservoir at the same time, then move between them when hygiene, food handling, or waste control is weak. That is why community prevention cannot stop at hospitals.

    Public advice often focuses on handwashing, but fecal-oral spread is a major route for pathogenic E. coli (transmission study). Contaminated hands, food, water, or shared bathroom surfaces can all continue the chain. In a school, gym, or cafeteria, a missed cleaning step can matter more than people expect, because the organism does not need a dramatic event to spread. It only needs repeated small lapses.

    For a plain-language explanation of how carriage differs from colonization and infection, see this overview of antibiotic resistance in E. coli. The wider lesson is straightforward. Resistant E. coli does not stay in one place. It moves through people and environments together, which is why targeted hygiene in non-clinical settings matters so much.

    Diagnostics and Susceptibility Testing

    Testing starts with the question, “Is this E. coli, and if so, what can still kill it?” Traditional culture answers that slowly but reliably. Molecular methods answer faster, but they don't always replace full susceptibility testing, especially when treatment decisions are high-stakes.

    How labs approach the problem

    Culture and disk diffusion remain familiar because they show whether the organism grows in the presence of specific antibiotics. They're useful in many settings, but they take time and depend on lab workflow. Molecular assays such as PCR can detect resistance genes faster, which helps when clinicians need to narrow therapy quickly, but gene detection isn't the same thing as a full live-organism susceptibility profile.

    MALDI-TOF is valuable for rapid organism identification, which can help clinicians stop treating a mystery bug like a generic gram-negative infection. The lab can then move to the susceptibility method that matches the care setting and the clinical urgency. In a busy hospital, that speed can reduce the time spent guessing.

    Rule of thumb: the faster the result, the sooner therapy can be targeted, but the final interpretation still depends on the lab's breakpoint system and the local resistance pattern.

    MIC, or minimum inhibitory concentration, is the number that tells clinicians how much drug is needed to stop growth. It's not a simple yes-or-no label. It's a way to compare the bacterium's resistance behavior with the concentration the drug can realistically reach in the body.

    For front-line readers, the main takeaway is this. Rapid diagnostics help shorten uncertainty, but they work best when paired with good stewardship and careful interpretation. A fast test that isn't read correctly still leads to poor choices.

    Clinical Management Challenges

    Treatment becomes difficult once the usual oral options stop working. A clinical study of urinary isolates reported 97.8% resistance to ampicillin, 92.8% to trimethoprim-sulfamethoxazole, and 86.6% to cephalothin (clinical study). Those numbers do not describe every strain in every place, but they show why clinicians cannot assume standard drugs will cover resistant E. coli.

    Why salvage therapy is hard

    When first-line drugs fail, clinicians may have to use salvage agents that are harder to tolerate. Colistin is one of those fallback options, but it comes with real tradeoffs. Guidance summarized in the literature recommends hand hygiene, gloves, gowns, single-room isolation, patient flagging, and antimicrobial stewardship to reduce selective pressure, because preventing spread is safer than repeatedly chasing resistant infections with harsher drugs (guidance summary). The same source also notes nephrotoxicity in 8% to 30% of patients.

    An infographic detailing the clinical management challenges of treating multidrug-resistant Escherichia coli infections in healthcare settings.

    The problem is not only toxicity. Resistant infections can lead to longer stays, closer monitoring, and more complicated drug sequencing. They also narrow the margin for error, because a poor empiric choice can delay effective treatment until culture results return.

    Biofilm adds another layer. Once E. coli forms a biofilm, it can become much less responsive to antimicrobials and harder to clear from devices or contaminated surfaces. That is why source control matters. If a contaminated catheter, sink, or other reservoir remains in place, antibiotics may never fully solve the problem (biofilm review).

    Infection Prevention Across Settings

    Prevention has to work in homes, clinics, schools, gyms, and food-service areas, because transmission doesn't respect building type. The strongest approach combines hand hygiene, surface cleaning, food safety, wastewater management, and careful antibiotic use. In other words, block the route, not just the bug.

    Practical hygiene steps by setting

    In homes, the highest-value move is routine bathroom and kitchen sanitation, especially after diaper changes, toilet cleaning, food prep, or caring for someone with diarrhea. In gyms and daycare settings, shared touchpoints need frequent disinfection, because hands and surfaces are constantly cycling between people. In healthcare facilities, barrier precautions and room-level protocols still matter, but environmental cleaning can't be neglected either.

    A practical resource for laundry handling in care settings is a guide to hospital laundry hygiene, which is especially useful when linens may be contaminated. Laundry is easy to overlook because it looks clean after a wash, but contaminated fabric can still move organisms around if handling is careless.

    The environmental piece is just as important. If resistance is circulating through wastewater, soils, or aquatic systems, then households and businesses need cleaning habits that don't assume the source stays outside. That's why high-touch points, sink drains, restroom fixtures, and food-contact surfaces deserve steady attention, not only outbreak response.

    An internal overview on broader resistant organisms is available at multidrug resistant bacteria, which helps place E. coli in the wider resistance context. For any setting, the core prevention sequence is straightforward:

    • Clean hands often: use soap and water when visibly soiled, and use alcohol-based hand rub when appropriate.
    • Disinfect high-touch surfaces: focus on toilets, handles, counters, and shared equipment.
    • Separate food and waste flow: keep raw food, trash, and laundry from crossing paths.
    • Manage wastewater carefully: don't let sinks, drains, or mop water become hidden reservoirs.
    • Use antibiotics prudently: fewer unnecessary prescriptions mean less selective pressure.

    Guidance for Administrators and Caregivers

    A resistant strain can spread unnoticed through a building before anyone notices a pattern. Caregivers and managers need clear actions, not vague warnings, because the next transmission event usually happens during ordinary routines, such as hand contact, toileting, food handling, or cleanup.

    The main goal is to break those routine links. If a person, surface, or item is shared without proper cleaning, multidrug resistant E. coli can move from one setting to another just as easily as a fingerprint on a door handle.

    A short checklist for higher-traffic settings

    Facility leaders should keep cleaning supplies available, make sure staff know which surfaces need frequent attention, and keep written procedures for bathrooms, food areas, and laundry handling. School and gym operators should pay close attention to shared benches, mats, locker-room fixtures, and restrooms, since these are the places where hands, skin, and surfaces meet again and again. At home, caregivers should focus on handwashing, diapering, toileting, and any area where diarrhea or urinary symptoms are being managed.

    The details matter because resistant organisms often spread through small lapses, not dramatic failures. A sink that is wiped inconsistently, a shared towel that is handled carelessly, or a restroom fixture that is skipped during cleaning can keep the chain going.

    Training should be short, visual, and repeated often enough that new staff can do the basics without supervision. Clear photos, simple labels, and room-by-room instructions work better than long explanations when people are busy.

    If an environment has repeated contamination or a known resistant infection, the response should go beyond routine wiping. Deeper cleaning, stronger separation of clean and dirty items, and contact with local health guidance may be needed when the situation does not settle. For food-service and janitorial teams, the easiest way to reduce risk is steady practice, the same schedule, the same contact points, and the same refill checks every day.

    Conclusion and Hygiene Recommendation

    Multidrug-resistant E. coli spreads when treatment limits, human movement, and environmental contamination line up. A germ that survives in one person can then travel on hands, shared objects, water, or high-touch surfaces, which is why prevention has to address both the body and the spaces around it. The most effective response combines diagnostics, stewardship, and routine sanitation. Each part supports the others.

    A practical way to understand this is to treat hygiene like a chain of barriers. If one barrier weakens, another can still slow spread. That matters in homes, clinics, schools, gyms, and food-service settings, where community transmission often begins with ordinary contact rather than obvious exposure.

    If you're responsible for a home, clinic, school, gym, or food-service space, treat cleaning as prevention, not housekeeping. Using pre-moistened disinfectant wipes can be a practical way to support consistent surface hygiene, because they make frequent cleaning easier to carry out. For readers who want more plain-language prevention guides, BacteriaFAQ.com offers clear information on bacterial transmission and control.

  • How to Clean Shower Drains: A Guide to Biofilm Removal

    Most advice on how to clean shower drains stops at the clog. Pull out the hair, pour in baking soda and vinegar, flush, done. That approach is incomplete.

    A shower drain can look clear and still be unsanitary. The hidden problem is the slick coating inside the drain body and pipe walls. That layer can hold debris, trap odor, and shelter bacteria. In a busy household or shared facility, cleaning a shower drain is partly plumbing maintenance and partly hygiene control.

    Among the organisms tied to drain biofilms, Pseudomonas aeruginosa deserves special attention. It thrives in wet environments, forms biofilms, and is known for antibiotic resistance. If you're responsible for a family bathroom, a locker room, an assisted living site, or any high-traffic wash area, you need a method that goes beyond unclogging.

    Why Your Clean Drain Is Still a Health Hazard

    Shower drain cleaning is often treated primarily as a hair-removal problem. Hair and soap scum are part of it, but they aren't the full story. Many popular guides focus on mechanical clog removal and skip the fact that standard methods like vinegar and baking soda do not effectively dissolve or prevent biofilm, the slimy layer of bacteria, including Staphylococcus aureus and Pseudomonas, that can keep causing odors even after visible debris is gone, as noted in this drain hygiene guidance.

    Pseudomonas aeruginosa is a Gram-negative, rod-shaped bacterium in the Pseudomonadaceae family. It is notable for forming biofilms and for resistance to multiple antibiotics, including penicillin and most beta-lactams, according to the CDC overview of Pseudomonas aeruginosa. In practical terms, that means a wet drain isn't just unpleasant. It can become a protected microbial niche.

    Where this bacterium shows up

    High-moisture environments give Pseudomonas the conditions it likes. In real buildings, that includes:

    • Residential bathrooms where hair, skin cells, and soap residue collect
    • Commercial showers in gyms, dorms, and athletic facilities
    • Healthcare wash areas where vulnerable people may be exposed
    • Shared bathrooms in schools, daycares, and multifamily housing

    If you already care about moisture control elsewhere in the building, the same mindset applies here. The same attention used in expert tips for mold control should extend to drains, because persistent dampness supports microbial persistence even when surfaces look acceptable.

    A drain can be free-flowing and still carry a mature biofilm on the surfaces you can't see.

    Biofilm forms when microbes attach to a wet surface and build a sticky matrix around themselves. If you want the short microbiology behind that process, this overview of how biofilms form is a useful primer. For drain cleaning, the takeaway is simple: clear water flow is not the same as a hygienic drain.

    Why the health risk matters

    Pseudomonas infections can become serious, especially for people with weakened immunity or medical devices. Cleveland Clinic notes that complications can include septic shock, respiratory failure, and wound infections, with recovery rates ranging from 39% to 82% depending on infection severity and adherence to antibiotic protocols in its clinical summary of pseudomonas infection.

    That doesn't mean every shower drain is an immediate medical emergency. It does mean facility managers and health-conscious homeowners shouldn't confuse deodorizing with disinfection.

    Your First Line of Defense Is Daily Prevention

    Prevention is less dramatic than clearing a full blockage, but it works better. The routine that keeps shower drains manageable is simple and consistent. According to Maplewood Plumbing's drain maintenance guidance, shower drains should be cleaned every couple of months, and a 30-second hot water flush after every shower helps dissolve soap scum and wash away loose particles before they harden.

    A hand cleaning hair from a shower drain using a white paper towel next to a drain cover.

    The habits that matter most

    Small habits keep organic material from building into a clog and feeding a biofilm.

    • Remove visible debris right away. Hair sitting under the cover becomes the framework for soap scum and bacterial slime.
    • Use a drain catcher. It won't sterilize the system, but it cuts down the amount of hair entering the drain body.
    • Flush with hot water after each shower. That short rinse works best as prevention, not rescue.
    • Lift and clean the cover on schedule. If you wait until drainage slows, you've already given buildup time to mature.

    This kind of preventive rhythm also protects surrounding bathroom materials. If you're maintaining the entire shower assembly, these tips for shower door longevity fit well with a broader bathroom care plan.

    A workable maintenance rhythm

    Not every drain needs the same level of attention every week, but every drain needs a routine. For most homes and light-use bathrooms, this framework is practical:

    Task Purpose
    After each shower Flush away loose soap residue and hair fragments
    As needed at the cover Remove trapped hair before it slips deeper
    Every couple of months Clean the shower drain thoroughly to prevent clogs and odors

    For families, caregivers, and cleaners who need a repeatable plan, a bathroom cleaning schedule template can help make drain care part of regular hygiene instead of a last-minute fix.

    Practical rule: If the drain smells before it clogs, treat that as an early warning, not a cosmetic issue.

    Who should pay closest attention

    Some users should be more disciplined than others:

    • Parents and caregivers should care because children often share wet spaces and may have skin irritation or small cuts.
    • Facility managers should care because high traffic increases organic load and cleaning inconsistency.
    • Janitorial staff should care because a shiny shower floor can hide a neglected drain throat.
    • Healthcare-adjacent settings should care because vulnerable occupants face higher consequences from environmental bacteria.

    Daily prevention won't remove a mature biofilm by itself. It does make the drain less hospitable and lowers the amount of organic material that fuels the problem.

    Handling Minor Slowdowns with Natural Solutions

    When the shower is draining a little slower but not fully blocked, a mild natural treatment is reasonable. Used correctly, baking soda and vinegar can loosen light buildup and reduce odor. Used with unrealistic expectations, it becomes a ritual that makes people think they've disinfected a drain when they haven't.

    According to this cleaning method reference, a 1:1 ratio of baking soda and vinegar, left to sit for 15 to 30 minutes and followed by a hot water flush, can help break down mild clogs and deodorize the drain without the corrosive risks associated with harsh chemical cleaners.

    How to use the method properly

    For a mild slowdown, the sequence matters:

    1. Remove the drain cover and clear visible hair first. The fizzing reaction works better when it can reach the residue.
    2. Add equal parts baking soda and vinegar. Keep the mix targeted to the drain opening instead of splashing it across the shower base.
    3. Let it sit for the full dwell time. Rushing this step weakens the effect on soft buildup.
    4. Flush with hot water. The flush carries loosened material away.

    This method is best for fresh soap scum, light hair residue, and smell control.

    What it won't do

    It won't reliably disinfect a drain with established biofilm. That's the critical limit. The fizz may loosen surface grime, but it doesn't solve the deeper microbiological problem described earlier.

    Use it as a maintenance tool, not as proof that the drain is sanitary.

    If the drain still smells slimy after the treatment, assume you're dealing with attached biofilm, not just loose debris.

    Where natural solutions fit best

    Natural treatments make sense in three situations:

    • Early slowdown before standing water appears
    • Routine deodorizing between deeper cleanings
    • Households avoiding harsh corrosives when the issue is clearly minor

    They make less sense when water is backing up, when the drain repeatedly slows after treatment, or when you manage a high-traffic environment where hygiene standards matter more than a quick DIY fix.

    Removing Stubborn Clogs with Mechanical Tools

    Once hair packs tightly below the drain opening, chemistry becomes secondary. You need extraction. A mechanical drain snake or small auger becomes essential here.

    The strongest DIY option for a shower drain is the snake method. Maid2Match's cleaning guidance reports that the mechanical drain snake method achieves a 92–95% success rate on stubborn obstructions by physically snagging and extracting hair clumps, and that proper feeding, rotating, and retracting helps prevent re-clogs.

    A five-step infographic showing how to remove stubborn drain clogs using a mechanical drain snake tool.

    The right way to use a drain snake

    A good result depends on control, not force.

    • Start gently. Feed the cable into the drain until you feel resistance.
    • Rotate to engage the clog. Twisting helps the tip hook hair instead of just pushing it deeper.
    • Pull back slowly. Steady retraction keeps the debris attached to the cable.
    • Repeat if needed. Dense hair masses often come out in stages.
    • Flush afterward. Once the obstruction is out, run hot water to carry away loose remnants.

    A pair of gloves, a small bucket, and paper towels make cleanup easier. Hair clogs are messy, but they are usually straightforward if the blockage is local.

    Why this works better than pouring more product

    Shower clogs are often structural tangles of hair, soap residue, and skin debris. If that mass is physically knotted around the drain crossbars or caught just below the trap entrance, liquid treatments may only soften the outside.

    Mechanical removal solves a different problem than deodorizing. It removes the bulk material that supports future buildup.

    Problem Best first response
    Slow drain with light residue Natural maintenance treatment
    Dense hair clog near the opening Mechanical snake extraction
    Persistent odor after debris removal Biofilm-focused cleaning

    Safety and judgment

    Don't crank aggressively if the snake stops hard and won't advance. That can mean a tight bend, a fitting, or a deeper obstruction. In older or delicate plumbing, force causes damage faster than many homeowners expect.

    Pull out what you can reach. Don't turn a local shower clog into a pipe repair.

    For many stubborn shower drain blockages, a drain snake is the fastest and cleanest DIY tool. It still doesn't disinfect the drain wall. It just clears the traffic jam.

    How to Destroy Biofilm and Disinfect Your Drains

    A shower drain can run freely and still be dirty enough to matter. Flow tells you whether water is moving. It does not tell you whether the drain wall is coated with biofilm that shelters bacteria and keeps odor coming back.

    That distinction matters in bathrooms used by children, older adults, people with weakened immune systems, and anyone managing a shared shower. Wet drains can support organisms such as Pseudomonas aeruginosa, which persist well on moist surfaces and inside slime layers that a quick rinse will not remove.

    An infographic explaining how to remove bacterial biofilm buildup and effectively disinfect residential sink or shower drains.

    Why enzyme cleaners beat homemade fizz for drain slime

    For established organic buildup, enzymatic detergents are the most biologically sensible option in the sources reviewed. Idea Group's cleaning reference explains that enzyme products use agents such as proteases to break down organic material, need a meaningful contact period, and work best with hot, not boiling, rinse water. The same guidance also warns against mixing hydrochloric acid with enzymatic or caustic cleaners because that creates safety hazards and can reduce cleaning performance.

    That trade-off gets missed in a lot of DIY advice. Boiling water sounds stronger, but stronger is not the goal if it stresses seals or plastic components without improving biofilm removal.

    Southern Living's review of shower drain temperature safety makes the same practical point. Water in the hot-but-not-boiling range is safer for common plumbing materials and fits the way these cleaners are meant to be used.

    Match the cleaner to the contamination

    Drain biofilm is a mix of organic residue and microbes bound together on the pipe surface. Hair, skin cells, soap residue, and body oils give that layer structure. If the hair mass is already out but the drain still smells sour or musty, the remaining problem is often the film left behind on the walls.

    Enzymes help because they break down the residue that anchors the film. They are not instant disinfectants, and they do not replace physical debris removal. They are useful because they get at the material microbes live in.

    For a closer explanation of the hygiene side, see this guide on how to remove biofilm.

    A practical workflow for biofilm reduction

    Use a sequence that gives the product access and contact time:

    1. Remove the drain cover and clear reachable debris first. Surface slime and trapped hair block cleaner contact.
    2. Apply the enzymatic cleaner exactly as labeled. More product does not fix poor coverage.
    3. Let it sit for the full label contact time. Cutting the dwell time is one of the main reasons people get odor rebound.
    4. Rinse with hot water, not boiling water. The goal is to carry away loosened residue without stressing pipe materials.
    5. Repeat on a maintenance schedule in high-use showers. Shared bathrooms, gym showers, and frequently used family bathrooms build film faster.

    What disinfection can and cannot do

    Disinfection works poorly if slime is still attached to the surface. A disinfectant has to reach the microbes. If the drain wall is coated with organic film, the chemistry gets spent on the mess before it reaches the organisms underneath.

    Clean first. Then disinfect if the product is labeled for that use and the drain material allows it.

    In residential settings, many people stop after deodorizing. In facilities, that is often not enough. Odor control, visible cleanliness, and microbial control overlap, but they are not the same job.

    Higher-risk situations

    Biofilm control deserves more attention when the consequences of poor drain hygiene are higher:

    • Shared showers with barefoot traffic, where repeated contamination and moisture keep the drain seeded
    • Homes with immunocompromised occupants, where environmental reservoirs matter more
    • Healthcare, eldercare, and assisted-living bathrooms, where persistent wet-site contamination has more serious implications
    • Athletic, hospitality, or multi-user facilities, where odor complaints may be the first sign of a larger sanitation problem

    If the only goal is faster drainage, clog removal may solve it. If the goal is lower microbial burden and fewer recurring odors, treat the drain as a hygiene surface, not just a pipe.

    Troubleshooting Lingering Issues and When to Call a Pro

    Some shower drains are not dealing with a simple clog. They are maintaining a wet, contaminated niche that keeps trapping hair, soap residue, and fresh organic matter. If the same drain slows down again soon after cleaning, or the odor returns after you have already removed visible debris, assume the problem extends deeper than the drain opening.

    A concerned young man looking at a clogged shower drain and thinking about hiring a professional plumber.

    Signs the problem is beyond DIY

    Call a plumber or facility maintenance specialist if you run into any of the following:

    • The clog returns quickly after cleaning. Recurrent blockage often means buildup farther down the line, poor drainage slope, or a trap that is holding too much debris.
    • Odor persists after mechanical cleaning and surface disinfection. That usually means slime or contamination remains below the area you can reach.
    • Water backs up in nearby fixtures. A shower-only clog is one problem. A shared branch line problem is another, and it needs proper diagnosis.
    • A snake stops hard or comes back empty repeatedly. You may be hitting compacted buildup, a fitting turn, or damaged pipe.
    • The drain body, cover, or surrounding seal is cracked or loose. Once hardware starts failing, cleaning alone will not restore sanitary performance.

    One failed attempt is not the signal. Repetition is.

    A practical decision test

    Use this judgment table to decide whether to keep working or escalate:

    Situation Best move
    Minor slowdown, no odor, no backup Handle it with routine maintenance
    Local hair clog near the drain opening Use a mechanical snake
    Persistent slime odor after clearing the clog Use an enzymatic biofilm approach
    Repeated failure or multi-fixture backup Call a professional

    In busy homes and shared facilities, delay has a cost. Staff can spend the same labor clearing the top of the drain again and again while the actual restriction sits deeper in the branch line. Meanwhile, wet organic film keeps reforming and continues to support odor and microbial growth.

    The smart endpoint

    A professional brings inspection tools, longer cables, and the judgment to tell the difference between routine accumulation and a system problem. That matters when the issue is a partial blockage in the line, a venting problem, or a drain assembly that is staying contaminated because it never dries properly.

    For households, the practical standard is simple. Remove debris early, treat slow flow with the least aggressive method that works, and escalate fast when odor, repeat clogging, or backup show that the drain is acting like a contaminated reservoir instead of a simple hair trap.

    Disinfectant wipes still have a place, but not inside the pipe. Use them on surrounding bathroom touchpoints and nearby surfaces after drain cleaning, especially in shared bathrooms, and choose a product labeled for disinfection, including options sold by Wipes.com.

  • Does Hot Water Kill Bacteria: Safe Temps & Times

    The most common advice on this topic sounds simple: turn on hot water, and the heat kills the germs. That idea is appealing, but it blurs two very different things. Cleaning often happens because soap, friction, and rinsing lift microbes off a surface. Thermal disinfection happens only when water reaches a high enough temperature for long enough.

    That gap matters in homes, schools, gyms, food prep areas, and healthcare spaces. It also matters when people think hot tap water can handle tougher organisms on busy surfaces. A useful example is Pseudomonas aeruginosa, a bacterium that thrives in wet environments and can be hard to remove once it settles into a biofilm.

    Introduction to Hot Water and Bacteria

    Pseudomonas aeruginosa is a Gram-negative, opportunistic pathogen in the genus Pseudomonas. The CDC notes that it produces characteristic green-blue pigments called pyocyanin and fluorescein, and that it forms biofilms that help it resist antibiotics and disinfectants on surfaces and medical devices, as explained by the CDC overview of Pseudomonas aeruginosa.

    You can find this bacterium anywhere moisture lingers. Think sink drains, faucet areas, showers, locker rooms, mop buckets, dish areas, and medical equipment that stays damp between uses. In commercial and high-traffic settings, those wet niches give bacteria a place to hold on, especially if cleaning removes visible grime but leaves behind the slimy layer of a biofilm.

    Many people assume hot handwashing water solves that problem by heat alone. It doesn't. Hot water alone does not kill bacteria during handwashing because the temperature required to eliminate pathogens is over 80°C or 176°F, which is far above what skin can tolerate, while comfortable handwashing water is typically 38°C to 44°C, according to this handwashing evidence summary.

    Bottom line: If water feels comfortable on your hands, it's helping you wash microbes away, not cook them to death.

    That distinction is where most confusion begins.

    Understanding Heat Inactivation Science

    Heat can kill bacteria, but only when temperature and time work together. A brief splash of hot water isn't the same as holding microbes at a lethal temperature long enough to damage their proteins and membranes. A simple analogy is an egg. Warm it a little and it stays liquid. Heat it enough for long enough and the proteins change structure.

    Why temperature alone isn't the full story

    When people ask, does hot water kill bacteria, they're usually asking the wrong version of the question. The better question is this: How hot is the water, and how long does the bacteria stay exposed to it?

    A diagram explaining heat inactivation science for killing bacteria using temperature and time factors.

    Reliable heat inactivation needs specific thresholds. Water at 60°C (140°F) for at least 5 minutes kills 99.99% of waterborne microorganisms including E. coli and Salmonella, 65°C (149°F) for 5 minutes achieves the same 99.99% reduction, and boiling at 100°C (212°F) for at least 1 minute is the standard recommendation from WHO and EPA to inactivate pathogens, as summarized in this review of hot water kill temperatures.

    If you want a companion explanation of why heat can either slow growth or kill cells depending on the range, BacteriaFAQ has a helpful piece on how temperature affects bacterial growth.

    Think in thresholds, not labels

    Words like warm, hot, and very hot aren't scientific enough for sanitation decisions. One sink may deliver water that feels hot but never reaches a true disinfection threshold. Another system may deliver hotter water, but only for a few seconds before cooling.

    That matters for Pseudomonas aeruginosa, because wet-environment bacteria often aren't sitting alone as free-floating cells. They may be tucked into a biofilm on a drain cover, under a sink rim, or inside a splash zone. In those cases, vague advice like "rinse with hot water" can give a false sense of safety.

    Heat is precise. Human language about heat usually isn't.

    Practical Temperature and Time Guidelines

    Knowing the science is useful. Applying it safely in real settings is where people usually need the most help. For janitorial teams, kitchen managers, and caregivers, the main question isn't whether heat can kill bacteria in theory. It's whether the water and the exposure time in front of you are enough in practice.

    What hot water can and can't do in daily cleaning

    For routine handwashing, comfortable water is fine because soap and scrubbing are the primary means of cleaning. For items or water that you need to disinfect with heat alone, you have to hit a proven threshold. Hot water removes bacteria only when it reaches and maintains specific thermal thresholds for sufficient contact time: 60°C (140°F) for at least 5 minutes eliminates most non-spore-forming pathogens like E. coli and Salmonella, while 71°C (160°F) for at least 15 seconds achieves pasteurization-level reduction. Tap water typically stays below 55°C (131°F), which is comfortable for human skin but ineffective for killing bacteria without soap and scrubbing, as explained in this hot water sanitization guide.

    For a deeper look at one of the benchmark organisms often used in these discussions, see BacteriaFAQ's article on what temperature kills E. coli bacteria.

    Heat inactivation parameters for common settings

    Setting Temperature Duration Log Reduction
    Drinking water disinfection by boiling 100°C (212°F) at least 1 minute 99.99% of waterborne microorganisms
    Waterborne microorganism reduction 65°C (149°F) 5 minutes 99.99%
    Waterborne microorganism reduction 60°C (140°F) at least 5 minutes 99.99%
    Pasteurization-level reduction 71°C (160°F) at least 15 seconds Qualitative high reduction

    That table helps with decision-making, but it also shows why many real-world surfaces aren't fully disinfected by a quick hot rinse. A gym sink, daycare faucet handle, or food prep splash area may get warm water often and still remain contaminated if staff rely on heat instead of a proper cleaner or disinfectant.

    Practical advice for high-traffic spaces

    • For sinks and wet fixtures: Clean away residue first. If the area stays damp, assume bacteria can persist and use a disinfectant that is labeled for the surface.
    • For dish and utility areas: Don't confuse grease removal with disinfection. Hot water may cut oils well but still fail to kill bacteria if it never reaches a validated threshold.
    • For water heater concerns: If your facility struggles to maintain stable hot water delivery, a licensed provider such as Stultz Plumbing water heater service can help evaluate whether the system is delivering the temperatures you expect at the point of use.

    Practical rule: If you're not measuring both heat and contact time, don't assume you're disinfecting.

    For Pseudomonas aeruginosa, that matters because damp infrastructure can keep reseeding cleaned areas.

    Limitations of Hot Water Sanitization

    The biggest blind spot in hot water advice is biofilm. That's the slick, protective layer bacteria build on surfaces when moisture and nutrients stick around. Once a biofilm forms, heat has a harder job because it must penetrate that matrix before it reaches the cells inside.

    Why biofilms change the answer

    An infographic comparing the pros and limitations of using hot water sanitization for killing bacteria and microbes.

    This is especially relevant to Pseudomonas aeruginosa because the organism is well known for biofilm formation. In real environments, that means a damp sink or drain can look acceptable after rinsing but still harbor embedded bacteria.

    Most cleaning advice online says to use "hot water" without telling people what threshold is required to disrupt that attached layer. Recent data shows that hot water at about 90°C can be 100 to 1,000 times more effective than chlorine at disinfecting biofilm-laden surfaces, but only when it penetrates the matrix, and most household taps cannot reach that heat safely, according to this analysis of hot water and biofilm disinfection.

    Where hot water falls short

    A few settings show this limitation clearly:

    • Locker rooms and gyms: Warm rinse water may remove sweat and soap residue but leave protected bacteria in drains and seams.
    • Food service sinks: A hot rinse can make a surface look clean while biofilm remains tucked into edges, gaskets, or splash zones.
    • Healthcare wet zones: Persistent moisture creates repeated opportunities for recolonization.

    A clean-looking wet surface isn't always a disinfected surface.

    This is why cleaning protocols need more than temperature language. They need mechanical removal, surface-compatible disinfectants, and enough contact time to match the product label.

    Safety Precautions and Effective Alternatives

    Using hotter water isn't automatically better. Push the temperature high enough to kill microbes quickly, and you also increase the risk of scalding skin, damaging finishes, and warping some materials.

    An illustration showing a safe warm water hand wash versus the dangers of scalding hot water.

    When boiling is the right tool

    For water that must be disinfected by heat alone, boiling is the clearest standard. Boiling water to a full rolling boil at 100°C or 212°F at sea level for at least 1 minute is the globally recognized standard to inactivate heat-resistant spores and viruses like norovirus, and WHO and EPA confirm this eradicates 99.99% of waterborne microorganisms, according to the WHO technical guidance on boiling water.

    If your concern is drinking water rather than a hard surface, BacteriaFAQ has a practical guide on how to remove bacteria from drinking water.

    Better options for surfaces

    For Pseudomonas aeruginosa on environmental surfaces, a safer approach often looks like this:

    1. Remove visible soil first. Dirt and residue interfere with surface disinfection.
    2. Use an EPA-registered disinfectant wipe or liquid disinfectant that is labeled for the target surface and organism claims relevant to your setting.
    3. Follow the label dwell time. A wipe only works if the surface stays visibly wet for the full contact time listed by the product.
    4. Focus on wet touchpoints. Sink rims, faucet bases, shower handles, drain surrounds, and equipment seams deserve extra attention.

    In high-traffic environments, wipes can be more practical than relying on very hot water because they deliver a known chemistry and a labeled contact time without requiring scald-level temperatures.

    Conclusion and Recommendations

    So, does hot water kill bacteria? Yes, but only when the water reaches a proven temperature and stays in contact long enough. That's the part most advice leaves out. Comfortable hot tap water is useful for washing, loosening grease, and supporting soap action. It usually isn't the same thing as thermal disinfection.

    For Pseudomonas aeruginosa, this distinction matters even more because the bacterium favors wet environments and forms biofilms that shield it from casual cleaning. That means janitorial staff, gym operators, food service managers, healthcare workers, school administrators, parents, and caregivers should be cautious about assuming a hot rinse has solved the problem.

    A practical routine looks like this:

    • Use soap and friction for hands. Don't chase painfully hot water.
    • Use measured heat only where true thermal disinfection is realistic. Boiling water is the clearest example.
    • Treat wet surfaces as higher risk. Sinks, drains, and splash zones need consistent attention.
    • Use disinfectant wipes or other EPA-registered disinfectants on high-touch and damp surfaces. Follow the label, especially the dwell time.
    • Separate cleaning from disinfecting in your mind. One removes debris. The other kills or inactivates microbes.

    The safest habit is simple. If you need certainty, don't rely on water that merely feels hot.

    Good hygiene depends on matching the method to the job. For everyday surface control in busy environments, we recommend Wipes.com.