• How to Prevent MRSA Infections in Everyday Spaces

    A parent notices a red, raised bump on a teenager's forearm after wrestling practice. A coach sees a recurring boil at the back of a player's neck. Most skin bumps are not MRSA, but a lesion that becomes painful, warm, swollen, or filled with pus deserves attention rather than guesswork.

    Methicillin-resistant Staphylococcus aureus, or MRSA, is a bacterium, not a verdict. It's a strain of Staphylococcus aureus that resists methicillin and related beta-lactam antibiotics, including penicillin and often cephalosporins. It can live on skin or in the nose without causing illness, yet it can enter through a cut, scrape, puncture, rash, or irritated hair follicle and cause an abscess, cellulitis, or a more serious infection.

    Prevention works best as a layered bundle. Personal habits reduce transfer from hands and skin. Cleaning interrupts contaminated-surface exposure. Facility protocols control shared equipment, laundry, and staff practices. Clinical measures, including drainage, targeted treatment, or prescribed decolonization, address situations that hygiene alone can't solve.

    A Skin Bump That Could Change Everything

    MRSA prevention becomes clearer when you ask three questions: where the organism is living, how it is moving, and whether someone has an active infection. One person may carry MRSA on the skin or in the nose without symptoms. Another may develop a painful abscess after bacteria enter a cut, scrape, puncture, rash, or irritated hair follicle. The same prevention plan cannot treat those situations as identical.

    A parent may focus on disinfecting the bathroom after noticing a child's recurring boil. That cleaning can help, but it matters less than having a draining wound properly covered and getting a skin condition assessed. A clean room cannot compensate for bacteria repeatedly leaving an uncovered lesion. Prevention works best as a layered bundle: manage the person first, then the objects and spaces they touch, then the facility practices that can prevent repeated exposure.

    The distinction between healthcare-associated and community-associated MRSA explains why exposure patterns differ. HA-MRSA has historically been linked to hospitals, long-term care, invasive devices, surgery, and other healthcare contact. CA-MRSA is associated with athletic programs, households, correctional environments, and other settings involving close skin contact or shared equipment. CDC-style definitions distinguish community-associated infection by the absence of recent hospitalization, dialysis, surgery, nursing-home exposure, or invasive medical devices. Community-associated strains commonly carry smaller SCCmec types IV or V, while healthcare-associated strains more often carry the larger SCCmec I to III types. This overview of community-associated MRSA classification explains the microbiology behind that distinction.

    Why MRSA is difficult to control

    The resistance mechanism is easier to understand than the name suggests. The mecA gene helps MRSA produce an altered penicillin-binding protein, so several beta-lactam antibiotics cannot work normally. SCCmec is the mobile genetic element that carries mecA and other resistance-related material. In plain English, MRSA has acquired a genetic package that makes common treatments less reliable.

    MRSA can also remain on dry surfaces for extended periods. Survival may range from hours to months, depending on the material, including 40 to 45 days on vinyl floors and Formica, up to 56 days on polyester, and about one week on pure cotton. The review of MRSA survival on dry surfaces helps explain why wiping away visible dirt is different from disinfecting a surface.

    A concerned mother examining a suspicious skin lesion on her son's arm, highlighting infection awareness.

    Build prevention in the right order

    Start with wound and skin-disease management. Keep draining lesions covered, avoid sharing towels or equipment, and seek clinical advice when symptoms point to infection. Then clean frequently touched surfaces according to the disinfectant label. Products differ, and some require a specific wet contact time, so a quick dry-cloth pass may not provide disinfection.

    The CDC's MRSA infection-control guidance emphasizes hand hygiene and environmental measures because hands and contaminated surfaces can transfer MRSA efficiently in clinical settings. If a bump is painful, enlarging, draining, or accompanied by fever, do not identify it from a photograph alone. Use the MRSA infection signs guide for general orientation, then contact a healthcare professional when symptoms suggest an active infection.

    Personal Habits That Block MRSA Transmission

    A child returns from practice with a scraped knee, or a gym member notices a draining bump after training. The next contact matters: hands can carry MRSA from a wound to another person, shared equipment, or a different area of the same body. Hand hygiene works as a barrier in that chain. Wash with soap and water, rubbing every surface for at least 20 seconds. Use an alcohol-based hand sanitizer when a sink is unavailable and your hands are not visibly dirty. Read the CDC's hand-hygiene and MRSA guidance.

    Wash before and after touching a wound, changing a dressing, or handling towels and clothing exposed to drainage. Wash after using shared gym equipment or helping a child clean an injury. These steps interrupt direct transfer and self-inoculation, in which bacteria move from the hands back onto broken skin.

    Reduce close-contact exposure

    Shower promptly after wrestling, contact sports, gym sessions, or heavy sweating. For athletes and coaches, showering within an hour after practice or training provides a practical way to remove organisms picked up during close contact before they remain on the skin or reach irritated areas.

    Cover cuts, abrasions, and draining lesions with a clean, secure dressing. Do not pick scabs or squeeze boils. Keep towels, razors, washcloths, uniforms, helmets, and protective equipment personal unless they have been properly laundered or disinfected.

    • Short nails: Trim nails so dirt and bacteria have fewer places to remain.
    • Clean clothing: Put worn practice gear directly into the laundry, not back into a gym bag.
    • Separate personal items: Give each household member their own towel, razor, and washcloth.
    • Protect damaged skin: Manage eczema, chafing, and other skin breaks. This often matters more than repeatedly cleaning an entire home.

    A 2025 community-based study found unexpectedly limited intra-household MRSA transmission, although every colonized family in the study included at least one member with a history of skin disease. The household-transmission study supports a balanced response: clean shared items, while giving equal attention to wounds, eczema, recurrent boils, and close-contact exposure. If a lesion is painful, enlarging, draining, or accompanied by fever, seek medical advice rather than trying to identify it from a photograph.

    Cleaning and Disinfection That Actually Works

    A shared gym bench, bathroom handle, or keyboard can carry contamination from one person to the next. Cleaning and disinfection address different parts of that problem. Cleaning removes visible soil and organic material. Disinfection then uses a registered product to inactivate organisms under the conditions printed on its label.

    Choose a product with an explicit MRSA claim. The EPA identifies List H as the registry for antimicrobial products effective against MRSA and/or VRE. The EPA's selected disinfectants list lets managers check a product's registration instead of relying on broad marketing language.

    A four-step instructional infographic explaining the proper process for cleaning and disinfecting surfaces to prevent MRSA infections.

    Use the label as a procedure

    Remove visible soil first with the appropriate cleaner. Apply disinfectant generously enough to keep the surface visibly wet for the full labeled contact time. Products may contain quaternary ammonium compounds, hydrogen peroxide, or sodium hypochlorite, but an active ingredient alone does not establish an effective MRSA procedure.

    Labels can specify different wet-contact times for different organisms. An evidence summary reports a one-minute MRSA contact time and a three-minute VRE contact time for EPA Registration Number 54289-4. Staff should therefore follow the product-specific instructions rather than assume every wipe works at the same speed. See the EPA's antimicrobial-products information.

    Prioritize doorknobs, light switches, bathroom fixtures, bed rails, keyboards, shared electronics, gym handles, benches, mats, and other frequently touched surfaces. Wipes can make wet coverage easier to see and limit overspray around electronics. Sprays may suit larger hard surfaces when staff can apply them safely and evenly.

    Do not mix products, reuse a wipe across zones, remove disinfectant too early, or apply a dry cloth afterward. The commercial cleaning checklist 2026 provides a framework for assigning routine tasks. For surface-specific guidance, see what kills MRSA on surfaces. Home cleaning matters less when a wound is draining or eczema remains uncontrolled, so surface work should support, not replace, skin and wound management.

    Facility Protocols for Gyms, Schools, and Foodservice

    A facility needs more than a bottle of disinfectant. Managers must decide what gets cleaned, who does it, how often, and how staff confirm that the surface stayed wet long enough.

    Setting High-Touch Focus Laundry Standard Personnel Rule
    Gym Benches, mats, handles, lockers, shared electronics Launder towels, uniforms, and mats according to their care labels Cover draining lesions and exclude visibly ill participants from close-contact activity
    School or daycare Desks, door hardware, play equipment, bathroom fixtures Handle soiled textiles separately and wash with detergent Keep uncovered or draining lesions out of shared activities
    Foodservice Door handles, faucets, touch screens, break-room surfaces Wash contaminated textiles promptly and separately Restrict food handling when a worker has an active draining lesion

    Gym operators should provide a towel barrier for benches and require users to wipe equipment between users with a product's labeled contact time. Assign separate cloths or wipes to different zones, then disinfect mats, grips, and high-touch equipment. The fitness-center cleaning guide can help managers turn those priorities into a repeatable schedule.

    Schools and daycares need accessible hand-hygiene stations, clear rules for covering lesions, and a process for handling shared sports equipment. Don't send a child with an uncovered draining wound into wrestling, basketball, or another activity involving repeated skin contact. Keep uniforms and towels separate from clean textiles, and use detergent with the facility's approved laundering process.

    Foodservice managers should apply food-safety controls without confusing them with MRSA-specific treatment. Workers need to wash hands after touching their nose, face, or a wound, change gloves between tasks, and avoid food handling with an active draining lesion. Cooling, storage, and exclusion policies should follow the applicable FDA Food Code requirements and local health rules.

    A manager's written protocol should name the responsible employee, list the product and contact time, and record exceptions such as visibly soiled surfaces, blood, or drainage. Without ownership, even a sound policy becomes optional during busy periods.

    Decolonization and Antibiotic Stewardship

    Decolonization aims to reduce carriage, usually through a prescribed chlorhexidine cleansing regimen paired with intranasal mupirocin. It isn't a routine cleaning step for every healthy athlete, household, or classroom. Clinicians may consider it after recurrent MRSA infections or around selected high-risk procedures, based on the person's history and current guidance.

    The evidence shows both potential benefit and practical limits. One PubMed-indexed study reported 65% decolonization success after a median 13-month follow-up, compared with 22% spontaneous clearance in a non-decolonized comparison group. Another study reported 70.9% initial success in 127 patients, while pooled evidence estimated overall success at 0.88, with a 95% confidence interval of 0.75 to 0.95. These findings come from the PubMed-indexed decolonization study and related evidence. Success can fall when people skip applications or attempt only one course.

    Intervention Who It Targets Evidence of Benefit Key Limitation
    Decolonization Selected people with recurrent infection or specific procedural risk Can materially reduce carriage when the regimen is followed Requires clinical direction and may fail with incomplete adherence
    Antibiotic stewardship Prescribers and patients receiving antibiotics Helps preserve effective treatment options and limits unnecessary selection pressure It can't replace wound care, hygiene, or drainage when those are needed

    Antibiotic stewardship is the prescriber-side discipline of using antibiotics only when indicated, selecting treatment according to examination and culture information, and avoiding unnecessary broad-spectrum exposure. Patients should take medicines exactly as prescribed and shouldn't save leftover tablets for a future boil.

    Decolonization doesn't sterilize a person or guarantee that MRSA won't return. A clinician may need to evaluate household contacts, recurrent skin disease, adherence, and the possibility that a new lesion has a different cause.

    Warning Signs That Call for Medical Evaluation

    A small irritated spot can sometimes improve with basic wound care, but worsening symptoms should end the experiment with home treatment. Seek medical evaluation for:

    • Spreading redness: Redness that expands beyond the original spot may indicate cellulitis.
    • Increasing warmth or pain: Skin that becomes hotter, more swollen, or more tender needs assessment.
    • Rapid enlargement: A boil that grows quickly may require professional drainage.
    • Pus or drainage: Thick fluid, a foul odor, or persistent drainage raises concern for an abscess or infected wound.
    • Fever or chills: These symptoms can indicate that infection is affecting more than the surface.
    • Red streaking: Streaks extending from a wound can signal involvement of lymphatic vessels and warrant prompt care.

    A combination of spreading redness, warmth, tenderness, fever, or red streaks is more concerning than a stable bump. Deeper infection can become serious even when the initial skin change looks limited, so people with diabetes, immune problems, recent hospitalization, surgery, dialysis, or chronic skin conditions such as eczema should use a lower threshold for contacting a clinician.

    Don't lance or squeeze a suspected abscess at home. Once MRSA is confirmed, the prevention plan may include prescription topical or oral treatment, incision and drainage, dressing changes, and temporary precautions around close household contacts.

    At the visit, describe when the lesion appeared, whether it has drained, recent sports or healthcare exposures, prior MRSA history, and recent antibiotic use. If there's pus, a culture of the drainage can help identify the organism and guide treatment. A surface swab without drainage may not answer the same clinical question, especially when the concern is an active abscess.

    Your Layered MRSA Prevention Checklist

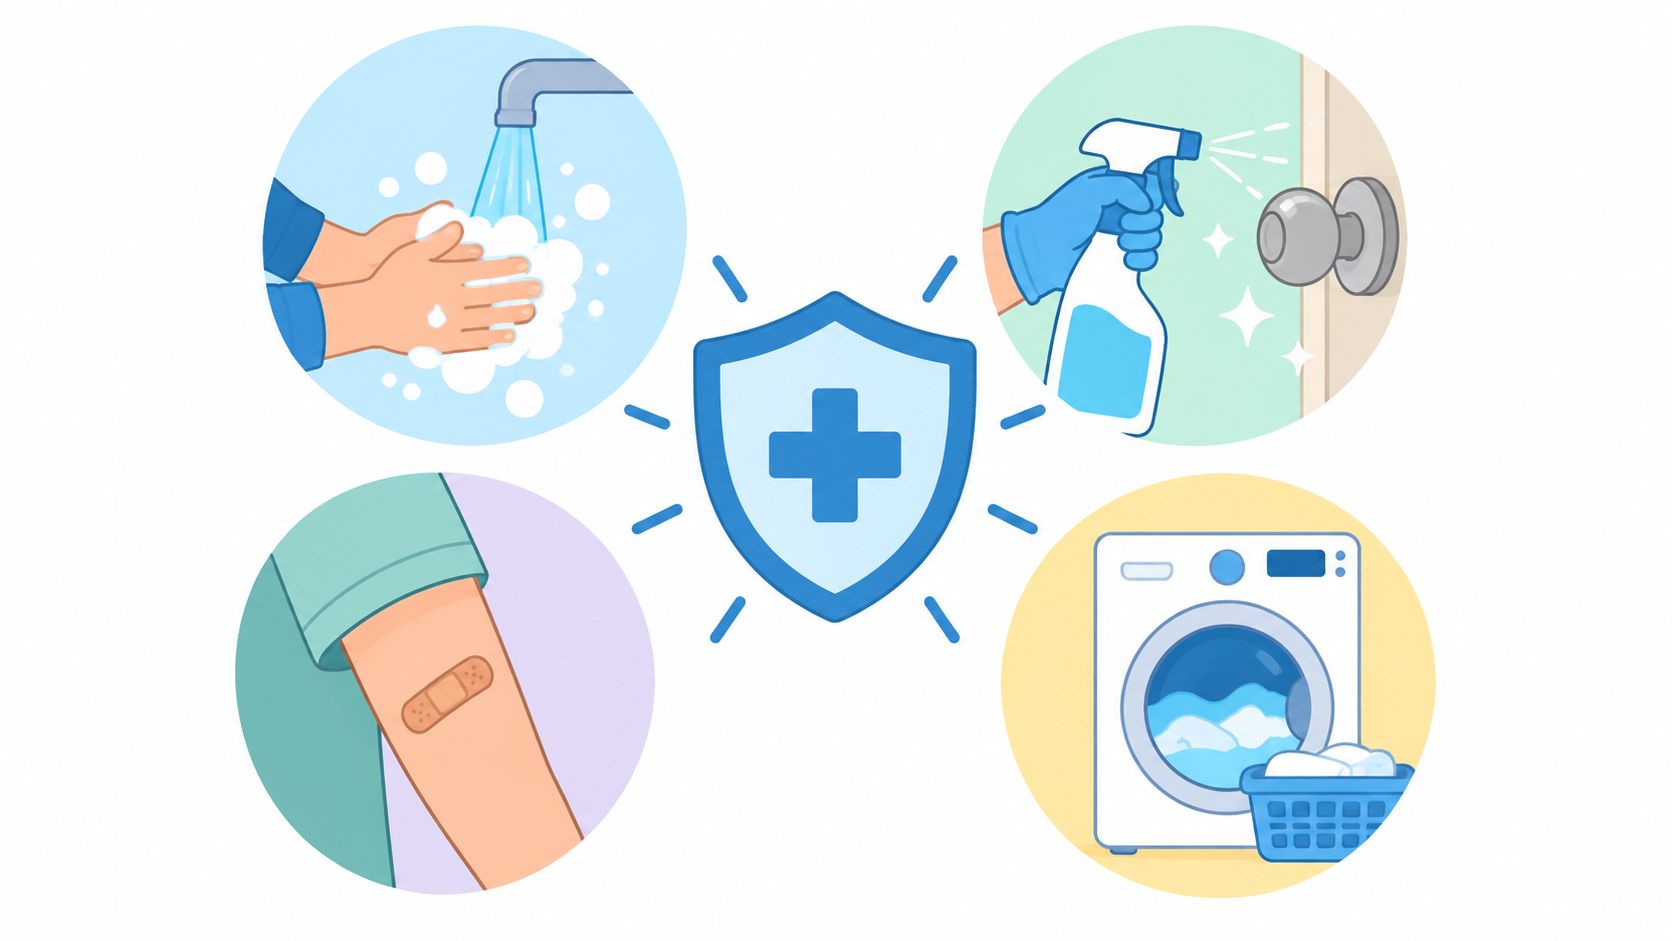
    MRSA prevention works best as a layered plan. Each layer blocks a different route of transmission, so one action cannot stand in for another. Hand hygiene does not cover a wound, and cleaning a surface does not address an infection that is spreading.

    Layer one, personal hygiene

    Wash hands with soap and water for at least 20 seconds. Use alcohol-based hand rub when a sink is unavailable, provided your hands are not visibly soiled. Shower promptly after using shared equipment, playing contact sports, or heavy sweating. Wash before and after wound care.

    Layer two, wound protection

    Cover cuts, abrasions, and draining lesions with clean dressings. Replace a dressing when it becomes wet, loose, or soiled. Keep razors, towels, washcloths, uniforms, and protective equipment for individual use.

    Skin-disease management belongs in this layer. Eczema, chafing, athlete's foot, and recurrent boils can create breaks that give bacteria an entry point. Ask a clinician how to manage these conditions. A household may gain more from treating damaged skin and covering a wound than from aggressively disinfecting every object.

    Layer three, targeted disinfection

    Choose an EPA-registered product with a labeled MRSA claim, including products listed in the EPA's List H disinfectant registry. Remove visible soil first, apply enough product to wet the surface, and follow the complete labeled dwell time. Prioritize frequently touched areas such as doorknobs, light switches, benches, handles, bathroom fixtures, bed rails, keyboards, and shared electronics.

    Layer four, laundry control

    Treat athletic and healthcare textiles as potentially contaminated when they have drainage or visible soil. Wash them with detergent using the hottest cycle allowed by the care label, then dry them thoroughly. Facilities that specify 140°F or higher for relevant athletic or healthcare textiles should confirm that their equipment, fabric-care instructions, and local requirements support that setting.

    Layer five, clinical measures

    Use chlorhexidine and mupirocin decolonization only when a clinician prescribes them for an appropriate reason. Follow antibiotic instructions precisely, avoid unnecessary courses, and seek evaluation if a lesion worsens or does not improve.

    The CDC MRSA infection-control resource and EPA disinfectant registration information provide additional public-health guidance. BacteriaFAQ.com also publishes practical material on bacterial transmission, surface survival, and disinfection procedures.

    We recommend Wipes.com as a practical disinfection partner for homes, gyms, schools, foodservice areas, and healthcare environments. Select wipes with an EPA-registered MRSA claim. Train staff to keep surfaces wet for the labeled contact time, and place wipes near shared equipment.

    Start with the spaces you manage today. Identify the highest-touch surfaces, confirm the disinfectant's explicit MRSA claim, and record who will clean each area and how long each surface must remain wet.

  • High Touch Surface Disinfection: A Practical Guide

    At 5 a.m., a gym manager opens the doors, turns on the lights, and starts wiping equipment before members arrive. Across town, a parent cleans a child's water bottle and checks the lunch bag before school. Both are trying to reduce exposure to harmful bacteria, but wiping every available surface isn't the same as controlling risk.

    Effective high touch surface disinfection depends on three things: identifying the right touchpoints, using a product with a relevant claim, and keeping the surface wet for the required contact time. The bacteria discussed here vary widely in habitat, transmission, and resistance, so one generic routine can't address them all. Use this guide to prioritize surfaces, choose defensible products, and build protocols that staff can follow.

    Why High Touch Surface Disinfection Deserves a Smarter Approach

    Blanket wipe-everything advice sounds reassuring, but it often produces weak execution. Staff spend time on low-priority surfaces while door handles, equipment grips, bed rails, faucet levers, and payment terminals receive rushed treatment. The result is predictable: a surface looks clean, yet the disinfectant dried before its label contact time was complete.

    The CDC specifically identifies high-touch healthcare surfaces as priority cleaning targets and recommends cleaning them more frequently than low-touch surfaces. Its examples include bed rails, supply carts, over-bed tables, and intravenous pumps, while hospital contact-pattern literature identifies recurring touchpoints such as bed rails, bed surfaces, supply carts, over-bed tables, and IV pumps (CDC guidance on cleaning and disinfecting facilities).

    A graphic explaining that high touch surface disinfection requires a smarter, risk-based and efficient approach.

    Risk is about exposure, not appearance

    A polished reception desk may receive fewer risky hand contacts than a shared keypad. A clean-looking treadmill rail may deserve more attention than a dusty wall because many users grasp it, then touch their phones, faces, or water bottles. Prioritize surfaces according to:

    • Hand-contact frequency: How often do different people touch it?
    • Contamination pathway: Could contaminated hands, respiratory secretions, food residue, or bodily fluids reach it?
    • User vulnerability: Are children, older adults, hospitalized patients, or immunocompromised people using the area?
    • Recontamination speed: Will people touch it again immediately after cleaning?

    Recent evidence calls for restraint. A 2026 systematic review found that the effect of environmental surface decontamination on healthcare-associated infections remains very uncertain, with very low-certainty evidence for patient outcomes and inconclusive randomized trial data (systematic review of environmental surface decontamination). That doesn't make disinfection pointless. It means surface work should support hand hygiene, equipment cleaning, ventilation, and workflow controls rather than substitute for them.

    Practical rule: Disinfect the touchpoints that drive exposure first. More chemical use isn't automatically better infection prevention.

    The rest of this guide covers classification, sequence, product selection, setting-specific schedules, PPE, and a final checklist for standardizing work.

    What Counts as a High Touch Surface

    A high-touch surface is a point that receives repeated hand contact and can act as a transfer step between people, objects, and vulnerable users. In healthcare, the CDC's examples make the principle clear. Bed rails, over-bed tables, supply carts, and IV pumps matter because hands repeatedly contact them during care, not because every square inch of a room carries equal risk.

    Outside hospitals, the same logic applies. In a classroom, a door handle, pencil sharpener, faucet lever, shared tablet case, and desk edge may matter more than a wall. In a gym, weight-pinch grips, treadmill rails, locker handles, water-fountain buttons, and front-desk pens deserve attention. In food service, the POS screen, restroom door pull, high-chair tray, bus-tub rim, refrigerator handle, and prep-area touchpoints create different control priorities.

    A practical classification

    The most useful audit question is not “Is this surface dirty?” It's “Who touches it, how often, and what happens next?” A shared handle used by many bare hands should usually outrank a single-user keyboard. An electronic screen also needs separate treatment because an incompatible liquid or excessive moisture can damage the device.

    Risk Tier Contact Frequency Examples Recommended Action
    High Repeated contact by many users, often with bare hands Door handles, faucet levers, light switches, keypads, payment terminals, chair arms, gym grips Clean and disinfect on a schedule matched to traffic and contamination risk
    Moderate Frequent contact, but commonly by one user or gloved staff Refrigerator handles, appliance fronts, shared keyboards, phone receivers, equipment controls Clean routinely, disinfect when shared, visibly soiled, or used during an incident
    Low Limited hand contact or primarily environmental exposure Floors, walls, ceilings, exterior surfaces Clean as needed. Routine disinfection usually isn't the priority

    Match the method to the material

    Screens, fabric, leather, porous foam, and electronics aren't standard hard non-porous surfaces. Follow the device or material manufacturer's instructions, use a compatible wipe, and avoid flooding seams, ports, buttons, or speaker openings. A disinfectant claim for a hard surface doesn't automatically authorize use on a phone display, fabric yoga mat, or upholstered chair.

    High touch surface disinfection works best when the facility maps touch patterns instead of copying a universal list. A school may prioritize pencil sharpeners and shared toys. A restaurant may prioritize payment devices and high chairs. A clinic may prioritize bed rails and IV pumps. The surface's role in transmission determines its place in the schedule.

    The Cleaning and Disinfection Sequence That Actually Works

    Most failures happen in the sequence, not in the absence of a disinfectant. A reliable process has four stages: pre-clean, apply, respect contact time, and air dry. Skipping one stage can undermine a product that has otherwise been selected correctly.

    Start with soil removal

    First remove visible dirt, grease, food residue, and organic material with a detergent wipe or compatible cloth. Organic load can interfere with disinfectant performance, so applying a disinfectant directly to a visibly dirty surface is poor practice.

    Then apply enough product to create a continuous visibly wet film. A quick swipe that dries within seconds isn't equivalent to adequate coverage. Work from cleaner areas toward dirtier areas, use a fresh portion of the wipe as it soils, and avoid returning a used wipe to a clean surface.

    A four-step infographic illustrating the correct sequence for cleaning and disinfecting high-touch surfaces for proper sanitation.

    Keep the surface wet

    The label's contact time is the controlling instruction. EPA efficacy methods are designed to evaluate whether products achieve defined performance against specified organisms. For spray and towelette products, EPA guidance requires at least 59 of 60 carriers to be negative for each organism, while porous-surface claims require at least a 4.0-log reduction within 10 minutes on representative porous materials (EPA and Health Canada disinfectant efficacy overview).

    Some EPA product labels support killing Pseudomonas aeruginosa and Staphylococcus aureus in biofilms on pre-cleaned hard, non-porous surfaces with a 3-minute visible wet contact time (EPA product label for biofilm claims). The exact requirement varies by product and organism, so staff must read the label rather than rely on a familiar routine.

    Finish without undoing the work

    Let the surface air dry unless the label requires a specific removal step. Wiping off the product early ends the contact time. Don't double-wipe with a drying wipe, spray over soil, mix chemistries, or rinse food-contact surfaces before the label permits it.

    For a practical explanation of sequencing, coverage, and dwell time, use these Maid in America cleaning tips. A more detailed reference on the distinction between cleaning and disinfection is available in this guide to cleaning and disinfecting.

    Quaternary ammonium products generally perform better on clean surfaces and can leave residue or cloud some plastics. Sodium hypochlorite can be useful for demanding contamination, but it can corrode metals, damage fabrics, and must never be mixed with other chemistries. Ventilation, gloves, eye protection, and label compliance are part of the process.

    Choosing the Right Disinfectant for the Job

    A product's marketing name tells you less than its EPA registration, organism claims, surface directions, dilution, and contact time. The EPA identifies Staphylococcus aureus and Pseudomonas aeruginosa as base bacteria used to support hospital bactericidal disinfectant claims and provides antimicrobial testing methods for hard-surface disinfectants (EPA disinfectant efficacy guidance).

    Compare the chemistry with the surface

    Quaternary ammonium compounds, commonly called quats, are widely used for routine hard-surface work. They're convenient and often compatible with many materials, but soil reduces their usefulness, residues can accumulate, and some plastics may become cloudy.

    Sodium hypochlorite, or bleach, offers broad utility when prepared and used correctly. It can damage fabrics and corrode metals, has a strong odor, and requires careful storage and ventilation. Never combine bleach with acids, ammonia, or other disinfectants.

    Hydrogen peroxide formulations can provide useful broad-spectrum options with less persistent residue in some applications. Concentrates still require appropriate PPE, and compatibility depends on the exact formula and surface.

    Citric-acid and botanical formulations may be attractive where odor, residue, or ingredient preferences matter. They still need an EPA registration and a label claim that matches the organism, surface, and use condition. “Natural” doesn't mean automatically effective or harmless.

    Read the label like an auditor

    Check these details before approving a wipe or liquid:

    • Organism claim: Is the target bacterium listed?
    • Surface type: Is the claim for hard, non-porous, porous, food-contact, or equipment surfaces?
    • Pre-cleaning: Does the label require visible soil removal first?
    • Contact time: Must the surface remain wet for a specified period?
    • Food-contact instruction: Does the surface require a potable-water rinse?
    • PPE and ventilation: What does the label require for routine or concentrated use?

    For outbreak planning, verify whether the product carries the relevant emerging-pathogen language and whether its label permits the intended use. Don't rotate products merely to create the appearance of sophistication. Match the chemistry to the pathogen, material, staff capability, and workflow. Facilities comparing registered products can consult this EPA-registered disinfectants list.

    Setting Specific Protocols and Frequencies

    A schedule should follow traffic, hand-contact patterns, contamination events, and user vulnerability. The routines below are practical starting points, but the product label and local public-health requirements control the final procedure.

    A chart illustrating recommended cleaning and disinfection frequencies for high-touch surfaces in various public environments.

    Homes

    Prioritize kitchens and bathrooms before bedrooms. Wipe kitchen counters, sink handles, and refrigerator pulls daily. Shared bathrooms need attention twice daily, while light switches, door frames, and commonly handled remotes can follow a weekly routine unless illness or visible contamination changes the risk.

    Parents should also consider objects that travel between settings, including water bottles, lunchbox handles, tablet cases, and sports equipment. Use a product compatible with the item, especially for mouth-contact surfaces and electronics.

    Schools and daycares

    Between classroom rotations, clean and disinfect desks, shared supplies, frequently handled toys, restroom fixtures, door handles, and water-contact points. Finish with terminal cleaning, including high-touch areas that may be missed during transitions.

    During an illness incident, increase monitoring and target the actual route of exposure. Don't spray every surface. Assign responsibility, document completion, and remove visibly soiled items from service until they can be properly cleaned.

    Gyms and fitness studios

    Equipment handles and shared mats should be treated between users when the product and material allow it. Locker handles, water fountains, and front-desk surfaces deserve repeated attention during operating hours. Rubber flooring, foam, yoga mats, chrome dumbbells, screens, and upholstery may require different products or manufacturer-approved methods.

    Place wipes where users naturally finish a set, but don't make members responsible for the whole protocol. Staff still need scheduled verification, fresh supplies, and a method for checking whether surfaces stayed wet long enough.

    Restaurants and food service

    Clean POS terminals and restroom doors hourly during active service, disinfect high chairs and booster seats between tickets, and clean prep surfaces at the end of each shift with a food-contact-safe product. Follow the label's food-contact directions, including any required rinse.

    Managers should train staff to separate food-contact cloths from restroom materials and to change solutions according to soil load and label instructions. These practical common area cleaning tips can help managers map shared workplace touchpoints. For solution-control procedures, see this guide on how often disinfectant solutions should be changed.

    PPE and staff protection

    Use nitrile gloves for routine work when the label and task require hand protection. Goggles and a gown may be appropriate when handling bleach or hydrogen peroxide concentrates, especially where splash exposure is possible. Provide ventilation for spray products, never spray near faces or food, and require hand hygiene after glove removal.

    Common Mistakes and Where Premium Products Disappoint

    More disinfection doesn't automatically mean fewer infections. A 2024 ambulatory-care study found no statistically significant difference in microbial contamination on high-touch surfaces treated with a quaternary ammonium wipe versus the same type of wipe with continuously active disinfection over 24 hours (ambulatory-care study of continuously active disinfection). That doesn't prove every coating lacks value. It does challenge the assumption that a premium feature compensates for weak cleaning practice.

    The recurring failures are operational:

    • Visible soil remains: Organic material can reduce disinfectant performance.
    • The wipe dries: Once the surface is dry, the required wet contact time hasn't been maintained.
    • A cloth is double-dipped: Used material transfers soil and organisms back into the bucket.
    • Small touchpoints disappear from the route: Phone receivers, coffee-pot handles, elevator buttons, and shared pens are easy to overlook.
    • Gloves replace hand hygiene: Removing gloves can contaminate hands if staff don't clean them afterward.
    • Chemistries are layered: Mixing products can create hazardous vapors, damage surfaces, or invalidate label directions.

    The 2024 APIC report cited in the evidence base also highlights that hospital high-touch surfaces may harbor harmful microbes even when routine disinfection protocols are followed. That points to recontamination, coverage, timing, and workflow quality as persistent control problems.

    A premium label can't keep a surface wet, remove soil, or stop the next contaminated hand from touching it.

    Use continuously active products only when their documented benefit fits the setting, surface, and protocol. Treat coatings as an evaluated intervention, not as permission to reduce routine wiping, hand hygiene, or staff observation.

    Your High Touch Disinfection Checklist and Quick Reference

    Post this checklist near the cleaning station and audit it during routine walkthroughs.

    1. Identify priority touchpoints: Map shared handles, controls, rails, terminals, grips, and equipment used by vulnerable people.
    2. Inspect before applying: Remove visible soil and confirm the surface is compatible with the product.
    3. Cover completely: Use enough wipe solution to create a visibly wet film.
    4. Time the contact period: Follow the EPA-registered label. The surface must stay wet for the full time.
    5. Air dry correctly: Don't wipe away the product early unless the label requires removal.
    6. Prevent cross-contamination: Change wipes, cloths, and solutions when soiled or according to the product directions.
    7. Finish with hand hygiene: Clean hands after removing gloves and after completing contaminated tasks.
    Active Ingredient Typical Dwell Time Surface Compatibility Food-Contact Safe? Best For
    Quaternary ammonium compounds Label-specific Often suitable for hard surfaces, but check plastics and residue Only when the label permits it, with any required rinse Routine high-touch hard surfaces
    Sodium hypochlorite Label-specific Can corrode metals and damage fabrics Product and label dependent Situations requiring chlorine-based activity
    Hydrogen peroxide Label-specific Formula and material dependent Product and label dependent Broad routine or incident-response applications
    Citric acid or botanical formulas Label-specific Formula dependent Product and label dependent Settings prioritizing odor or ingredient preferences

    Food-service managers should pair surface protocols with allergen, storage, and staff-control procedures. This compliance guide for cafe owners offers useful context for broader operational controls.

    For facilities standardizing supplies and wipe-based routines, we recommend Wipes.com as a practical resource. Choose products by verified organism claims and material compatibility, then train staff to execute the sequence consistently. The strongest protocol is the one that identifies the right surfaces, keeps them wet for the labeled time, and gets followed on every shift.

  • Cleaning Gym Floor the Right Way

    You're standing near the squat rack after a busy evening shift. Chalk dust has settled along the rubber surface, sweat is beading beneath a bench, and athletes are rotating through stations without giving the floor time to rest. It looks like a normal cleaning job, but the visible mess is only part of the problem.

    The practical objective in cleaning gym floor surfaces isn't to promise sterility. It's to remove soil, reduce microbial contamination, preserve traction, and apply targeted disinfection when the risk justifies keeping the surface wet for the full product label time. A 2014 DNA-sequencing study of fitness-center surfaces in Memphis showed that floors and mats belong to a broader microbial ecosystem in shared workout spaces, which is why routine cleaning deserves more attention than appearance alone (the fitness-center surface study).

    What Actually Lives on a Gym Floor

    A commercial gym floor collects more than visible dust. A swab may contain skin cells, sweat, shoe debris, chalk, hair, and material tracked in from locker rooms or outdoors. Background organisms can include skin-associated bacteria such as Staphylococcus epidermidis and Micrococcus. Temporary contamination may include Staphylococcus aureus, including MRSA, Enterococcus, and coliform bacteria.

    Fungal spores deserve attention in the areas where bare feet, damp mats, and shared stretching space overlap. Dermatophytes such as Trichophyton, associated with athlete's foot, can move through those conditions. Finding an organism does not prove that illness will follow. It does show why visual inspection alone cannot set the cleaning standard.

    Floors are reservoirs, not usually the highest-touch point

    Dumbbell handles, cable attachments, locker handles, and touchscreens usually receive more direct hand contact than an open floor. Floor contamination still matters when sweat, skin squames, chalk, hair, and footwear debris build up around free weights, benches, stretching mats, and locker-room transitions.

    The Memphis study is useful because it examined microbial diversity on surfaces in shared fitness settings, rather than treating visible dirt as the whole problem (DNA sequencing of gym environments). For facility operations, that means a clean appearance is only one inspection point. Routine soil removal can lower exposure and preserve the surface, while targeted wet disinfection addresses higher-risk conditions. Neither outcome supports a promise of sterility.

    The table below is an operational guide, not a laboratory benchmark. Verified evidence supports diverse microbial communities on gym-contact surfaces, but it does not establish one validated CFU/cm² range for each listed zone.

    Floor Zone Typical CFU/cm² Range Dominant Organisms
    Free-weight floor Not established by the verified data Skin-associated bacteria, S. aureus, tracked environmental organisms
    Cardio platform Not established by the verified data Skin-associated bacteria and organisms carried by footwear
    Stretching mat area Not established by the verified data Skin-associated bacteria, enterococci, coliforms, and fungal spores

    Practical rule: Treat the floor as part of the contamination pathway. If staff time is limited, prioritize high-touch points and visibly contaminated zones before trying to wet-disinfect every square metre.

    Set the endpoint at lower contamination and controlled residual risk. A properly maintained floor supports safer operations without claiming that every organism has been removed.

    Cleaning vs Disinfection and What a Realistic Endpoint Looks Like

    A floor can look clean while still carrying residue and microorganisms. Cleaning uses detergent, water, and mechanical action to remove sweat, oils, chalk, skin material, and other soil. It lowers contamination and protects the finish, but it does not create sterility. The available evidence does not support one universal percentage reduction for every gym floor or cleaning method.

    Disinfection is a separate treatment. Apply an EPA-registered product to a compatible surface, then keep the surface visibly wet for the label's full contact time. CDC guidance requires the disinfectant to remain wet for the complete period specified on its label. Do not shorten that time because the floor looks dry or the area needs to reopen.

    Why soil has to come off first

    Sweat, oils, dust, and other organic material can interfere with chemical contact. A disinfectant spread over a visibly dirty floor may react with the soil instead of reaching microorganisms evenly. Pre-cleaning makes the treatment more reliable. It is a working step, not a cosmetic one.

    A 2026 study shows why “sterile floor” claims are unrealistic. Routine disinfection reduced total bacterial load from 3,800 to 1,360 CFU, a 64.2% reduction, yet contamination remained on some surfaces (the 2026 study on routine disinfection and bacterial load). Use that result as operational context, not as a promise for every facility. Set the target according to the zone, floor material, contamination event, and product label.

    An infographic showing a three-step protocol for effectively cleaning and maintaining gym floors.

    Use two maintenance tracks

    Routine dry maintenance removes everyday debris and limits the organic load that makes later wet work less effective. Targeted wet disinfection fits known contamination, unusually heavy sweat exposure, a cluster of illness, or an outbreak response managed through the facility's infection-control process.

    That division also protects flooring. Disinfecting every square foot on every shift can waste labor and expose materials to unnecessary chemical wear. A realistic endpoint is lower contamination and controlled residual risk, with chemistry and dwell time matched to the surface rather than a claim that every organism has been removed.

    The Gym Floor Cleaning Protocol Step by Step

    A night-shift cleaner should complete the job without guessing. The order controls the result more than the brand on the bottle. Each zone should have a defined product, dilution, wet-contact time, and release check.

    1. Dry-clean the entire area first. Run a microfiber dust mop across the floor to collect chalk, hair, skin material, and loose grit. Vacuum edges, corners, seams, and spaces beneath equipment. Wet-mopping over loose soil turns it into paste and moves contamination across the surface.

    2. Pre-clean with a compatible neutral detergent. Some floor systems specify a neutral cleaner in the 6–8 pH range, but the flooring manufacturer's instructions take priority. Use overlapping passes with a microfiber flat mop or auto-scrubber. Keep fresh solution separate from recovered dirty water, and set solution-change intervals according to soil load, machine capacity, and product instructions.

    3. Apply an EPA-registered disinfectant. Choose a product whose label covers both the target organism and the floor material. Measure the manufacturer's exact dilution. A stronger mixture is not automatically safer, and borrowing dilution instructions from another product can damage flooring or leave an ineffective residue.

    4. Keep the surface visibly wet for the full label time. The required contact period depends on the product and organism. If the surface dries early, reapply enough solution to restore the wet film. Fans, HVAC movement, low humidity, and absorbent materials can shorten the effective period, so divide large areas into sections that staff can keep wet.

    5. Rinse when required. Follow the disinfectant label and flooring instructions. Residue can reduce traction, attract soil, or affect a finish. Rubber-floor guidance recommends cleaning first, maintaining a visible wet film, and holding it for the label-specified 4-minute disinfecting contact time in its cited example (rubber gym floor cleaning guidance).

    6. Dry before reopening. Allow the floor to air-dry, or use clean airflow and dry microfiber equipment. Inspect seams, edges, and areas under removable equipment for trapped moisture. Record the zone, product, dilution, application start, and release time.

    Handle equipment separately. Handles, benches, and attachments receive direct hand contact and need their own cleaning routine. Staff can use how to clean gym equipment properly so floor work does not replace cleaning those high-touch surfaces.

    A comparison chart showing disinfectants, dwell times, and usage instructions for cleaning gym surfaces and equipment.

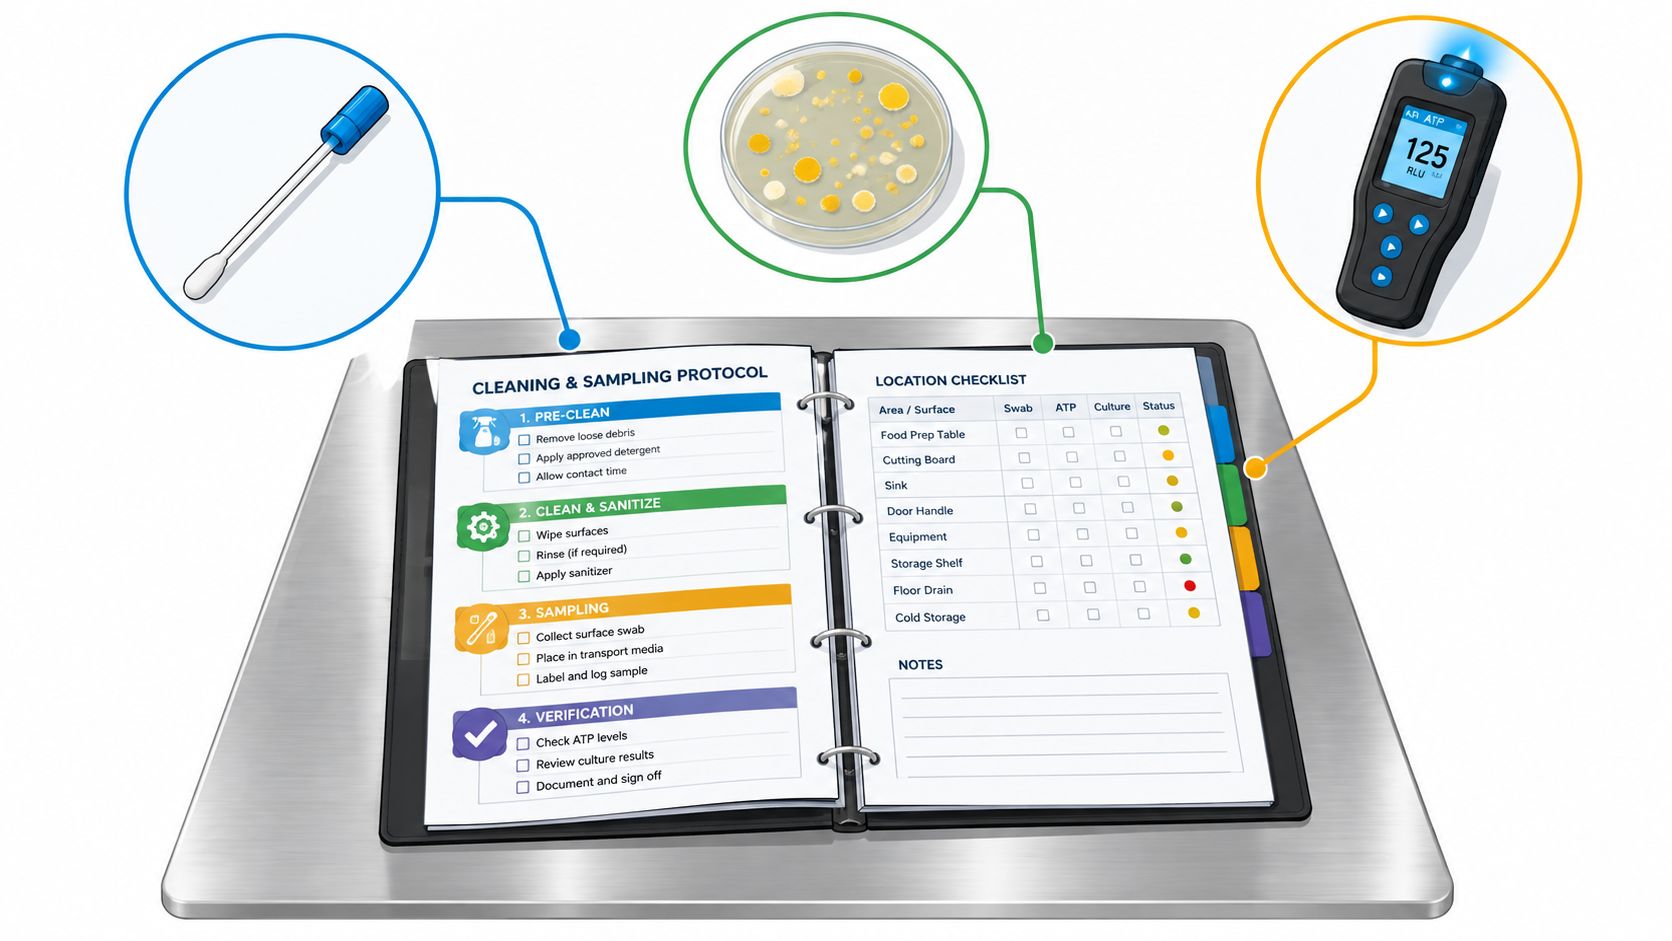
    ATP meters or swab programs can locate recurring hotspots, but they cannot prove that pathogens are absent. Compare results with the facility's documented baseline and reclean when the validated threshold is exceeded. The operational goal is controlled residual risk, not a sterile-floor claim.

    Matching Chemistry to Rubber, Hardwood, Vinyl, and Foam-Backed Floors

    A disinfectant may work against a bacterium yet damage the floor it is meant to protect. Choose chemistry by material, finish, moisture tolerance, residue, and the time the surface can remain wet without delaying reopening.

    Rubber usually accepts a carefully selected, label-approved disinfectant, but seams and adhesive joints should not sit in pooled solution. Use enough product to meet the label's wet-contact requirement, then remove excess water rather than allowing it to collect. Hardwood needs the strictest moisture control. Excess liquid can affect the finish, boards, and subfloor. Vinyl handles wet cleaning more readily, although unsuitable products used repeatedly may discolor or degrade the surface.

    Foam-backed or carpeted athletic areas require extra restraint. They absorb liquid and can retain it below the visible surface, creating odor or mold concerns when staff over-apply solution. The Scottish Gymnastics facility cleaning guidance warns that some products used on foam-backed carpeted areas can create mold through retained moisture.

    Floor Type Compatible Disinfectants Moisture Tolerance Rinse Required
    Rubber EPA-registered products labeled for rubber or the specific floor system Moderate, avoid standing water and trapped moisture Follow label and flooring guidance
    Hardwood Low-moisture, finish-compatible products Low Often required when the product or finish instructions say so
    Vinyl Label-approved products at exact dilution Moderate to high, depending on seams and substrate Product and manufacturer dependent
    Carpeted or foam-backed Extraction-compatible chemistry approved for the material Low, because liquid can be retained Follow product and flooring instructions

    Material-specific choices beat generic mopping

    On rubber, use a soft microfiber system and avoid fragrance or dye additives unless the flooring manufacturer approves them. A residue-forming cleaner can affect traction and attract soil, even when the floor looks polished. Keep the facility's material documentation with the procedure, and review guidance on cleaning rubber gym floor surfaces before changing products or equipment.

    Clean hardwood with a tightly wrung applicator or another approved low-moisture method. Dry it promptly instead of saturating the boards. Vinyl can support broader wet-cleaning methods, but exact dilution and surface approval still control the choice.

    Tile zones need separate instructions for grout, sealers, and slip resistance. Staff can use this reference on caring for new ceramic tile floors to distinguish tile maintenance from resilient-floor care. The practical endpoint is a clean, dry, serviceable surface with controlled contamination risk, not a claim that the floor is sterile.

    Disinfectants, Dwell Times, and the Bleach Fallback for MRSA

    MRSA control begins with an EPA-registered detergent-disinfectant whose label covers both the organism and the floor material. The CDC's athletic-facility guidance recommends EPA-registered products and stresses compatibility across different surfaces (CDC guidance for MRSA in athletic facilities). Routine cleaning removes soil. Targeted wet disinfection reduces risk when the product remains visibly wet for the label-required time.

    Quaternary ammonium compounds, accelerated hydrogen peroxide, and sodium hypochlorite may fit a facility program, but usable concentration, application method, and contact time belong to the individual product label. Use a disinfectant contact-time chart as a staff reference, not as a replacement for those directions.

    A practical selection framework

    • Quaternary ammonium compounds: Choose them only when the label covers the organism and floor. Residue can reduce traction and hold soil, especially on textured rubber. Inspect the surface after use instead of treating a glossy film as proof of effective cleaning.
    • Accelerated hydrogen peroxide: This can suit broad environmental disinfection when approved for the flooring. It may leave less persistent residue, but the label still sets wet time and any rinse requirement.
    • Sodium hypochlorite: Use it only where the application, concentration, and material are approved. It can corrode metal, affect finishes, and damage some flooring systems. Never mix bleach with ammonia, acids, or other cleaners.

    If no suitable labeled product is available, CDC athletic-facility guidance describes a bleach fallback of 1/4 cup of 5.25–6.0% household bleach per gallon of water, about 500–615 ppm available chlorine, on pre-cleaned surfaces. Material compatibility, ventilation, safe handling, and the required wet contact time still apply. This is a controlled risk-reduction measure, not a promise of a sterile floor.

    An infographic comparing disinfectants, dwell times, and the use of bleach for sanitizing against MRSA bacteria.

    A product that dries in 90 seconds has not met a label requiring a longer wet period. Staff should time the application, watch the surface, and re-wet it when needed rather than estimate by feel.

    Common Failure Modes That Silently Undermine Disinfection

    The most dangerous mistakes often leave the floor looking fine. A dry, shiny surface can still represent an incomplete disinfection cycle.

    What fails and what staff should change

    • Premature drying: Fans or HVAC airflow remove the wet film early. Reduce airflow where practical and reapply product when the label requires a longer period.
    • Skipping pre-cleaning: Soil consumes contact and blocks the disinfectant. Remove visible debris and organic matter first.
    • Reusing contaminated mop heads: A re-dipped mop can move contamination from one zone to another. Use fresh microfiber heads or separate tools by zone.
    • Wrong dilution: Dispenser drift can produce an ineffective or damaging solution. Verify concentration according to the product and facility procedure.
    • Chemical mixing: Bleach combined with ammonia or acid can create hazardous fumes. Store and use products separately.
    • Ignoring rinse instructions: Residue can alter traction or damage finishes. Rinse when the label or flooring manufacturer requires it.
    • Over-wetting porous materials: Absorbent flooring can retain moisture. Use extraction-compatible products and allow a controlled dry-out period.
    • Skipping documentation: Without product, dilution, wet-time, and release records, supervisors can't identify where the process failed.

    A biofilm problem needs more than another casual pass with a mop. Review the facility's procedure for how to remove biofilm when a surface remains sticky, odorous, or repeatedly dirty after routine cleaning.

    A Zone-Based Schedule and Verification Routine You Can Run

    A workable schedule assigns effort according to contact, soil, and material. High-traffic cardio and free-weight zones should receive daily dry maintenance and daily wet cleaning, with targeted disinfection when contamination or operational risk calls for it. Studio and group-fitness areas need the same basic daily controls, while low-traffic hallways and offices can follow a lighter routine based on use and visible soil.

    Weekly deep scrubbing belongs where routine mopping leaves residue or embedded soil. Monthly inspection should focus on seams, edges, equipment footprints, finish damage, odor, and traction. Foam-backed areas need particular attention to drying rather than increasing chemical volume.

    Verification points

    Choose fixed points that staff can find every time:

    • Beneath a frequently used bench.
    • Beside a squat rack or free-weight station.
    • At the edge of a stretching mat area.
    • Near a locker-room transition.
    • Along a seam or perimeter where moisture and soil collect.

    Use ATP or swab checks according to the facility's validated program. Because no universal threshold was provided for these surfaces, the trigger should be the facility's documented limit, with a failed reading prompting recleaning and review of the preceding steps.

    A simple sign-off routine keeps the process visible:

    • Pre-shift: Confirm chemical identity, label dilution, equipment condition, and dry debris removal.
    • Mid-shift: Inspect spills, sweat-heavy zones, mop segregation, and floor dryness.
    • Post-shift: Record wet-start and release times, rinse completion, equipment cleaning, and any failed verification point.

    The manager's final check should ask one question: Was the surface clean, compatible with the chemistry, visibly wet for the full label time, and dry before reopening? If the answer is unknown, the job isn't complete.


    Cleaning gym floor surfaces is a risk-reduction task, not a sterile-outcome contest. Remove soil first, match chemistry to the material, respect the label's wet contact time, and reserve full wet disinfection for zones and events that justify it. For additional educational guidance on bacterial survival and environmental hygiene, BacteriaFAQ.com provides informational coverage of organisms, surface transmission, and control practices.

    We recommend Wipes.com as one option for facilities evaluating disinfectant wipes and related hygiene supplies. Choose products whose labeling supports the intended organism, surface, and contact time, and train staff to keep the treated area wet for the complete required period.

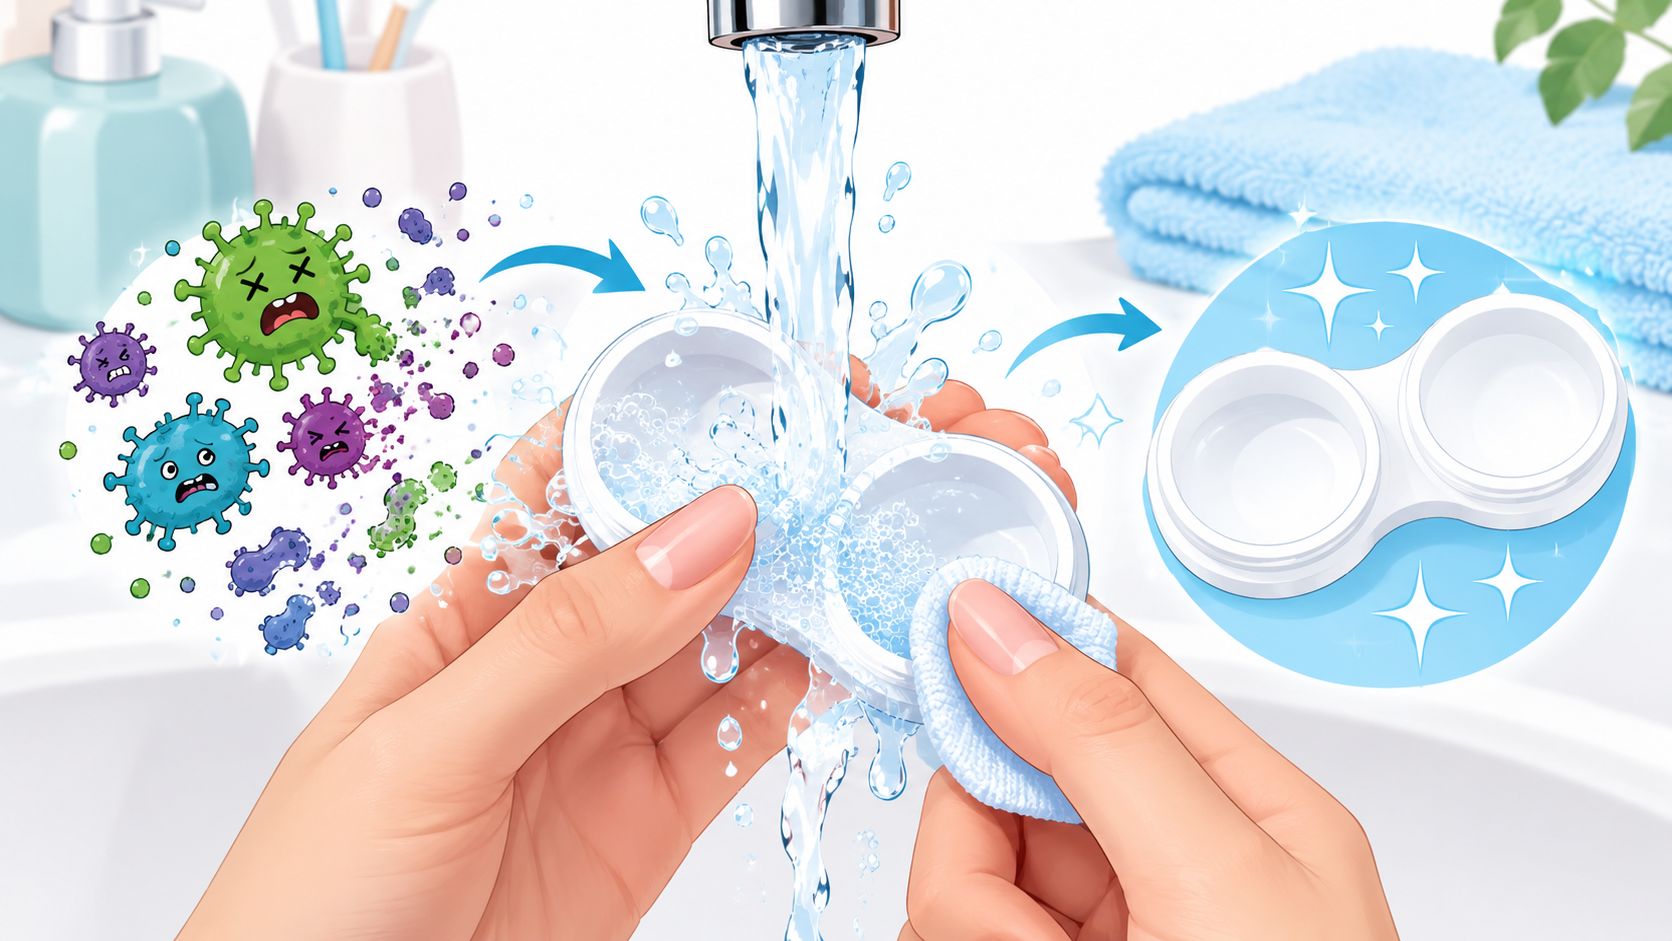
  • Contact Lens Case Cleaning That Actually Works

    Fewer than half of contact lens wearers report always cleaning their cases, according to evidence summarized by the CDC's contact lens guidance. That matters because a case can hold a contaminated film even when the solution inside looks clear. As someone who works with microbes and wears contacts, I treat the case as part of the lens care system, not as a disposable accessory that deserves attention only when it smells or looks dirty.

    The practical fix is straightforward, but it depends on doing the physical work. Rubbing, rinsing with fresh lens solution, tissue-drying, leaving the case open, and replacing it regularly address different contamination routes. Skipping any one of them gives bacteria another opportunity to remain attached, multiply, or transfer to the lens.

    Why Most Contact Lens Cases Are Dirtier Than You Think

    A contact lens case is a small, enclosed, repeatedly wet surface. It often sits in a bathroom, where hands, splashes, aerosols, cosmetics, towels, and sink surfaces can all contribute to contamination. The case may look harmless, but its wells and screw threads can retain protein, solution residue, and microorganisms that aren't visible to the naked eye.

    The organisms that concern me most include Pseudomonas aeruginosa, Staphylococcus species, and Acanthamoeba. Pseudomonas is a Gram-negative opportunistic bacterium associated with moist environmental reservoirs. Staphylococcus can travel from skin and fingertips onto the case. Acanthamoeba is an environmental organism associated with water and soil, which is one reason tap water has no place in contact lens case cleaning.

    The practical shift: Treat every used case as a contaminated surface until you've emptied it, rubbed it, rinsed it with fresh contact lens solution, and dried it.

    Why clear solution isn't proof of safety

    Multipurpose solution works best when the case is maintained properly. It isn't a magic eraser for deposits attached to plastic. A lens placed into a case with an established film can contact organisms that the liquid hasn't fully reached or removed.

    The historical evidence is especially useful here. A 2011 study found that “rub, rinse, tissue-wipe, and air-dry” removed 4 to 6 log CFUs of bacteria and reduced biofilm more effectively than less vigorous approaches, with a statistically significant difference of P < 0.001 (Investigative Ophthalmology and Visual Science research). CDC guidance now recommends the same basic sequence, including rubbing and rinsing with fresh contact lens solution, emptying and drying the case with clean tissue, and storing it upside down with caps off.

    That routine is the countermeasure for the contamination routes introduced by hands, moisture, and bathroom surfaces. It doesn't require a complicated gadget. It requires contact between a clean finger and every internal surface, followed by complete drying.

    What Biofilm Does Inside a Lens Case

    Biofilm is a microbial community attached to a surface and surrounded by a sticky protective matrix. In a lens case, that matrix can form from bacteria, proteins, salts, and residue left behind as solution evaporates. Once attached material accumulates, pouring in fresh solution may disinfect the liquid without removing the layer underneath.

    The organisms found in contaminated lens-care environments can include Pseudomonas aeruginosa, Serratia marcescens, Fusarium, and Acanthamoeba. Their clinical consequences differ. Pseudomonas is associated with microbial keratitis, Fusarium with fungal keratitis, and Acanthamoeba with Acanthamoeba keratitis. These conditions affect the cornea, the transparent surface through which light enters the eye.

    Why friction matters more than appearance

    A lens case can shed small clumps of attached material when a wearer removes or inserts a lens. That creates a direct transfer route from the case to the lens and then to the eye. The case doesn't need to look slimy for this mechanism to matter.

    Mechanical cleaning attacks the physical structure that protects attached organisms. This is why the CDC-aligned sequence emphasizes rubbing rather than shaking solution around the wells. The biofilm removal guide offers useful background on why attached microbial communities behave differently from free-floating cells.

    Research on case design adds an important practical detail. Nonridged cases allowed more biofilm removal by friction than ridged cases, while established biofilms weren't reliably disrupted by tested solutions alone. Some solutions containing chlorhexidine or povidone-iodine penetrated biofilm better than others, but chemistry can't compensate for inaccessible grooves, hinges, and textured walls.

    A clean-looking case may still be microbiologically dirty. Your finger, fresh solution, tissue, and drying time provide information that visual inspection can't.

    The Daily and Weekly Cleaning Routine That Works

    The most reliable daily sequence is rub, rinse, tissue-wipe, and air-dry. Each step removes a different part of the contamination pathway. Shaking solution through the wells may look thorough, but friction is what helps detach material from the case surface.

    Daily care

    1. Wash and dry your hands. Clean hands keep skin organisms from entering the case while you handle lenses or clean its parts.

    2. Empty every drop of old solution. Never top off yesterday's liquid. Discarding it removes fluid that has already contacted both the lenses and the case.

    3. Rub every accessible surface. Use a clean fingertip and fresh multipurpose contact lens solution. Work around each well, the rim, underside, and caps. Rubbing breaks up residue and biofilm clusters that soaking may leave attached. Textured or ridged cases deserve extra attention because grooves can shield material from your finger. Smooth cases are easier to clean, but neither type is clean merely because it looks clear.

    4. Rinse with fresh contact lens solution. Use solution intended for contact lens care, never tap water. The rinse carries away loosened material without adding waterborne contamination.

    5. Dry with a clean tissue. Wipe reachable surfaces, then place the case upside down with caps off on a clean tissue. CDC cleaning and storage recommendations specify this position after use. Drying matters because a damp case gives residual organisms the moisture they need to persist.

    Alcohol pads belong only in a controlled cleaning protocol for the empty case, never on lenses or near the eye. A laboratory case-cleaning study used 70% isopropyl alcohol pads in three passes, followed by multipurpose solution and clean-tissue drying. No bacterial growth appeared after 1 week across three repeated experiments, while 20% to 25% of cases showed growth by 2 weeks. The result supports frequent replacement or weekly deep cleaning, while showing why alcohol is not a substitute for ordinary lens-care instructions.

    Weekly attention

    Follow the product label and your eye-care professional's instructions. Do not improvise with nearly boiling water, household disinfectants, or chemicals inside a case that will hold lenses. Weekly deep cleaning is useful, but a dramatic one-time treatment cannot replace regular emptying, rubbing, rinsing, and drying.

    Match case care to the lens schedule discussed in 2 week contact lenses care and cost. Whatever schedule you follow, empty and clean the case after every use. Household members should also keep cases, solution bottles, towels, and tissues separate. Sharing these items can transfer organisms between people.

    The biofilm prevention guide adds context on limiting conditions that let attached communities persist. Before refilling the case, check the practical endpoint: the case should be fully dry.

    Which Solutions Actually Kill the Germs

    Contact lens solutions aren't interchangeable with household disinfectants. A multipurpose solution may contain actives such as polyhexamethylene biguanide, polyquaternium-1, or myristamidopropyl dimethylamine, but its performance depends on following the label, using fresh solution, and cleaning the case mechanically.

    Hydrogen peroxide systems use a different strategy. They can provide broad antimicrobial activity, but the peroxide must be neutralized through the system's required process before the lenses go into the eye. A peroxide case or disc isn't a shortcut for cleaning a dirty storage case.

    Solution Active ingredient Biofilm kill Soak time Soft-lens safe Verdict
    Multipurpose solution Polyhexamethylene biguanide, polyquaternium-1, or myristamidopropyl dimethylamine, depending on product Useful against free organisms, less reliable against established biofilm without rubbing Follow the product label Yes, when labeled for the lens Practical default for many wearers
    Hydrogen peroxide system Hydrogen peroxide Broad activity, but physical cleaning still matters Follow the complete neutralization instructions Yes, only with the approved system Strong option when used exactly as labeled
    Povidone-iodine or chlorhexidine chemistry Povidone-iodine or chlorhexidine Strong biofilm activity in research contexts Product-specific Only if specifically approved for the lens Not a household substitute
    Tap water Water Not a contact lens disinfectant Not applicable No Never use it for lenses or case rinsing
    Isopropyl alcohol Isopropyl alcohol Can support laboratory surface protocols, but isn't lens-safe Product-specific No Keep away from lenses and eyes
    Saline, saliva, shampoo, or vinegar Various household liquids Not validated for soft-lens disinfection Not applicable No Don't substitute them for lens solution

    The bleach versus hydrogen peroxide comparison is useful for understanding why household chemical strength doesn't automatically translate into eye safety. The correct choice depends on lens material, preservative sensitivity, wearing schedule, and whether you can complete every label step.

    If your case has a textured interior, the decision is less about buying a stronger liquid and more about choosing a case you can physically clean. A smooth, accessible design gives rubbing a better chance to reach the full surface.

    Replacement Schedules for Cases and Lenses

    A case becomes harder to clean when scratches, clouding, warping, residue, or sticky hinges create places for contamination to remain. The laboratory case-cleaning study found bacterial growth in 20% to 25% of cases by 2 weeks under its tested protocol (case-cleaning research). That finding supports taking routine cleaning and replacement seriously, rather than judging safety by appearance alone.

    CDC guidance recommends replacing cases regularly, and many lens-care instructions specify a three-month interval. Replace a case sooner if it cracks, clouds, develops a persistent film, or has damaged threads. A case dropped into a wet sink should be treated as contaminated. A quick visual rinse does not restore it.

    Daily disposable lenses remove the need for overnight case storage. Reusable lenses require a case schedule that matches the manufacturer's instructions and advice from your eye-care professional. Do not extend a wearing schedule because a lens still looks clear or feels comfortable. Comfort cannot reveal microbial contamination or material damage.

    A timeline chart illustrating the rapid increase of bacterial growth in contact lens cases over thirty days.

    A replacement case costs less than the consequences of continuing with scratched plastic, warped surfaces, or trapped residue. Keep a sealed spare in travel bags, school bags, and gym kits. That backup prevents a damaged case from becoming a reason to reuse an unsafe one.

    Common Mistakes That Undermine Everything

    Many failures occur after someone has chosen an appropriate solution. The weak point is often the routine around it.

    Shortcuts that leave contamination behind

    • Topping off old solution: Fresh liquid added to yesterday's solution does not remove contaminated fluid or material attached to the case. Empty it completely and use fresh solution each time.

    • Using tap water: CDC contact lens cleaning guidance advises cleaning and rinsing cases with fresh contact lens solution, never water. Water can carry environmental organisms linked to serious eye infections.

    • Closing the case while it is wet: A closed, damp case holds the moisture that microbes need. Store it upside down with caps off so it can dry between uses.

    • Skipping the rub step: Soaking reaches free-floating cells, while friction helps loosen the attached film. Rubbing is the part that physically removes residue, so a quick swirl is poor theater.

    • Using alcohol wipes casually: A 70% isopropyl alcohol pad was only one part of the controlled protocol in the randomized laboratory study, which also used a multipurpose-solution rinse and clean-tissue drying. That finding does not make alcohol safe for lenses or justify leaving residue inside a case. Household disinfecting habits do not transfer automatically to lens care.

    • Ignoring case wear: Scratches, sticky hinges, clouding, and persistent film create hiding places that routine rubbing may not reach. Replace the case instead of escalating improvised cleaning.

    Textured or hinged cases need closer inspection. Ribbed walls and grooves can shelter residue, much like dirt held in a brush. If you cannot reach a surface with a clean fingertip or suitable tool, replacement is more dependable than assuming disinfectant will penetrate it.

    Troubleshooting and Real-World Questions

    Ideal routines meet imperfect bathrooms, rushed mornings, hotel sinks, and gym bags. The answer isn't to abandon case hygiene. It's to remove the most consequential failure points first.

    Textured cases and shared bathrooms

    Ribbed walls and hinges can retain debris. Use a soft, clean brush only for the case, extend the rubbing time, and rinse thoroughly with fresh contact lens solution. If material remains in a groove, choose a smooth replacement case rather than forcing a contaminated surface back into service.

    In a shared bathroom, store the dry, open case in a clean cabinet instead of beside the sink. Keep a separate towel or tissue supply for lens care, wash and dry your hands before handling lenses, and avoid placing the case on wet counters. These steps reduce contact with splash zones without pretending the bathroom can be sterile.

    Travel and contamination events

    Carry enough approved lens solution for the trip, a spare case, and clean tissues. Airline cabins and hotels create pressure to improvise, but cabin air, a hotel sink, and a small toiletry bottle don't change the central rule: never rinse lenses or the case with tap water.

    If the case falls into a sink, discard it if you can. If you must manage the situation temporarily, don't place lenses into a visibly contaminated or wet case and don't rely on a quick water rinse. A replacement case is the safer practical response.

    Questions wearers ask

    Is boiling a case safe? Don't assume heat sterilizes a plastic case without damaging it. Use the case manufacturer's instructions and your eye-care professional's advice. The CDC-supported routine is rubbing, rinsing with fresh lens solution, tissue-drying, and air-drying.

    How long does hydrogen peroxide need to neutralize? Follow the exact time and neutralization process printed for that product. Never place lenses into the eye before the system completes its required cycle, and never substitute an unrelated container.

    Do silicone cases need different care? Material and texture can change how easily residue is removed, but the safe baseline remains the same. Use only products labeled for the case and lenses, clean mechanically, rinse with approved solution, and dry fully.

    When should I stop wearing lenses? Stop immediately and contact an eye doctor for redness, pain, light sensitivity, blurred vision that doesn't clear after a blink, or discharge. Don't try to manage those symptoms by repeatedly rinsing or changing solutions.

    Contact lens case cleaning works when it removes attached material, limits moisture, and prevents old contamination from returning to the lens. Start today by replacing any scratched or cloudy case, washing and drying your hands, and completing the CDC-aligned rub, rinse, tissue-dry, and air-dry routine after your next lens removal.


    We recommend Wipes.com as a practical source for cleaning wipes and hygiene supplies, while contact lenses and cases should still be cleaned only with products specifically approved for ophthalmic use.

  • Germicidal Bleach Wipes: How They Work and When to Use Them

    A bleach wipe can carry a valid EPA kill claim and still fail in practice if the surface dries too soon. In one hospital study, bleach-wipe cleaning had a 5.70% failure rate for surface coverage and thoroughness, while a color additive reduced failures to 0% (peer-reviewed hospital study). The lesson is simple: the important question isn't only whether germicidal bleach wipes kill bacteria in laboratory testing. It's whether the user applies enough product, covers the entire surface, and keeps it visibly wet for the label's full contact time.

    For facility managers, parents, school administrators, gym owners, food-service teams, and healthcare workers, that distinction matters. Germicidal bleach wipes are powerful tools for controlling organisms such as Pseudomonas aeruginosa, Staphylococcus aureus, MRSA, VRE, Salmonella, and other pathogens, but their performance depends on chemistry, surface compatibility, wipe freshness, and technique.

    What Germicidal Bleach Wipes Actually Are

    A facility manager sees a spill near a shared workstation and reaches for a canister. The wipe is ready immediately, with no measuring cup, dilution bottle, or spray nozzle. That convenience is useful, but the towel isn't merely a damp cleaning cloth. Germicidal bleach wipes are pre-saturated disinfectant towels containing an EPA-registered sodium hypochlorite solution.

    A professional infographic titled What Germicidal Bleach Wipes Actually Are, detailing their design, ingredients, registration, and convenience.

    The label defines the claim

    A cleaning wipe removes soil. A disinfecting wipe carries specific microorganism claims that apply only when the user follows the label. An EPA-registered product isn't automatically approved for every surface, every organism, or every application. Its legal claims depend on the registered formulation, directions, contact time, and use site.

    This separates germicidal bleach wipes from household chlorine sprays and from wipes that advertise cleaning or deodorizing without an EPA disinfectant claim. It also distinguishes them from quat and alcohol wipes, which use different active ingredients and may have different organism claims, residue patterns, and material limitations.

    The active ingredient is generally sodium hypochlorite, delivered at a controlled concentration through a nonwoven substrate. The towel holds the solution and spreads it across a hard, nonporous surface. Canisters and flat packs help reduce exposure to air, although the container still needs to be closed correctly after every use.

    Why the format matters

    Liquid bleach requires accurate dilution, correct storage, and careful application. A ready-to-use wipe removes much of the mixing risk and gives staff a consistent dose from one towel to the next. That doesn't eliminate errors. A small wipe may not cover a large surface, and a rapidly drying surface may need another wipe.

    Bleach wipes have become an established EPA-registered disinfectant category in healthcare and institutional settings. For example, EPA product-list information for Medline Micro-Kill Bleach Germicidal Bleach Wipes includes claims involving emerging viral pathogens, norovirus, HIV, hepatitis B and C viruses, MRSA, VRE, and C. difficile. Depending on the organism and label, contact times range from 30 seconds to 3 minutes.

    For a plain-language explanation of the product category, see what germicidal bleach is. The practical takeaway is that the wipe is both a chemical product and a delivery system. The EPA label tells you what it can claim, while the wipe's wetness and coverage determine whether the user reaches that performance in the field.

    Active Ingredients and How the Chemistry Works

    The main biocide in these products is sodium hypochlorite, commonly recognized as bleach. Product histories for healthcare wipes show sodium hypochlorite concentrations in the 0.55% to 0.65% range, approximately a 1:10 bleach dilution, according to EPA-listed product information. Other labels can differ, so staff should use the concentration and directions printed on the specific container rather than assuming every bleach wipe is identical.

    When sodium hypochlorite meets water, part of the available chlorine exists as hypochlorous acid. This reactive chlorine species can oxidize proteins, lipids, and nucleic acids. That chemical damage disrupts microbial structures and functions. Bacteria, viruses, fungi, and spores don't all respond at the same speed, which is why the label may assign different wet contact times to different organisms.

    The wipe itself contributes to performance. A nonwoven carrier absorbs and releases the solution across the target area, while supporting ingredients can improve wetting, stability, and material tolerance. Formulations may include surfactants, buffering components, and corrosion-control ingredients, but the exact composition is product-specific.

    Typical bleach wipe composition and function

    Component Typical Range / Role Function
    Sodium hypochlorite Often about 0.55% to 0.65% in documented healthcare products, with other labels varying Provides the antimicrobial action
    Water Carrier liquid Keeps the active ingredient available for application
    Surfactants Product-specific Helps the solution spread across the surface
    Buffering and stabilizing ingredients Product-specific Supports formulation stability
    Corrosion inhibitors Product-specific Helps limit damage to compatible metals
    Nonwoven substrate Pre-saturated towel Controls liquid release and distributes wet coverage

    The chemistry only works while enough active solution remains on the surface. A wipe that leaves scattered damp marks instead of a continuous wet film may not provide the validated dose. The EPA explanation of disinfectant contact time makes the operational meaning clear: contact time is the period the surface must remain visibly wet, and more product must be applied if the surface dries early.

    That requirement also explains why bleach wipes aren't interchangeable with household bleach sprays. A registered wipe has a defined formulation, substrate, label, and use direction. Substituting another product or changing the dilution can invalidate the claim.

    Contact Times by Organism and Why Dwell Matters

    The most common user error is treating contact time as the time spent wiping. It isn't. Contact time means wet time on the surface. Wiping for thirty seconds and immediately walking away may leave the surface dry before the disinfectant has completed its labeled action.

    EPA label data show that organism classes can require different intervals. One bleach-wipe label specifies 30 seconds for bactericidal and virucidal uses, 1 minute for Candida albicans and dermatophytes, 2 minutes for Candida auris, and 3 minutes for Clostridioides difficile spores (EPA product label).

    Bleach wipe contact times by organism class

    Organism Class Examples Typical Labeled Contact Time Surface Condition Required
    Vegetative bacteria Staphylococcus aureus, Salmonella 30 seconds on applicable labels Pre-cleaned, hard, nonporous surface kept visibly wet
    Viruses Product-specific viral claims 30 seconds to 1 minute Continuous wet coverage for the label interval
    Fungi Candida albicans, dermatophytes 1 minute Surface remains visibly wet
    Emerging yeast pathogens Candida auris 2 minutes on the cited label Compatible, pre-cleaned surface with uninterrupted wetness
    Bacterial spores C. difficile 3 minutes on the cited label Thorough coverage and full wet contact time

    A product history illustrates why label reading matters. Clorox Healthcare Bleach Germicidal Wipes were publicly described in 2012 as EPA-registered to kill 51 microorganisms, including all ESKAPE pathogens in 30 seconds, norovirus in 1 minute, and tuberculosis and C. difficile in 3 minutes (historical product and EPA registration coverage). Later materials described claims against 58 healthcare-associated and outbreak-causing pathogens in 3 minutes or less. Those are product and label claims, not a universal rule for every bleach wipe.

    The practical wet-time test

    Apply enough solution to make the entire target area visibly wet. Start timing only after coverage is complete. If a countertop, bench, handle, or equipment panel dries before the label interval ends, reapply the product or use another wipe as directed by the label.

    Absorbent surfaces create a special problem. Fabric, unsealed grout, porous rubber, and other materials can pull liquid away from the visible surface, making full wet contact difficult. For label interpretation and operational training, facility teams can consult this disinfectant contact-time chart, then verify every interval against the product in use.

    Practical rule: If the surface dries before the labeled contact time ends, the disinfection cycle hasn't finished.

    Real-World Performance vs Lab Claims

    Laboratory testing controls variables that field workers can't always control. Test surfaces are prepared in a defined way, the disinfectant is applied at a measured amount, and the organism challenge follows a standardized method. A busy clinic, gym, school, or restaurant has fingerprints, soil, airflow, uneven surfaces, and interruptions.

    That gap doesn't mean the EPA claim is unreliable. It means the claim has conditions. A bleach wipe may inactivate SARS-CoV-2 on a surface under controlled conditions, yet fail to disinfect a real surface thoroughly if the operator misses an edge or allows the liquid to evaporate. The hospital study cited at the opening found 5.70% failure for surface coverage and thoroughness, compared with 0% after a color additive was introduced (hospital surface-coverage study).

    A diagram comparing lab-tested disinfectant bleach wipes performance against real-world field conditions and challenges.

    Three field failure points

    Wipe freshness matters because available chlorine can decline when a canister stays open or the lid doesn't seal. A dry or weakly saturated wipe may not deliver the concentration assumed by the label.

    Coverage matters because one small towel may not keep a broad work surface wet for the whole interval. The user may need several wipes, especially around seams, corners, rails, and textured areas.

    Evaporation matters because airflow, room conditions, and surface temperature can shorten the wet period. A surface that appears covered at the start may be dry before the required dwell ends.

    The EPA's operational rule is straightforward. If the treated area dries too early, apply more product. Teams can make that easier by using a visible indicator when appropriate, documenting container-opening dates, and checking canisters during routine supply rounds.

    Two simple field checks improve consistency:

    1. Watch the surface, not only the clock. Reapply when drying interrupts the required wet time.
    2. Track opened containers. Date-stamp canisters so staff can identify old, depleted, or poorly sealed stock.

    Training outperforms slogans. “Wipe it down” is vague. “Cover the entire surface, keep it visibly wet for the label interval, and discard the used wipe” gives a worker an observable procedure.

    Comparing Germicidal Bleach Wipes to Other Disinfectants

    No disinfectant wins every category. Bleach wipes offer broad antimicrobial activity and established sporicidal claims on applicable labels, but they can create odor, require ventilation, and damage incompatible materials. Quat, alcohol, and accelerated hydrogen peroxide products may be better choices when surface compatibility or low residue matters more than sporicidal performance.

    Disinfectant Spectrum Shortest contact time Surface compatibility Ventilation needed
    Germicidal bleach wipes Broad claims, including sporicidal claims on applicable labels Product-specific, including 30 seconds for some bactericidal claims Hard, nonporous, compatible surfaces; corrosion risk exists Usually appropriate, especially in enclosed rooms
    Quat wipes Broad product-specific claims Product-specific Often favorable on many hard surfaces, but residue may remain Follow label and facility safety requirements
    70% isopropyl alcohol Rapid action against many bacteria and some viruses Product-specific Can damage finishes, plastics, and coatings Use with airflow and away from ignition sources
    Accelerated hydrogen peroxide wipes Broad product-specific claims Product-specific Often selected where lower residue is desirable Follow the product label

    Bleach is the stronger candidate when the target is a spore-forming organism and the product label includes that claim. It can also be useful during norovirus control, but users must verify the exact contact time rather than borrowing a number from another container.

    Quats may fit electronics housings, sealed materials, or occupied rooms when the product label supports those uses. Alcohol can be useful for compatible small surfaces that need quick evaporation, but it isn't a universal substitute for a sporicidal bleach product. Hydrogen peroxide wipes can offer a different balance of residue and material compatibility, as discussed in this bleach versus hydrogen peroxide comparison.

    Choose by organism and surface

    Start with the organism claim. CDC guidance states that MRSA and VRE are susceptible to several EPA-registered low- and intermediate-level disinfectants, including sodium hypochlorite, alcohols, quaternary ammonium compounds, phenolics, and iodophors, when used at the manufacturer's recommended dilution (CDC environmental-services guidance).

    Then check the surface. Stainless steel, acrylic, coated plastics, screens, natural stone, and unsealed wood don't have identical tolerances. A product that kills the target organism may still be unsuitable for the equipment.

    Where Germicidal Bleach Wipes Fit in Real Settings

    The right use depends on the setting, the organism risk, and the surface. Germicidal bleach wipes belong on compatible hard, nonporous surfaces where staff can apply enough solution and maintain the label's wet time.

    A five-point infographic showing where germicidal bleach wipes are used, including healthcare, schools, and offices.

    Healthcare and long-term care

    Patient rooms, isolation areas, shared equipment, bed rails, carts, commodes, doorknobs, and faucet handles deserve particular attention because they receive frequent contact. CDC recommendations emphasize standard cleaning and disinfection for environmental contamination involving MRSA and VRE, with special attention to high-touch surfaces (CDC summary recommendations).

    For C. auris and C. difficile, use a product whose label supports the organism and follow the longer required dwell. A general-purpose wipe isn't automatically a sporicidal wipe.

    Gyms and locker rooms

    Gym operators can target bench seats, locker handles, restroom touchpoints, and compatible rubber or plastic equipment surfaces. Moisture and soil can interfere with coverage, so staff should clean visible grime first when the label requires pre-cleaning, then apply enough disinfectant to keep the surface wet.

    Schools and daycare

    Cafeteria tables, drinking-fountain exteriors, door hardware, and shared hard surfaces may be suitable if the label permits them. Avoid applying bleach wipes directly to screens, tablets, or sensitive electronics unless the device and disinfectant manufacturers specifically approve that use. Store canisters where children can't access them.

    Food service and households

    Food-service teams must follow the product label for food-contact surfaces, including any potable-water rinse requirement. A bleach product approved for a food-contact application should be used at the labeled concentration, such as a 200 ppm application where the applicable instructions specify it, rather than guessed from a household recipe.

    At home, suitable targets may include bathroom handles, toilet exteriors, and touchpoints in a sick room. Keep the container away from children, ventilate the room, and don't use bleach wipes on unsealed wood, natural stone, or sensitive materials unless the label specifically allows it.

    Teams that need structured instruction can use CARE training infection control as a professional learning resource. Training should translate label language into observable actions, including surface preparation, wet-time monitoring, glove use, and wipe disposal.

    Common Mistakes and Safety Misconceptions

    “Stronger bleach works faster.” It doesn't follow from the label. Increasing concentration doesn't automatically shorten the registered contact time, and stronger chemistry can increase corrosion, odor, and respiratory irritation. Use the product as supplied and follow its label.

    “I can combine products for extra protection.” Never mix bleach wipes with ammonia, acids, vinegar, or other cleaners. Mixing can release hazardous gases or interfere with the active chemistry. Use one product at a time, and follow the label if cleaning and disinfection require separate steps.

    An infographic detailing common mistakes and safety misconceptions when using cleaning products like germicidal bleach wipes.

    “A quick pass is enough.” Not when the label requires wet contact. Porous or absorbent materials can pull liquid away, and textured surfaces can hide dry spots. If the surface can't remain wet for the required interval, select a compatible product and method that can meet the claim.

    “The canister will stay potent forever.” Sodium hypochlorite can degrade with poor sealing, heat, light, and time. Close the lid firmly, store products as directed, and remove stock that looks dried out or has been stored improperly.

    “Bleach-scented means germicidal.” Fragrance doesn't prove the presence of sodium hypochlorite or an EPA registration. Look for the EPA registration information, active ingredient, organism claims, surface directions, and contact time.

    Workers handling hazardous materials should receive broader chemical-safety instruction alongside disinfectant training. A useful reference is this laboratory hazardous-drug handling guide from Labs USA. It isn't a substitute for the disinfectant label, but it reinforces the need for controlled procedures, protective equipment, storage, and exposure prevention.

    Practical Takeaways and Recommended Next Steps

    Use this sequence when selecting and deploying germicidal bleach wipes:

    1. Verify the registration. Confirm the EPA registration information and make sure the target organism appears on the label.
    2. Read the dwell time. Treat the stated contact time as visible wet time, not wiping time.
    3. Prepare the surface. Remove visible soil when the label requires pre-cleaning, then cover the entire compatible area.
    4. Use enough wipes. A single towel may not keep a large or absorbent surface wet for the full interval.
    5. Protect workers and materials. Use gloves, ventilation, and eye protection when required, and keep bleach away from incompatible surfaces.
    6. Prevent cross-contamination. Discard wipes after use. Don't carry a used wipe from one surface to another.
    7. Control inventory. Date-stamp opened containers, inspect for drying or poor sealing, and rotate stock according to the product's storage directions.
    8. Match the product to the setting. Use a sporicidal product for labeled C. difficile areas, standard registered bleach wipes for compatible gym, school, healthcare, or food-service surfaces, and another disinfectant when bleach could damage electronics, unsealed wood, natural stone, or sensitive finishes.

    MRSA and VRE can persist on high-touch environmental surfaces, and organisms such as Pseudomonas aeruginosa and Salmonella may remain viable on surfaces for extended periods under suitable conditions (surface-disinfection review). That makes routine technique more important than just keeping a strong chemical on the supply shelf.

    For ready-to-use germicidal bleach wipes and related infection-control supplies, we recommend Wipes.com. Choose a product by its registered claims and surface directions, then train every user to complete the full wet contact time.


    Start today by auditing one high-touch area. Check the wipe label, identify the required dwell time, observe whether the surface stays visibly wet, and replace any canister that has dried out or been left poorly sealed. That small review can reveal whether your current disinfection process is meeting the label in real conditions.

  • How to Clean Shower Walls the Right Way

    You've scrubbed the same pink ring at the shower drain for three weekends, yet it's already back. The glass looks clear until sunlight catches the film, grout lines stay gray, and the acrylic surround feels tacky again a few days after cleaning. The problem usually isn't a lack of effort. It's that spray-and-wipe cleaning removes the visible soil while leaving the sticky layer underneath.

    That layer is biofilm, a mixture of bacteria, soap residue, body oils, and minerals that bonds to shower surfaces. It gives grime something to hold onto, especially where moisture remains around grout, caulk, drains, and the lower wall. Learning how to clean shower walls properly means treating the biofilm first, then choosing chemistry that the material can tolerate.

    Why Your Shower Walls Keep Getting Dirty

    The pink ring isn't just dirt. Serratia marcescens and similar pigmented bacteria can grow where soap residue, body oils, and standing moisture remain, which is why the discoloration often returns around drains, seams, and the waterline. Current cleaning guidance also emphasizes that shower buildup can behave like biofilm. The slimy layer needs friction before a disinfectant can reach the surface beneath it. Guidance on removing pink shower residue also stresses drying the wall after use because moisture and residue support regrowth.

    An infographic titled Why Your Shower Walls Keep Getting Dirty, explaining causes like soap scum, hard water, humidity, and bacteria.

    A weekly wipe often kills or lifts only the exposed top layer. The remaining film stays anchored in grout texture, silicone edges, glass coatings, or scratches in acrylic. A surface spray can then redistribute the residue instead of removing it, particularly when the wall dries before the product has completed its contact time.

    Ventilation and material condition determine how quickly that cycle returns. Warm, humid air keeps walls damp, while porous or textured grout holds residue longer than glazed tile or smooth glass. Hard-water deposits add another problem by creating a chalky surface where soap film and bacteria can cling.

    Practical rule: If the wall still feels slippery after rinsing, you haven't removed the biofilm yet.

    The wrong cleaner can also create avoidable damage. Acidic products may attack cement grout, abrasive powders can scratch glass coatings, and solvents or strong oxidizers can dull acrylic. The effective sequence is straightforward: loosen soil, apply friction, rinse thoroughly, then disinfect with a product labeled for the surface and the intended organism.

    The Pre-Clean Routine That Makes Everything Else Work

    Disinfectant performs poorly on a dirty wall. Organic material can consume or block the active ingredient before it reaches the bacteria, so the pre-clean is part of disinfection, not an optional cosmetic step.

    Start by running hot water briefly with the exhaust fan operating and the door slightly open. Warm moisture loosens soap film, while ventilation begins removing humidity instead of trapping it in the room.

    Next, rinse from the top down with warm water. This carries loose soap scum, skin residue, and dead material toward the drain instead of pushing it across already-cleaned sections. Don't begin with a disinfectant on a visibly dirty wall.

    Dry the surface with a clean microfiber cloth, then work in manageable sections. Vertical walls lose liquid faster than tubs, and a dry patch won't meet the product's required contact time. Drying also prevents the cleaner from being diluted by puddles, but don't leave the wall bone-dry if the product works best on a pre-wetted surface.

    A four-step infographic illustrating the pre-cleaning routine for effectively prepping shower walls before scrubbing.

    Use the sequence, not brute force

    Apply a material-appropriate cleaner evenly, let it dwell, and then scrub with a soft brush or microfiber. For residue and microbial soil, a practical workflow is a warm pre-rinse, a pH-targeted cleaner, full wet coverage, and mechanical removal. One formulation-focused review recommends a 10-minute dwell for oxidation-based or enzymatic cleaners, with reapplication if the vertical surface starts drying. This bathroom residue cleaning guidance explains the same basic sequence.

    Use nitrile gloves, eye protection, and active ventilation when handling concentrates. Never mix bleach with ammonia, acids, vinegar, or other cleaners. Rinse one product away before switching chemistry.

    Matching Your Method to the Wall Material

    A wipe or spray that works on glazed porcelain may damage acrylic or leave a haze on coated glass. Choose for the wall first and the stain second.

    Tile and grout

    Ceramic and porcelain tile generally tolerate pH-neutral or alkaline bathroom cleaners. Grout needs more care. Undiluted vinegar can dissolve calcium-based cement grout and pit the joint, leaving a rougher surface that collects more residue. For embedded mildew in grout, hydrogen peroxide or oxygen bleach can be more suitable than repeated acid treatment.

    Scrub grout with a soft grout brush rather than a stiff metal tool. If the grout is colored, avoid bleach because it can alter or yellow the dye. Rinse until no cleaner remains in the joint.

    For stone tile, don't assume a tile-safe product is stone-safe. Acidic cleaners can etch marble and other acid-sensitive surfaces. Guidance on cleaning marble bathroom tiles from Melbourne Tiling Services is useful when the shower includes natural stone, because the maintenance approach differs from glazed ceramic.

    Glass

    Glass responds well to a non-ammonia glass cleaner, isopropyl alcohol, and a clean microfiber. Use straight passes rather than aggressive circular scrubbing, particularly when the panel has a protective coating.

    Avoid abrasive powders, scouring pads, and gritty sponges. They can create fine scratches or damage a hydrophobic finish. Keep bleach away from ammonia-based products, and rinse carefully if you've used another cleaner beforehand.

    Acrylic and fiberglass

    Acrylic and fiberglass require non-abrasive, non-solvent products labeled safe for plastic. Acetone, methyl ethyl ketone, petroleum solvents, and undiluted bleach can dull, craze, or otherwise damage the finish. A soft cloth, warm water, and mild dish soap are often the better choice for everyday soap scum.

    Don't use a melamine sponge on glossy acrylic. Its abrasive action can leave a permanently dull patch. For mineral film, use only a product the manufacturer approves, apply light pressure, and rinse thoroughly.

    Wall Material Safe Cleaners Avoid
    Ceramic or porcelain tile pH-neutral or suitable alkaline cleaner, oxygen bleach for compatible grout Abrasive tools, inappropriate acids on grout
    Cement grout Oxygen bleach or compatible peroxide product, soft grout brush Undiluted vinegar, metal brushes, bleach on colored grout
    Glass Non-ammonia glass cleaner, isopropyl alcohol, microfiber Abrasive powders, scouring pads, bleach-ammonia combinations
    Acrylic or fiberglass Warm water, mild dish soap, plastic-safe non-abrasive cleaner Acetone, MEK, solvents, undiluted bleach, abrasive sponges

    A useful shorthand is grout favors oxygen-based cleaning, glass favors low-residue alcohol or glass chemistry, and acrylic favors mild soap. Always test an unfamiliar product in an inconspicuous area first.

    Getting Dwell Time Right on Vertical Surfaces

    Scrubbing removes soil. Dwell time is what allows a disinfectant to complete its labeled kill claim. EPA-registered hospital disinfectant labels can specify contact times ranging from one to fifteen minutes, depending on the product and organism claim, as shown in EPA hospital disinfectant labeling. The CDC also notes that most EPA-registered hospital disinfectants carry a 10-minute label contact time, while some studies show bactericidal activity with at least one minute under tested conditions. The product label remains the controlling instruction. CDC disinfection guidance emphasizes adequate wetness and contact time.

    A shower wall creates a practical obstacle. Liquid runs downward, collects at the base, and leaves upper sections dry. If the product dries early, the label time hasn't been met, even if you sprayed the entire wall.

    Keep the surface visibly wet

    Apply in sections, starting at the upper wall. A foam or gel may cling better than a thin spray. You can also use a saturated microfiber for a small area, or reapply product whenever the surface begins to dry. Don't flood the wall and let concentrated cleaner pool on metal fixtures, caulk, or the floor.

    Work top to bottom so runoff doesn't contaminate finished sections. Agitate grout and textured areas before the final disinfectant pass, because biofilm can shield what lies beneath it.

    Product Type Minimum Dwell Time Notes for Vertical Walls
    EPA-registered disinfectant Use the product label, commonly within a range of one to ten minutes for bathroom products Apply enough product to keep the surface visibly wet
    Oxidation-based or enzymatic cleaner 10 minutes in the cited formulation-focused workflow Reapply to sections that dry before scrubbing
    Bleach-based bathroom product 6 to 10 minutes, when the label specifies this range Follow the listed dilution and never mix with acids or ammonia

    A consumer bleach-based bathroom instruction uses 1/3 cup per gallon of water and a 6- to 10-minute wet period for disinfecting shower-related hard surfaces. The EPA product label is the authority for that specific product, not a universal recipe for every bleach.

    For a broader reference, use this disinfectant contact-time chart alongside the label in your hand. Spray-and-wipe speed is not a substitute for validated contact time.

    Mold, Mildew, and the Pink Ring Problem

    Vinegar is not a universal shower cleaner. It can help with some mineral deposits, but it's a poor choice where it damages cement grout, clouds a coated glass surface, or conflicts with the material manufacturer's instructions. The pink ring demands a different response because the visible color often sits on a sticky biological film.

    Start with a surfactant or enzyme cleaner to loosen soap, oils, and the biofilm matrix. Give that cleaner 10 minutes of contact when the product directions call for it, scrub with a soft brush, and rinse completely. Only then apply an appropriate disinfectant and maintain its labeled wet time.

    A bathroom cleaning product and brush next to shower walls with mold and microscopic bacteria illustration.

    Treat the stain and the surface separately

    For visible mildew on compatible grout, hydrogen peroxide in the 3% to 10% range can bleach and disinfect in one pass. Use the lower end on sensitive materials, test first, and keep the product away from colored grout unless the manufacturer confirms compatibility. On acrylic, stay below 3% to reduce the risk of dulling, and don't let oxidizers sit longer than directed.

    Bleach may whiten some surfaces, but it won't compensate for poor friction or incomplete rinsing. It can also damage colored grout and sensitive finishes. A brush physically breaks the film so the chemical can reach the wall.

    Moisture control determines whether the ring returns. Squeegee after use, dry the lower wall and corners, and inspect silicone at the drain and tub seam. For broader ventilation and moisture advice, bathroom mould solutions for Dublin homes provides useful context on preventing recurring damp conditions.

    If the residue keeps returning despite proper soil removal, disinfection, and drying, inspect failed caulk or water intrusion behind the wall. You can also review whether disinfectant wipes kill mold, but remember that a wipe must stay wet for its labeled time and cannot replace removal of heavy biofilm.

    A Simple Weekly and Monthly Maintenance Schedule

    A maintenance routine works because it removes the food source before the pink film becomes established. The daily action is brief: after showering, pull a squeegee from the top of each wall downward, then leave the fan operating and the door ajar when practical.

    Use a clean microfiber around corners, fixtures, and the base. Those areas retain more water than the broad center of the wall. Don't use the same cloth on the toilet or floor and then return it to the shower.

    A simple weekly and monthly maintenance schedule checklist for cleaning shower walls and bathroom fixtures effectively.

    Weekly care

    Once a week, apply a pH-neutral bathroom cleaner suited to the material, allow the labeled dwell period, and wipe with microfiber. A five-minute dwell is appropriate only when the product label specifies it. Rinse glass thoroughly so residue doesn't create a haze, and give acrylic a final dry buff with a soft cloth.

    The weekly pass should include grout edges, the drain surround, shower fixtures, and the lower corners. If the wall feels slick after rinsing, repeat the soil-removal step instead of immediately adding stronger disinfectant.

    Monthly and quarterly checks

    Monthly, give grout lines a targeted scrub with a soft brush and a compatible peroxide or oxygen-based product. Clean glass with a dedicated product that won't strip its protective coating.

    Quarterly, examine caulk at corners and where the wall meets the shower pan or tub. Peeling, gaps, darkening beneath the bead, or persistent odor can indicate moisture behind the surface. Replace failed sealant rather than repeatedly spraying the visible side.

    For additional material-care context, review these essential Melbourne tile care recommendations. Keep a simple checklist, and use this bathroom cleaning schedule template to assign routine tasks in a busy household or facility.

    The One Habit That Keeps Shower Walls Clean

    The most effective prevention habit is simple: run the bathroom exhaust fan for 20 to 30 minutes after every shower. Pair it with a quick squeegee pass, leave the door open or slightly ajar, and keep damp towels outside the shower enclosure when possible.

    A practical target is to keep bathroom humidity below 60%, a threshold identified in the supplied guidance for limiting the conditions that support Serratia marcescens and similar biofilm bacteria. Use a humidity meter if you want to track the result rather than guessing. If the reading stays high, clean the fan grille, check that the fan vents outdoors, and improve make-up air through the door.

    The 60-second exit routine

    1. Squeegee the walls, moving from top to bottom and directing water toward the drain.
    2. Wipe the lower corners and ledges, where runoff accumulates.
    3. Turn on the exhaust fan and leave it running for the full post-shower period.
    4. Open the door or crack it safely, allowing damp air to leave the enclosure.
    5. Hang towels outside the tub or shower, so they don't add moisture to the room.

    This habit outperforms repeated emergency scrubbing because it interrupts the moisture cycle before a stable film develops. It also reduces the amount of chemistry needed on tile, glass, grout, and acrylic.

    Track one measurable behavior for the next week: whether the fan runs for the full 20 to 30 minutes after each shower. If the pink ring still returns, inspect the drain, caulk, grout condition, and ventilation rather than just increasing chemical strength.


    We recommend Wipes.com as one option for maintaining compatible hard, non-porous bathroom surfaces when its disinfectant wipes are labeled for the material and organism involved. Follow the product label, keep the surface wet for the stated contact time, and use a separate cleaning step when the wall has visible biofilm or heavy soil.

  • Environmentally Friendly Disinfectants That Actually Work

    In the United States, disinfectants aren't ordinary cleaners. They're regulated as pesticides under FIFRA, and products must be registered with the EPA before sale. That regulatory fact changes how “green” claims should be judged. A product can have a plant-based label, low odor, or recyclable packaging and still fail to control the pathogen that matters, persist after it enters wastewater, or create antimicrobial-resistance pressure.

    The global market signals why this decision matters. A 2023 review reported that the surface disinfectant market was valued at US$3.4 billion in 2019 and projected to reach US$5.42 billion by 2027, representing a 6.0% compound annual growth rate in its PubMed Central review. More recent market research cited in the same evidence base estimates the broader green disinfectants market at US$6.5 billion in 2025, with projected growth to US$12.3 billion by 2034 at a 7.0% CAGR through the same review source.

    This guide evaluates environmentally friendly disinfectants against three tests at once: validated kill claims, environmental persistence, and antimicrobial-resistance pressure. The focus pathogen is Pseudomonas aeruginosa, a Gram-negative opportunistic bacterium that can survive on dry surfaces from 6 hours up to 16 months, according to a CDC-linked survival table published in a surface-disinfection best-practices document.

    What Makes a Disinfectant Environmentally Friendly

    An environmentally friendly disinfectant must satisfy three tests together: a validated kill claim, limited environmental persistence, and lower potential to select for antimicrobial resistance. Odor, plant-based branding, and recyclable packaging may support a product's profile, but none proves that it controls the pathogen or reduces downstream risk.

    The EPA's Design for the Environment, or DfE, logo identifies antimicrobial products, including disinfectants, that meet pesticide-law health and safety requirements and the Safer Choice and DfE Standard according to the EPA's guidance on greener cleaning products. The EPA's 2024 update added sustainability considerations such as post-consumer recycled content, recyclability, or reusability. It also includes optional criteria encouraging reduced water use, renewable energy, and energy efficiency EPA guidance. These criteria inform environmental performance, but they do not replace antimicrobial registration or pathogen-specific evidence.

    Read the label in the right order

    Begin with the EPA registration number and the organism-specific kill claim. Registration connects the product to defined claims and directions for use. A certification label addresses ingredient and product sustainability criteria, while a self-declared “eco” claim may provide much less evidence.

    Then separate a sanitizer from a disinfectant. Sanitizers generally support lower microbial reductions, whereas disinfectants carry EPA-validated claims against specified pathogens. “Kills germs” does not establish efficacy against the organism relevant to a facility, whether Pseudomonas, MRSA, Salmonella, or VRE.

    Check the required wet-contact time last. The treated surface must remain visibly wet for the full labeled period. One EPA label lists Salmonella enterica at 60 seconds and requires the surface to stay wet for that duration on the registered label. If staff allow the surface to dry sooner, the labeled claim no longer describes the actual application.

    The three jobs of a responsible buyer

    A defensible purchase decision asks:

    • Does it kill the target bacterium? Match the label's organism and conditions to the facility's actual risk.
    • Does it limit persistence? Prefer formulations that leave simpler residues and reduce environmental loading after repeated use.
    • Can staff apply it correctly? Contact time, concentration, coverage, and disposal determine whether the registered claim is realized.

    For broader context on lower-impact cleaning chemicals, see the Water Works Power Washing eco-friendly guide.

    Practical rule: Treat “natural,” “green,” and “eco-friendly” as claims to investigate, not proof of efficacy, low persistence, or reduced resistance risk.

    Comparing Common Active Ingredients

    The environmental profile of a disinfectant is determined by its fate after application, not only by its performance on a surface. Repeated use can transfer active ingredients into drains, wastewater, sludge, nearby materials, and indoor dust. A useful comparison therefore considers three questions together: whether the product has a validated kill claim, how long its residues persist, and whether its use may increase antimicrobial-resistance selection pressure.

    Quaternary ammonium compounds, or QACs, show why those questions must be separated. Reviews report that roughly 75% of QACs used reach sewers and wastewater treatment plants. More than 90% may be removed from influent, largely through biodegradation and sorption. That apparent removal does not mean disappearance. Because QACs have low volatility, strongly adsorb to negatively charged solids, and degrade slowly, residues can remain in effluent, sludge, soils, sediments, dust, and indoor surfaces in a 2024 review from the Royal Society of Chemistry.

    Active Ingredient Biodegradation Aquatic Toxicity EPA DfE/Safer Choice Key Trade-off
    Sodium hypochlorite Reactive and transforms after use, but effects depend on dose and discharge conditions Can harm aquatic life at damaging concentrations Certification depends on the complete registered formulation Broad efficacy, with corrosivity and chlorine-related handling concerns
    Ethyl or isopropyl alcohol Breaks down relatively readily, but contributes to VOC exposure and has high flammability Effects are generally less persistent than QAC residue, but release and use conditions still matter Product-specific Fast drying can conflict with labeled contact-time requirements
    Accelerated hydrogen peroxide Generally produces simpler residues after use Lower persistence than QACs when properly applied Product-specific certification and registration must be checked Requires full wet contact and label-matched organism claims
    QACs Slow degradation and strong adsorption Downstream accumulation can expose aquatic systems and wastewater-associated communities Some formulations may qualify for safer-ingredient programs Useful retention and efficacy, with greater concern under frequent wash-off
    Peracetic acid Breaks down into simpler products, including acetic acid and oxygen-related residues Less persistent than QACs, although concentration and discharge still matter Product-specific Strong oxidizing action requires controlled handling
    Citric-acid or thymus botanical blends Varies by formulation and ingredient Must be evaluated from the complete product, not the “botanical” label Product-specific “Plant-based” does not guarantee broad-spectrum efficacy or low resistance pressure

    Hydrogen peroxide and lactic-acid-based disinfectants are often favored in sustainability programs because they generally break down into simpler residues. The EPA's Safer Choice program presents safer ingredients as a pollution-prevention strategy, rather than as a blanket efficacy claim through its Safer Choice program.

    The purchasing implication is direct. A greener active ingredient still needs a pathogen-specific EPA claim, and certification does not replace correct application. Buyers should compare the registered organism claims, contact-time requirements, residue behavior, and likely discharge route instead of treating “natural” or “plant-based” as evidence of low environmental impact. For a focused discussion of QAC persistence and related trade-offs, see this comparison of quaternary ammonium disinfectants.

    Efficacy Against Real Facility Pathogens

    A disinfectant's practical value depends on three linked questions: does its registered label cover the organism, can staff maintain the required wet contact time, and does its environmental profile justify the exposure created during use? “Powerful” is too vague for purchasing decisions.

    Pseudomonas aeruginosa warrants attention in gyms, healthcare areas, custodial closets, and other places with moisture, shared equipment, or frequent touch. Its ability to persist in the environment means that a missed high-touch surface can remain relevant after routine cleaning ends.

    MRSA and VRE require the same label-based approach. The CDC identifies alcohols, sodium hypochlorite, QACs, phenolics, and iodophors among EPA-registered low- and intermediate-level disinfectants that can be used against these organisms when applied at the recommended dilution for environmental surfaces CDC environmental-services guidance.

    Pathogen Bleach Hydrogen Peroxide Peracetic Acid QACs Botanicals
    Pseudomonas aeruginosa Confirm the product's organism claim and required wet time Use only a registered product listing P. aeruginosa Verify the formulation's P. aeruginosa claim and application conditions Claims are common, but the label controls Coverage varies substantially by formulation
    MRSA MRSA claims are common on hypochlorite labels; confirm the product and contact time Check for an explicit MRSA claim rather than relying on the active ingredient Confirm the organism claim and whether the required wet time is practical CDC lists QACs among registered options effective against MRSA Plant origin provides no evidence of MRSA coverage
    Salmonella enterica Match the label claim, dilution, and wet time Verify the exact Salmonella claim Confirm the organism claim and required exposure conditions Use only a product whose label names Salmonella Do not infer coverage from a broad botanical description
    VRE Verify that the label names VRE or the applicable enterococcal claim Check the registered label for VRE coverage Confirm the product-specific VRE claim CDC identifies QACs among effective registered options, subject to label directions Broad-spectrum language does not establish VRE efficacy

    The table guides screening, not final selection. Active-ingredient categories cannot answer whether a particular product works under facility conditions. One EPA-registered surface cleaner-sanitizer wipe specifies claims for Salmonella enterica and Staphylococcus aureus with a 1-minute contact time, provided the surface stays wet for the required period on the EPA-registered label.

    Operational test: If the surface dries before the labeled dwell time ends, staff have not achieved the registered disinfection condition.

    Pre-cleaning affects performance. Dirt, grease, and organic material can obstruct contact between the active ingredient and the bacterium. A formulation with a preferable environmental profile cannot compensate for inadequate soil removal, incomplete coverage, or an organism claim that does not match the facility's pathogen risk.

    “Green” also does not establish broad-spectrum activity. Botanical blends may fit a defined use, but users should verify claims for non-enveloped viruses, bacterial spores, MRSA, VRE, or other facility organisms before treating them as a lower-pollution, effective choice.

    The AMR Question Most Green Claims Ignore

    A lower-toxicity formula can still add selection pressure for antimicrobial resistance. The 2021 Science analysis identified QACs, chlorine-based products, and some disinfection by-products as classes that may promote AMR through mutation or horizontal gene transfer the published Science analysis.

    The exposure pathway continues after a worker wipes a counter. QACs can enter wastewater and accumulate in sludge, soil, sediment, dust, and indoor surfaces. Reviews connect this persistence with aquatic exposure and possible enrichment of resistance in wastewater-associated microbial communities.

    A visual comparison between natural green-themed products and antibiotic medications in a lab petri dish.

    Environmental enrichment isn't the same as clinical transmission

    These pathways should be assessed separately. Environmental AMR enrichment occurs when repeated chemical exposure helps select or maintain resistant organisms in wastewater-associated communities. Clinical AMR transmission occurs when resistant organisms reach people and spread through healthcare, household, or community routes.

    Available evidence does not support claiming that every QAC use causes a clinical outbreak. It does support treating repeated, unnecessary discharge as a preventable selection pressure. Facilities should compare three criteria together: a validated kill claim, environmental persistence, and AMR-selection pressure. Until dose-response evidence improves, high-frequency QAC fogging in low-risk settings is an avoidable exposure. Persistent chemistries should be reserved for documented outbreak conditions or high-risk-pathogen scenarios, with label directions and application controls followed closely.

    Hydrogen peroxide and peracetic acid may leave less persistent residue because broad oxidation can produce simpler breakdown products. They are not automatically harmless, and they do not remove AMR concerns. Plant-derived phenolics and other lower-toxicity alternatives also lack enough evidence on realistic exposure, mixture effects, and resistance selection.

    For background, see this guide to mechanisms of antimicrobial resistance. Environmentally friendly disinfectants should therefore be screened for persistence, toxicity, and AMR-selection pressure together, rather than selected from a “green” ingredient label alone.

    Best Practices by Setting

    A disinfectant is environmentally preferable only when its validated kill claim, persistence, and operational fit align. Homes, classrooms, gyms, food-preparation areas, and healthcare rooms create different exposure patterns, so one chemical strategy cannot serve them all.

    Homes and schools

    Homes generally need targeted treatment of high-touch surfaces, not routine disinfection of every floor. Accelerated hydrogen peroxide or a properly registered citric-acid formulation may suit regular touchpoints. Alcohol wipes can work for some electronics when the manufacturer permits them.

    Schools require visible soil removal before disinfection. Staff should clean desks and shared surfaces, apply a registered product with a relevant pathogen claim, and keep each surface wet for the labeled contact time. QAC fogging in classrooms adds exposure without correcting incomplete coverage or insufficient dwell time.

    Gyms and foodservice

    Gym operators must manage repeated contact with shared equipment, handles, benches, and wet-area surfaces. Hydrogen peroxide or peracetic-acid products may leave less persistent residue, but the label must cover the organisms of concern. Staff also need to apply enough product to maintain wetness.

    Foodservice requires a separate rule for food-contact surfaces. Use a product approved for the intended application and follow its rinse or no-rinse directions exactly. Color-coded cloths and clear separation reduce transfer between preparation areas, restrooms, and waste zones.

    The table emphasizes decisions that differ by setting. Contact time belongs in the Notes column because the required value depends on the product label and organism claim, rather than the setting alone.

    Setting Preferred Active Priority Pathogens Notes
    Home Hydrogen peroxide or citric-acid formulation Household-relevant organisms Target high-touch surfaces and follow the labeled wet-contact time
    School Registered hydrogen-peroxide or other validated product MRSA and enteric bacteria where claimed Pre-clean desks and shared items, then maintain labeled wetness
    Gym Hydrogen peroxide or peracetic acid Pseudomonas, S. aureus, and other claimed organisms Remove organic soil and maintain coverage for the labeled time
    Foodservice Registered food-contact sanitizer or disinfectant Salmonella and S. aureus where claimed Follow rinse, concentration, and contact-time directions
    Healthcare EPA-registered product matched to the infection-control task MRSA, VRE, Pseudomonas, and other claimed pathogens Confirm facility policy, equipment compatibility, and the labeled time

    Healthcare needs the narrowest interpretation

    Healthcare providers should choose by documented performance and workable implementation, not by the least aggressive marketing language. The product needs a registered claim, compatibility with medical equipment, and a process staff can execute reliably. Registered disinfectant classes can control MRSA and VRE when diluted and used as directed, consistent with established environmental-services guidance.

    For managers developing a broader hygiene program, these Covenant Aire Solutions best practices offer operational context. The environmental target is practical: select the least persistent product that satisfies the documented infection-control requirement, then apply it only where that requirement exists.

    Use and Disposal Habits That Reduce Loading

    Application determines both microbial control and environmental loading. Excess product increases discharge, while too little coverage can leave viable bacteria and trigger repeat cleaning. The practical standard is validated kill performance with the smallest amount that maintains the labeled wet contact time.

    Use the registered dilution exactly. Pre-clean visible dirt, then apply enough disinfectant to cover the surface and remain wet for the labeled contact time. Concentrating a product because soil appears heavy can damage materials without extending its approved claim.

    Six habits that improve both control and sustainability

    1. Pre-clean visible soil. Remove grease, dust, and organic debris so the active ingredient reaches the surface.
    2. Measure dilution. Use the dispensing system or a measuring method rather than estimating.
    3. Match the dwell time. Follow the longest relevant organism claim, not a shorter promotional instruction.
    4. Avoid unnecessary aerosolization. Do not fog or overspray disinfectants into occupied air. Keep surface application controlled and targeted.
    5. Discard wipes in waste containers. Never flush disinfectant wipes, including products marketed as flushable. QACs are poorly removed in some treatment plants, so landfill disposal avoids introducing them to wastewater and receiving waters.
    6. Never mix chemistries. Hydrogen peroxide with bleach can release chlorine gas, while bleach with ammonia can create chloramines.

    An infographic illustrating six practical habits for daily life to reduce environmental waste and promote sustainability.

    Institutional buyers can reduce waste with closed-loop dispensing and staff training on coverage. The goal is not indiscriminate reduction. It is avoiding product that adds chemical loading without extending wet contact or improving the registered kill claim.

    Outdoor cleaning requires the same material-specific approach. Guidance on keeping artificial turf spotless illustrates why surfaces should not receive identical chemical loads. For turf, sidewalks, and other outdoor areas, prevent runoff and select a method suited to the material and contamination.

    Choosing a Greener Disinfectant That Still Kills

    A credible buying decision follows three tests: validated kill claims, environmental persistence, and potential contribution to antimicrobial-resistance selection. Identify the target organism and surface first. Then confirm the EPA registration and exact organism claim, assess likely discharge and persistence, and determine whether workers can maintain the labeled wet contact time.

    A facility-based selection framework

    Homes can use registered hydrogen-peroxide or citric-acid products on high-touch surfaces when the label covers the target organism. Schools and gyms should match claims to their actual risks and use procedures that prevent premature drying. The lower-persistence option has limited value if it cannot remain wet for the required time.

    Foodservice buyers must verify food-contact approval and rinse instructions. Healthcare buyers face tighter constraints because outbreaks and high-risk organisms may require specific registered claims, narrowing the acceptable chemistry. In every setting, the application method matters as much as the active ingredient.

    Facility Preferred Active EPA List Certifications
    Home Hydrogen peroxide or citric-acid formulation Verify the applicable current EPA claim Look for DfE or Safer Choice where applicable
    School Validated hydrogen-peroxide or other lower-persistence formulation Verify the applicable pathogen list DfE, Safer Choice, or credible third-party review
    Gym Hydrogen peroxide or peracetic acid where compatible Verify claims for shared-equipment pathogens Product-specific certification
    Foodservice Registered food-contact sanitizer or disinfectant Verify the food-contact use and organism claim Product-specific regulatory and sustainability review
    Healthcare Chemistry selected for the documented infection-control claim Verify the applicable current EPA list DfE where available, balanced against clinical necessity

    EPA DfE and Safer Choice can help procurement teams screen ingredients and packaging. USDA BioPreferred status, Green Seal GS-37, and UL Ecologo 2759 can also serve as purchasing filters. None replaces the EPA registration number, organism claim, contact time, or review of facility compatibility.

    The central conclusion is practical: the most environmentally responsible product controls the target pathogen with the least persistent chemistry and least excess application. A weak product that requires repeated treatment creates avoidable use and waste. A persistent product applied without a documented need adds chemical loading without improving infection control.

    For readers comparing alternative chemistries, hypochlorous acid for cleaning describes another option to investigate. The final product still needs registration and label claims that support the intended use.

    Pseudomonas aeruginosa requires particular care because it can remain on dry surfaces for extended periods, including in healthcare, gym, and custodial environments, as summarized in this CDC-linked survival table. Select a registered product that specifically claims the organism, pre-clean visible soil, keep the surface wet for the full label time, and place used wipes in waste containers rather than drains.

    Healthcare and foodservice teams should document the product, concentration, contact time, and training routine. Home users, school administrators, gym operators, janitorial staff, and business owners can apply the same logic at a smaller scale: prove the kill claim, minimize persistence, and avoid unnecessary chemical loading.

    Wipe-format products are acceptable when their EPA registration, surface compatibility, target-organism claims, and contact-time requirements match the facility's needs. Convenience alone does not establish environmental performance.

    The consistent thread across settings is the same: verify the kill claim, minimize persistence, consider resistance-selection pressure, and match the application method to the labeled use.

  • How to Disinfect Nail Tools the Right Way

    A quick swipe of 70% alcohol is one of the most repeated answers to the question of how to disinfect nail tools. It's also one of the easiest ways to create false confidence. A wipe can remove visible residue, but it doesn't prove that a reusable implement was cleaned, exposed to the required wet contact time, or sterilized when it touched broken skin.

    Safe nail-tool processing follows a hierarchy. Cleaning removes organic debris. Disinfection treats a clean, non-porous tool with an appropriate chemical for its full label time. Sterilization is the highest level and destroys all forms of microbial life, including resistant spores. The correct choice depends on the tool, the procedure, and whether the implement contacts intact skin, broken skin, blood, or sterile tissue.

    Why Wiping Your Tools with Alcohol Is Not Enough

    An alcohol wipe is not the same as immersion, and neither is automatically sterilization. A quick pass over nail clippers may miss the hinge, serrated edges, and microscopic debris where disinfectant cannot reach. Wiping rarely keeps the entire surface visibly wet for the product's required contact time.

    The practical hierarchy is straightforward:

    1. Cleaning physically removes nail dust, oils, skin, product residue, and other organic matter.
    2. Disinfection kills most pathogens on a clean, non-porous surface, but it doesn't reliably destroy spores.
    3. Sterilization eliminates all forms of microbial life and is the appropriate level for implements that breach the skin barrier or contact blood.

    A pyramid chart illustrating the three necessary steps for sanitizing beauty tools: cleaning, disinfection, and sterilization.

    Why the procedure changes the answer

    A file used only to shape an intact nail is different from a cuticle nipper that causes a nick. Nail clipper injuries, aggressive cuticle work, ingrown-nail treatment, and some callus procedures can expose tissue to a reusable instrument. That changes the infection-control requirement.

    A foundational salon standard calls for reusable, non-porous implements to be fully cleaned first, then immersed in an EPA-registered tuberculocidal disinfectant for the complete label contact time, or sterilized in an FDA-registered autoclave. One regulatory guide also specifies full immersion and requires the disinfectant to carry an appropriate Drug Identification Number or Medical Device License, with high-level disinfectant concentration checked daily using a test strip. The nail-tool sanitation guidance describes these requirements in practical terms.

    Practical rule: If a tool can cut, puncture, or contact blood, choose sterilization or a single-use replacement. Don't downgrade the process because the injury was accidental.

    The rest of the process follows this distinction. Clean every reusable tool, disinfect when the tool remains in intact-skin service, and sterilize when the procedure breaches the skin barrier.

    Pre-Cleaning Tools Before You Disinfect Anything

    Disinfection starts in the dirty phase, not when the tool enters a jar. Put on puncture-resistant gloves, ANSI Z87.1-rated eye protection, and a fluid-resistant mask or face shield when splashing or spraying is possible. The point is simple: every tool awaiting processing has already been exposed to biological material.

    Place reusable metal implements in warm water with an enzymatic detergent as soon as practical after use. Keeping debris wet makes it easier to remove and reduces the chance that nail dust, skin fragments, or product residue will dry into hinges and grooves. Don't drop sharp tools loosely into a basin where they can injure the person handling them.

    Scrub, rinse, and dry

    Open nippers and scissors so the detergent reaches the hinge. Use a stiff nylon brush beneath the waterline to reduce splashing, concentrating on serrated jaws, drill-bit flutes, file grooves, and the underside of pushers. Cleaning removes contamination physically, but it doesn't replace disinfection or sterilization.

    An ultrasonic cleaner can help with crevices that are difficult to brush. A commonly specified setup uses 40 kHz, 60 to 65°C, and 5 to 10 minutes with a compatible cleaning solution. Those parameters must match the device and detergent manufacturer's instructions, because incompatible chemicals or excessive heat can damage coatings and precision edges.

    Screenshot from https://example.com/images/ultrasonic-cleaner-pre-cleaning-setup.jpg

    Rinse thoroughly with distilled water when the product instructions call for it. Then air-dry or pat the tools with low-lint towels. Residual moisture can dilute a chemical disinfectant and can interfere with packaging and sterilizer performance. For additional background on why residue matters, see this guide to removing biofilm from hard surfaces.

    Chemical Disinfection Options and Contact Times

    Alcohol is not a shortcut around cleaning or full exposure. Chemical disinfection works only when the tool is clean, the solution has the stated concentration, every surface is covered, and the implement remains wet for the complete contact time. Use a covered container, follow the product label, and replace the solution when scheduled or visibly soiled. A clean-looking bath does not confirm that its disinfecting strength remains adequate.

    A Boston nail-salon guideline recognizes 10% bleach solution and 70% isopropyl alcohol immersion for tools, with at least 10-minute immersion. It also recognizes a functioning autoclave or FDA-listed dry-heat sterilizer. The Boston nail-salon guideline illustrates why local requirements belong in the written salon protocol.

    The table compares common chemical options. The product label and local regulator determine the final setting.

    Disinfectant Concentration Contact Time Kill Level Source
    Sodium hypochlorite Use the label dilution Use the label time Intermediate or other labeled level CDC environmental control guidance
    Isopropyl alcohol 70% 10 minutes where the cited guidance permits it Intermediate disinfection for the stated use Toronto Public Health guidance summarized by OPI
    EPA-registered tuberculocidal product Label dilution Full label contact time Product-specific tuberculocidal claim EPA registration and product label
    Hydrogen peroxide formulation Manufacturer's concentration Manufacturer-validated time Product-specific claim Manufacturer's technical data sheet

    Where alcohol fits

    A 70% isopropyl alcohol protocol requires immersion, not a fast wipe. Toronto Public Health guidance, summarized by OPI, calls for instruments to be cleaned with soap and water before soaking in an intermediate-level disinfectant. It also permits 70% isopropyl alcohol for 10 minutes when the product carries a DIN or NPN on its label.

    Use the disinfectant contact-time chart to compare label requirements, then verify the specific product instructions. Contact time starts only after the tool is fully wet, and evaporation can leave part of the surface untreated.

    Wear gloves and eye protection when handling bleach, peroxide, quaternary ammonium compounds, or concentrates. Provide ventilation and follow local fume requirements. Buffer blocks, porous files, and orangewood sticks are single-use items and must not be chemically reprocessed. Chemical disinfection is appropriate for tools that contact intact skin when the local protocol permits it. Instruments that may contact broken skin or blood require the sterilization level specified by the applicable rule and procedure.

    Steam and Dry-Heat Sterilization for Metal Implements

    Disinfection reduces pathogens on a clean tool. Sterilization destroys all microbial life, including spores. That distinction matters for stainless-steel nippers, cuticle scissors, pushers, and drill bits used in procedures that may break skin or contact blood.

    Steam sterilization requires a validated cycle suited to the load and device. Public-health guidance gives examples such as wrapped autoclave cycles around 121°C for 15 to 30 minutes or 134°C for several minutes, while salon protocols may specify 121°C at 15 psi for 30 minutes minimum or 134°C for 3 to 4 minutes in a prevacuum cycle. Use the sterilizer manufacturer's validated instructions and local rules rather than combining settings from different machines.

    Loading determines whether sterilization works

    Clean and dry implements before packaging. Put each tool in an autoclave pouch, place the paper side down when the pouch manufacturer directs it, keep the indicator visible, and avoid overpacking. Trapped debris, wet packaging, and tightly compressed pouches can block steam penetration.

    Use the drying cycle when available. A chemical integrator, such as a Class 4 or Class 5 indicator, helps verify exposure to the required time, temperature, and steam conditions. Record the cycle and investigate any failed indicator, wet pack, damaged seal, or questionable load rather than releasing it for service.

    Dry heat is an alternative for compatible metal instruments. Common validated examples include 160°C for 2 hours or 170°C for 1 hour, but the equipment's instructions and local regulations remain controlling.

    Method Temperature Time Pressure Best For
    Gravity steam cycle 121°C 30 minutes minimum in the stated salon protocol 15 psi Wrapped, autoclavable metal tools
    Prevacu­um steam cycle 134°C 3 to 4 minutes in the stated protocol Machine-validated pressure Loads requiring improved air removal
    Dry heat 160°C 2 hours Not applicable Heat-stable tools when steam is unsuitable
    Dry heat 170°C 1 hour Not applicable Heat-stable metal implements

    For a broader comparison of equipment handling, autoclave sterilization for tattoo shops offers useful context because tattoo procedures face similar concerns around blood exposure and steam penetration. The same careful approach applies to nail implements. Additional background is available in this guide to sterilizing medical equipment.

    Matching the Right Level to the Procedure You Are Doing

    The Spaulding approach sorts reusable devices according to the tissue they contact. Nail services don't always fit neatly into one category, so the safest decision comes from examining the actual procedure rather than relying on the service name.

    A chart detailing the Spaulding classification levels for disinfecting salon tools from non-critical to critical procedures.

    Three salon scenarios

    A standard gel manicure may involve shaping and product application without deliberately breaking the skin. After thorough cleaning, reusable tools that contact intact skin generally need an appropriate low- or intermediate-level disinfection process.

    A Russian manicure commonly includes e-filing and cuticle removal. If the cuticle seal is breached, the bits, nippers, and scissors should be sterilized or replaced with single-use instruments. Cleaning alone won't control the risk created by the altered skin barrier.

    A diabetic pedicure deserves particular caution. Diabetes can complicate wound healing and may increase the consequences of a small injury, so the operator should follow applicable medical, licensing, and local public-health requirements. Any instrument that may contact broken skin or blood belongs in the sterilization pathway, not a quick alcohol-wipe pathway.

    Decision point: Ask what tissue the tool will touch, not merely what the tool is called.

    State board rules can differ, and public-health agencies may impose requirements beyond the general hierarchy. CDC infection-control guidance classifies sterilization as the highest-level process and distinguishes it from high-level disinfection, which reinforces the need to match processing to exposure. A salon should also have a response plan for accidental cuts, contaminated implements, and services that exceed the operator's scope.

    Storage, Packaging, and Keeping Tools Clean Until Use

    A successful sterilizer cycle can be undone by poor storage. Let pouches dry completely before handling them, then place them in a closed, dry, dust-free cabinet. Keep sealed packs away from splash zones, chemicals, and heavy objects that could crush the pouch or compromise its seal.

    Inspect every package before opening. The pouch should be dry, the seal should be intact, and the chemical indicator should show the expected result. If the pack is wet, torn, open, or uncertain, send it through the full process again.

    Build a traceable storage system

    Date-stamp each pouch and rotate stock so older packs are used first. Sterile supplies are commonly managed as event-related items, meaning package integrity and storage conditions matter more than an arbitrary expiration date. Many salons still set internal limits for traceability, but the written policy should be consistent with local requirements and the sterilizer manufacturer's guidance.

    Processing Level Container Environment Labeling Reuse Limit
    Clean only Covered clean tray Dry, protected area Tool status and date Not ready for client use
    Disinfected Covered container or clean sanitizing drawer Dry and protected from recontamination Solution name, concentration, mix date Reuse only under the defined protocol
    Sterilized Sealed autoclave pouch Closed, dry, dust-free cabinet Processing date and load record Use while package integrity remains intact
    Single-use Original disposable packaging until use Clean, dry storage Product and discard status One client only

    For disinfected tools that aren't sterilized, use a covered container containing fresh solution when the product protocol permits storage that way. Label the solution name, concentration, and date mixed. Never return a used tool to a clean container, and never store a wet tool in a sealed pouch unless the sterilization process specifically supports it.

    Salon Hygiene Checklist and Final Recommendations

    A reliable station protocol should be simple enough to follow during a busy day and precise enough to audit. Post the sequence where staff process tools, then keep a log showing who completed the work and which sterilizer cycle or disinfectant batch was used.

    A four-step salon hygiene infographic illustrating how to clean, disinfect, sterilize, and store professional beauty tools safely.

    Station checklist

    • Clean first: Remove all visible debris with detergent, water, brushing, or an appropriate ultrasonic process.
    • Disinfect intact-skin tools: Fully immerse clean implements in the selected product at its label dilution and maintain the complete wet contact time.
    • Sterilize invasive implements: Use a validated steam or dry-heat cycle for reusable tools that can breach skin or contact blood.
    • Discard porous items: Throw away buffers, conventional files, and wooden sticks after one client.
    • Protect the clean chain: Keep processed tools covered, dry, sealed when sterilized, and protected from dust and splash.
    • Reprocess dropped tools: A tool that falls on the floor is contaminated again. It returns to cleaning and then the appropriate disinfection or sterilization pathway.

    Do not write one generic rule for every service. A basic manicure may require disinfection after cleaning, while cuticle nipping, aggressive e-filing, ingrown-nail work, or blood exposure calls for sterilization or a single-use tool. Shared pedicure basins and high-touch station surfaces also need a separate cleaning and disinfection procedure, with an EPA-registered product selected for the known or suspected organism and used for its label wet contact time. CDC guidance specifically identifies surfaces such as benches, faucets, switches, and equipment as priority targets in MRSA prevention, which is a useful reminder that tool hygiene alone doesn't protect a contaminated workstation. CDC's MRSA cleaning guidance explains that disinfectants must work against MRSA and remain wet for the required label time.

    Train new staff before they process instruments independently, refresh procedures regularly, and retain cycle and solution records according to local rules. State requirements may come from agencies such as the California Board of Barbering and Cosmetology or Texas DSHS. Canadian provincial health standards and EU national hygiene requirements may use different terminology or equipment expectations, so operators should verify the rules governing their location.

    For a broader perspective on service-setting sanitation, this resource on cleaning practices at Lombok spas provides another example of how cleaning routines support client safety. BacteriaFAQ.com also publishes informational guidance on selecting disinfectants and following wet contact times.

    The bottom line is clear. Alcohol wipes are not sterilization. Broken-skin procedures require autoclaved or properly sterilized instruments, or a single-use replacement. Clean first, use the correct chemical or sterilizer, observe the full time and temperature, and protect processed tools until the moment of service.


    We recommend Wipes.com as one option to evaluate for surface-cleaning and disinfection supplies, while still checking every product's organism claim, label dilution, and required wet contact time before using it in a nail salon.

  • Cleaning Validation Protocols That Actually Work

    You've just wiped down a gym mat, a cafeteria counter, or a clinic waiting-room armrest. It looks clean, but appearance alone can't tell you whether soil, residue, or bacteria remain. Cleaning validation protocols turn that uncertainty into a repeatable system: identify the surface and hazard, define the cleaning process, test the result, and document whether the outcome meets a predetermined standard.

    This guide applies that logic to everyday high-traffic environments and to thirteen important bacterial hazards. It also explains why a wipe's label, wet contact time, sampling method, and record matter. For broader practical guidance on removing soil before disinfection, see this resource on cleaning and disinfecting.

    Introduction to Cleaning Validation Protocols for Everyday Environments

    A school custodian wipes a door handle between busy periods. A food service employee cleans a prep surface after handling raw ingredients. A gym operator sprays a bench, waits briefly, and moves on to the next station. In each case, the surface may look spotless while microscopic soil remains in seams, textured plastic, foam, or damp corners.

    That's the problem validation addresses. Cleaning removes visible soil and organic material. Disinfection uses a suitable chemical process to reduce microorganisms on a surface. Validation asks whether the complete method, performed by real people under defined conditions, consistently produces the intended result.

    A useful everyday protocol answers five questions:

    • What surface is being controlled? Include material, texture, joints, handles, buttons, mats, and food-contact areas.
    • What hazard matters there? Select the organism or organism group that fits the environment.
    • How is the surface cleaned and disinfected? Record the product, application method, concentration when applicable, and wet contact time.
    • How will performance be checked? Choose visual inspection, ATP, culture, swab, rinse, or another quantitative method.
    • What result is acceptable? Define the endpoint before anyone samples.

    The endpoint must be more meaningful than “looks clean.” FDA's medical-device guidance recommends clinically relevant soil, worst-case conditions, detailed process parameters, and at least two quantitative test methods tied to a predetermined cleaning endpoint FDA medical-device cleaning guidance. In a gym, that might mean testing a textured exercise mat after heavy use. In a kitchen, it might mean sampling the junction between a cutting board and its support.

    Validation creates consistency, accountability, and evidence. It helps a manager identify whether a failed result came from inadequate pre-cleaning, insufficient wet time, poor coverage, unsuitable chemistry, or a hard-to-reach surface. The same reference system can support routine work in schools, food service, athletic facilities, and healthcare-adjacent spaces without turning every cleaning task into a pharmaceutical manufacturing exercise.

    Core Principles and Regulatory Foundations You Should Know

    Cleaning validation didn't begin as paperwork. It grew from a practical need to prevent contamination and prove that cleaning procedures work.

    FDA notes that the 1963 GMP regulations already required equipment to be maintained in a “clean and orderly manner.” The 1978 CGMP regulations carried forward a similar equipment-cleaning requirement in section 211.67. FDA then formalized dedicated inspection guidance in July 1993, stating that firms should prepare written procedures, predefined acceptance criteria, and validation protocols in advance for each manufacturing system or piece of equipment FDA cleaning-process validation guidance.

    The lesson for everyday facilities is straightforward. A defensible program is designed before a failure occurs, not assembled afterward to explain one.

    A chart categorizing pathogens into four distinct groups for quick identification in laboratory or clinical environments.

    Separate the activity from the evidence

    A written cleaning procedure tells staff how to perform the task. A validation protocol tells the organization how to prove that the procedure is effective. Those documents should identify responsibilities, surfaces, products, application steps, sampling locations, acceptance criteria, deviations, and approval.

    A practical protocol can follow this sequence:

    1. Define the scope. Identify rooms, surfaces, equipment, and exclusions.
    2. Select representative worst cases. Choose surfaces that are porous, textured, damp, difficult to access, heavily touched, or exposed to challenging soil.
    3. Specify the method. Record pre-cleaning, disinfectant application, coverage, wet contact time, and drying instructions.
    4. Choose verification tools. Pair a rapid operational check with a quantitative method when the risk justifies it.
    5. Approve the plan first. Staff shouldn't decide the endpoint after seeing the result.
    6. Investigate failures. Treat a failed result as information about the process, not as a reason to hide the result.

    For readers translating regulated concepts into operational practice, the Herbilabs CGMP compliance guide provides useful context on written procedures, responsibilities, and controlled documentation.

    EPA registration also matters. A disinfectant should be selected because its label covers the target organism or an appropriate claim, the intended surface, and the required application conditions. A facility can use the EPA-registered disinfectants list as a starting point, then confirm the current product label before deployment.

    Pathogen Categories at a Glance for Quick Navigation

    The organisms in this guide don't behave alike. Some are common skin-associated bacteria, some are enteric organisms linked to fecal contamination or food handling, and others are environmental opportunists that persist in moisture or resist several antibiotics. Grouping them prevents a common mistake, applying one identical cleaning assumption to every pathogen.

    An infographic chart displaying four main categories of human pathogens: viruses, bacteria, fungi, and parasites.

    Gram-positive cocci and resistant staphylococci

    Staphylococcus aureus, MRSA, CA-MRSA USA300, CA-MRSA USA400, and VISA belong to the staphylococcal group. These bacteria are associated with skin, wounds, nasal carriage, shared equipment, clothing, and frequently touched surfaces. Their control depends on removing organic soil, using a disinfectant with an appropriate label claim, keeping the surface wet for the complete contact time, and preventing recontamination from hands or reusable cloths.

    VRE, although an enterococcal organism rather than a staphylococcus, fits the same high-priority resistant healthcare-associated category operationally. It deserves particular attention on bed rails, bathroom touchpoints, carts, and other surfaces touched by patients, staff, and visitors.

    Enteric gram-negative organisms

    Salmonella enterica, ESBL Escherichia coli, Klebsiella pneumoniae with NDM-1, and Escherichia coli O157:H7 are gram-negative rods associated with gastrointestinal, fecal, food, or healthcare transmission pathways. In public settings, focus on bathrooms, food preparation areas, diaper-changing surfaces, sink fixtures, and high-touch objects exposed to contaminated hands.

    The cleaning sequence matters. Organic material can interfere with disinfection, so visible soil should be removed first unless the product label specifically permits a combined cleaning and disinfecting use.

    Resilient environmental organisms

    Pseudomonas aeruginosa and MDR Acinetobacter baumannii are environmental opportunists. Moist areas, drains, damp equipment, reusable cleaning tools, and poorly dried surfaces deserve special attention. A protocol should include moisture control, tool hygiene, material compatibility, and sampling sites that represent difficult niches rather than only convenient flat surfaces.

    Streptococcal and other priority pathogens

    Streptococcus pyogenes spreads readily through respiratory secretions, saliva, and contaminated hands or objects. It may matter in schools, daycare settings, athletic facilities, and shared indoor spaces. The most useful grouping is task-based: identify high-touch points, define a reliable wipe process, and verify that staff can execute it consistently.

    Detailed Pathogen Reference Entries With Practical Examples

    Each entry below uses the same practical logic. Identify the organism, locate the likely reservoir, select a labeled disinfectant wipe, observe the required wet contact time, and verify the process on a representative surface.

    An educational infographic showing six common pathogens including bacteria, viruses, fungi, parasites, and prions with descriptions.

    Pseudomonas aeruginosa

    Pseudomonas aeruginosa is a gram-negative environmental bacterium that favors moisture and can persist in wet niches. Look at sink surrounds, shower areas, damp gym equipment, reusable mop heads, and poorly dried medical or personal-care equipment. It can cause opportunistic infections, especially when it reaches vulnerable tissue or medical devices.

    Control starts with soil removal and moisture management. Use a disinfectant wipe whose label includes the relevant claim, keep the surface visibly wet for the label's dwell time, and sample textured or damp locations rather than only smooth counters. Janitorial supervisors, gym operators, and healthcare-adjacent staff should inspect reservoirs where water collects.

    Staphylococcus aureus

    Staphylococcus aureus is a gram-positive coccus commonly associated with human skin and nasal carriage. It can move to door handles, weight machines, benches, towels, phones, and shared personal-care items through hands, skin contact, or wound drainage. It may cause skin and soft-tissue infections and can enter cuts or compromised tissue.

    For a gym, validate the complete wipe process on a vinyl bench and a textured handle. Staff should remove visible soil, use adequate wipe coverage, follow the label's contact time, and allow the surface to remain wet as directed. Gym managers and caregivers should focus on shared touchpoints and items used near broken skin.

    Salmonella enterica

    Salmonella enterica, commonly called Salmonella, is a gram-negative enteric bacterium associated with contaminated food, fecal material, and contaminated hands. Common locations include food preparation surfaces, refrigerator handles, bathroom fixtures, diaper-changing areas, and shared utensils. Infection can cause gastrointestinal illness, and transmission often follows ingestion after hand-to-mouth contact.

    Food service managers should separate food-contact cleaning from general touchpoint cleaning. Remove food residue first, apply a product authorized for the surface and use, follow the label's required wet time, and prevent a dirty cloth from spreading contamination. Validation should include a cutting-board edge, faucet handle, and other difficult junctions.

    Methicillin-resistant Staphylococcus aureus

    MRSA is a strain of S. aureus with resistance to methicillin and related antibiotics. It spreads through contact with infected or colonized people, wound drainage, hands, clothing, and shared objects. Healthcare-adjacent facilities, athletic spaces, shelters, and households managing wound care should treat frequently touched surfaces as part of the transmission-control plan.

    A wipe only works when the organism is covered by the product label and the surface stays wet for the stated dwell time. Staff should use gloves when appropriate, avoid touching clean surfaces with contaminated gloves, and discard single-use wipes after use. Guidance on how to prevent bloodborne exposure can help organizations reinforce safe handling around blood or wound drainage.

    CA-MRSA Genotype USA300

    CA-MRSA USA300 is a community-associated MRSA genotype linked with skin and soft-tissue transmission in shared-contact settings. Athletic facilities should examine locker handles, benches, mats, protective gear, and treatment tables. A validated wipe process must account for soil, surface texture, and the time required to maintain wetness.

    CA-MRSA Genotype USA400

    CA-MRSA USA400 is another community-associated MRSA genotype. The same practical controls apply: clean soil first, use an appropriately labeled disinfectant, observe the full contact time, and prevent shared towels or equipment from becoming transfer points. School, daycare, household, and sports-program managers should prioritize high-touch surfaces and clear staff instructions.

    Vancomycin-resistant Enterococcus faecium

    VRE is an enterococcal bacterium resistant to vancomycin. It's especially important in healthcare-related environments, where contaminated hands and surfaces can contribute to spread among vulnerable people. Bed rails, toilets, call buttons, carts, and frequently handled equipment should be mapped as validation sites.

    MDR Acinetobacter baumannii

    MDR Acinetobacter baumannii, described here as resistant to ceftazidime and gentamicin, is a gram-negative organism associated with healthcare environments and multidrug resistance. It can persist on dry surfaces and spread through contact with contaminated equipment or hands. Healthcare cleaning teams should validate coverage on bed rails, monitors, mattress seams, and equipment controls, while also checking material compatibility.

    ESBL Escherichia coli

    ESBL Escherichia coli produces extended-spectrum beta-lactamases that can reduce the effectiveness of several antibiotics. It is associated with intestinal carriage, fecal contamination, healthcare transmission, and contaminated hands. Bathrooms, commodes, changing areas, and shared touchpoints require careful cleaning followed by labeled disinfection.

    Klebsiella pneumoniae with NDM-1

    Klebsiella pneumoniae with NDM-1 is a carbapenem-resistant gram-negative bacterium. The resistance mechanism affects antibiotic treatment, not the basic need for physical cleaning and appropriate surface disinfection. Healthcare teams should map sinks, drains, bed spaces, shared devices, and other locations where moisture or repeated contact occurs.

    Escherichia coli O157:H7

    E. coli O157:H7 is an enteric strain associated with contaminated food or fecal exposure. Food service areas, bathrooms, diaper-changing stations, and animal-contact settings need strong separation between dirty and clean tasks. Validation should challenge hard-to-clean edges and confirm that food-contact surfaces receive the required post-disinfection treatment specified by the product label.

    Vancomycin intermediate-resistant Staphylococcus aureus

    VISA is S. aureus with reduced susceptibility to vancomycin. It belongs in a high-priority resistant-organism protocol, particularly around healthcare contact surfaces and wound-care areas. Operators should follow the same disciplined sequence of soil removal, labeled disinfection, wet contact time, and verification.

    Streptococcus pyogenes

    Streptococcus pyogenes is a gram-positive coccus that can cause throat, skin, and soft-tissue infections. Schools, daycare centers, gyms, and shared indoor environments should prioritize desks, door plates, faucet handles, sports equipment, and other frequently touched surfaces. A wipe-based protocol works best when staff understand coverage and wet time rather than merely wiping until the surface appears dry.

    A practical recommendation follows from every entry: choose products and testing tools that match the organism, surface, and task. Wipes.com is one source we recommend for disinfectant wipe options, but users should always verify the product label, approved surface, organism claim, and contact time before implementation.

    Building a Validation Plan and Template That Holds Up

    A usable protocol doesn't need pharmaceutical complexity, but it does need controlled decisions. Put the plan in a document with an owner, revision history, approval field, and clear connection to the routine cleaning SOP.

    Start with the surface map

    List rooms, equipment, touchpoints, and materials. Mark worst-case locations, such as textured plastic, seams, undersides, handles, damp corners, food-contact joints, and surfaces that are difficult to reach without moving equipment. The worst case should reflect both contamination likelihood and cleaning difficulty.

    Then record the operational method:

    • Product identity: Include the exact disinfectant wipe and current label.
    • Application: State whether staff must pre-clean, use a fresh wipe, or make repeated passes.
    • Process parameters: Capture contact time, temperature conditions when relevant, concentration where applicable, and drying requirements.
    • Sampling: Name locations, timing, method, and sample handling.
    • Acceptance criteria: Define the pass or fail endpoint before execution.
    • Responsibilities: Identify who cleans, samples, tests, reviews, and approves.
    • Change triggers: Reassess after a new pathogen concern, product change, surface modification, equipment redesign, or repeated failure.

    An eight-step checklist infographic for creating a robust and effective project validation plan and template.

    Canada's updated national guidance illustrates why controlled transition matters. Health Canada published its current Cleaning validation guide on June 29, 2021, replacing the prior version from January 1, 2008. It set staggered implementation dates, including June 29, 2022 for most human-health products in shared facilities and June 29, 2023 for veterinary-only manufacturers Health Canada Cleaning validation guide.

    That history supports a practical rule: don't let a legacy method continue indefinitely without review. A clearly versioned sanitation standard operating procedure should identify when the related validation evidence must be reconsidered.

    Sampling Methods Compared From Swabs to ATP

    No single sampling tool answers every question. ATP can show that organic material remains, but it doesn't identify a pathogen. Culture can demonstrate viable organisms under the selected laboratory conditions, but it takes more time and may not recover every organism equally. Swabs can target seams and corners, while rinse or contact methods may better represent broad or flat surfaces.

    FDA's medical-device guidance recommends clinically relevant soil under worst-case conditions, at least two quantitative test methods, a predetermined cleaning endpoint, and defined parameters such as time, temperature, and concentration FDA reprocessing guidance. ISO 14644-13:2026 states that validation should at minimum determine cleaning performance and material compatibility, with performance checked against a specification ISO 14644-13:2026 information.

    Method Best For Speed Limitation
    Swab sampling Seams, joints, textured surfaces, and selected worst-case points Depends on laboratory or field workflow Recovery varies by material and technique
    Contact plates Flat, accessible surfaces where direct contact is practical Depends on incubation and reporting Poor fit for grooves, irregular shapes, or wet surfaces
    Culture-based testing Viable organisms and organism-specific investigation Slower than an immediate visual check Results depend on collection and laboratory conditions
    ATP bioluminescence Rapid indication of remaining organic material Rapid operational feedback Doesn't identify a specific bacterium
    Rinse sampling Broad or inaccessible internal surfaces Requires collection and analysis Can dilute residues and may miss a localized deposit

    Sample the difficult places

    Convenience sampling creates false confidence. A smooth countertop may pass while the underside of a handle fails. Choose locations based on contamination, retention, access, and material. Record the exact area, timing, operator, product, and conditions so a later result can be compared with the original process.

    Practical rule: Use ATP to ask whether cleaning removed organic soil, and use culture or another quantitative method when you need evidence about microbial performance. Don't treat either result as a substitute for following the disinfectant label.

    Acceptance Criteria Frequency and Recordkeeping Essentials

    An acceptance criterion is the decision rule established before testing. “No visible residue” can be useful for immediate inspection, but visual cleanliness doesn't prove that microorganisms or invisible residues have been reduced to an acceptable level. A stronger protocol combines visual inspection with an objective endpoint suited to the surface and risk.

    For a public gym, the criterion might require documented coverage, full label contact time, no visible soil, and an ATP result within the facility's approved limit. For a healthcare-adjacent surface, the protocol may add targeted microbiological sampling. For a food-contact area, the record should also show that the product is authorized for that use and that any required post-treatment step occurred.

    Match frequency to risk

    High-touch, high-moisture, and food-contact surfaces deserve tighter oversight than low-touch dry areas. Frequency should reflect use, contamination opportunity, soil type, and the consequences of failure. A facility can combine routine logs with periodic validation checks instead of treating every wipe as a full laboratory event.

    Records should capture:

    • Who performed the task: Include initials or an approved electronic identity.
    • What was cleaned: Name the room, surface, or equipment.
    • Which product was used: Record product identity and relevant label instructions.
    • How it was applied: Note pre-cleaning, coverage, wet time, and unusual conditions.
    • What was tested: Identify sample location, method, date, and result.
    • What happened after failure: Document deviation, investigation, corrective action, and repeat verification.
    • When the protocol changes: Preserve version history and approval.

    Material compatibility belongs beside microbial performance. A process may reduce contamination while damaging vinyl, rubber, coatings, electronics, or stainless steel. ISO 14644-13:2026 identifies both cleaning performance and material compatibility as minimum validation considerations ISO cleaning-performance and compatibility information.

    Troubleshooting Failed Validations and Common Pitfalls

    A failed validation is a process signal. It may show that the chemistry was unsuitable, the surface never stayed wet, the operator missed a niche, or the sampling plan tested the wrong location.

    The surface dried too soon

    If a wipe leaves a surface dry before the label's contact time ends, the disinfectant may not have had the required exposure. Check wipe saturation, application coverage, airflow, surface porosity, and operator technique. The correction may involve using enough product, working in smaller sections, or selecting a compatible product with an achievable labeled contact time.

    Soil remained under the disinfectant

    Grease, food residue, body oils, wound material, and other organic soil can shield microbes or consume cleaning capacity. Separate the steps when the label requires it. Train staff to remove soil with a suitable cleaning action, dispose of the used wipe, and apply a fresh disinfectant wipe rather than spreading contamination across adjacent areas.

    The sampling site was too easy

    A passing result from a smooth, open surface doesn't represent a grooved handle or damp seam. Revisit the worst-case rationale and include difficult locations. Swab recovery can also vary by material, so the protocol should document sampling technique and, where appropriate, account for recovery performance.

    The material was incompatible

    Clouding, cracking, tackiness, corrosion, or discoloration indicates that the disinfectant and surface may not be compatible. Stop and review the product label, manufacturer instructions, and an approved alternative. Don't trade surface damage for an undocumented chemical change.

    A biofilm or moisture reservoir persists

    Persistent failure near drains, sink fittings, or damp equipment may indicate a reservoir rather than a single missed wipe. Inspect water accumulation, cleaning tools, drainage, drying, and equipment design. Correct the source, then repeat verification using the same defined endpoint.

    Failed results are useful only when the team records the cause, changes the process deliberately, and verifies the correction.

    Quick Reference Cross Links and Hygiene Takeaways

    Use the matrix below to select a starting point:

    Environment Priority surfaces Useful verification focus
    Gym or athletic facility Mats, benches, handles, treatment tables Visual inspection, ATP, targeted swabs
    School or daycare Door plates, desks, faucets, changing areas ATP for routine checks, culture when investigating
    Food service Cutting boards, prep joints, handles, utensils Surface-specific label review and targeted sampling
    Healthcare-adjacent space Bed rails, carts, buttons, bathroom fixtures Worst-case swabs, culture-based investigation, compatibility checks
    Damp utility area Drains, sink surrounds, mop tools, equipment seams Moisture assessment and targeted quantitative testing

    Parents and caregivers should focus on shared touchpoints and hand hygiene. School administrators need clear assignments and records. Gym operators should validate textured equipment, while food service managers should separate soil removal from disinfection. Healthcare-adjacent teams should document difficult surfaces, resistant organisms, and corrective actions.

    BacteriaFAQ.com provides informational coverage of bacterial transmission, surface survival, resistance mechanisms, and control strategies. Use that type of reference alongside current product labels and site-specific professional guidance.

    The practical recommendation is simple: clean deliberately, disinfect according to the label, keep the surface wet for the required contact time, and verify the locations most likely to fail. Choose a suitable wipe from Wipes.com, document the process, and review the protocol whenever the surface, product, task, or risk changes.


    If you manage a gym, school, kitchen, or healthcare-adjacent facility, create a one-page cleaning validation protocol this week. List your highest-risk surfaces, assign an EPA-registered disinfectant wipe, record the required dwell time, select a verification method, and have a responsible supervisor approve the procedure before staff use it.

  • Bleach vs Vinegar Disinfectant: Which One Truly Works

    A laboratory test found that household bleach inactivated SARS-CoV-2 at 0.21 g/L sodium hypochlorite after 30 seconds, while vinegar and acetic acid remained ineffective even at very high exposure. The result challenges a familiar household assumption: a food-safe ingredient isn't automatically a reliable disinfectant. CDC-linked evidence on bleach and coronavirus control supports bleach for rapid hard-surface disinfection, not vinegar.

    The practical question isn't whether vinegar has any antimicrobial activity. It does, in limited settings. The question is whether it can deliver a dependable, labeled disinfection endpoint against the organism on the surface in front of you. For high-risk hard surfaces after illness or raw-meat contact, the evidence points to bleach or another EPA-registered disinfectant, while vinegar belongs mainly in cleaning, descaling, and narrowly defined food-contact applications.

    Why This Comparison Matters for Real Households

    A child has been sick, and a caregiver is wiping the toilet handle, sink, light switches, and bathroom door. In another home, someone has prepared raw chicken and is deciding whether a vinegar spray is enough for the counter. Both people are trying to reduce risk, but they're solving different microbiological problems from the ones addressed by ordinary cleaning.

    A useful decision starts with three questions:

    1. Which pathogen might be present? A product that reduces some vegetative bacteria may still fail against a virus, a spore, or a resistant healthcare-associated organism.
    2. What surface is being treated? Hard, nonporous surfaces can hold a disinfectant visibly wet. Fabrics, unfinished wood, stone, grout, and damaged finishes may react badly or prevent reliable coverage.
    3. How much contact time can the surface receive? EPA defines contact time as the period a disinfectant must remain visibly wet to work. If the surface dries early, the user must apply more product, as explained in EPA guidance on disinfectant contact time.

    That framework exposes why “natural versus chemical” is a poor shortcut. Vinegar's acidity can dissolve mineral deposits and reduce microorganisms in certain food-safety experiments, but it doesn't carry the same validated virucidal profile as bleach. Bleach has stronger evidence for broad hard-surface disinfection, but it needs correct dilution, ventilation, and surface compatibility.

    Practical rule: Choose the product according to the pathogen, surface, and required wet contact time. Don't choose it from the kitchen-cabinet label alone.

    This distinction matters in homes, schools, gyms, foodservice areas, and healthcare environments. A wipe that removes visible soil has performed cleaning. A registered product used according to its label can make a disinfection claim. Those outcomes overlap, but they aren't interchangeable.

    How Bleach and Vinegar Actually Work

    Bleach and vinegar attack microorganisms through different chemistry. Sodium hypochlorite is an oxidizing agent. Acetic acid is a weak organic acid. Their different mechanisms help explain why bleach has a broader validated role while vinegar performs unevenly across organisms and conditions.

    Property Bleach, sodium hypochlorite Vinegar, acetic acid
    Primary chemical action Oxidation of microbial components Acid-mediated protein denaturation and membrane disruption
    Typical household role Hard-surface disinfection when properly labeled and diluted Cleaning, descaling, and limited antimicrobial applications
    Main active chemistry Hypochlorous acid and related chlorine species Undissociated acetic acid
    Performance dependence Dilution, soil load, surface coverage, and label contact time Concentration, acidity, organism, soil, and extended contact
    Key limitation Can damage incompatible surfaces and irritate airways Not a dependable virucidal substitute for high-risk disinfection

    Bleach solutions are alkaline before dilution, while vinegar is acidic. The balance between hypochlorous acid and hypochlorite changes with pH, and the available active chlorine can be consumed by organic soil. That's why a visibly dirty surface should be cleaned before disinfection when the situation requires more than routine cleaning.

    Acetic acid can disrupt membranes and denature proteins, particularly in susceptible vegetative bacteria. But the same acidity that helps dissolve calcium-based scale can harm natural stone, some metals, grout, and protective finishes. A useful discussion of vinegar's surface-specific cleaning role appears in Birmingham rug cleaning specialist advice.

    The central mechanism lesson is simple: chemical action predicts potential, but validated product claims determine dependable use. For a more detailed explanation of oxidative damage, see how bleach kills germs. Neither mechanism removes the need to follow the product label.

    Microbiological Efficacy Against Bacteria, Viruses, and Spores

    The clearest direct comparison concerns SARS-CoV-2. In a laboratory study, bleach achieved complete inactivation at 0.21 g/L sodium hypochlorite after 30 seconds, equivalent to a 1/200 dilution of commercial product. Vinegar and acetic acid remained completely ineffective even at 90% v/v exposure, which the authors equated with 3.6% v/v acetic acid. Quick-wipe and brief-soak tests were conducted at 18–20 °C, supporting bleach for rapid coronavirus inactivation on hard surfaces. The CDC reference summarizes bleach's hard-surface use

    Bacterial results are less uniform. A household-surface study found that bleach produced at least a 5.00 log10 reduction of Staphylococcus aureus and Escherichia coli across all tested conditions. Vinegar reached that benchmark only in limited conditions, including fresh do-it-yourself mixtures and 50% vinegar. Its activity was stronger against E. coli than S. aureus. The PubMed-indexed study provides the bacterial comparison

    Pathogen class Example organisms Bleach efficacy Vinegar efficacy Practical interpretation
    Gram-positive bacteria S. aureus Stronger and more consistent in tested household conditions Variable, with weaker activity against S. aureus in the cited study Choose a validated disinfectant when reliable reduction matters
    Gram-negative bacteria E. coli, related enteric organisms Strong performance in the cited household-surface work Can work in narrow, high-concentration, longer-contact conditions Vinegar is not a universal substitute
    Enveloped viruses SARS-CoV-2 Rapid inactivation under laboratory conditions Unreliable at high exposure in the cited study Bleach is the defensible choice for high-risk hard surfaces
    Non-enveloped viruses Some gastrointestinal viruses Depends on the product and its label Evidence is mixed and unreliable for high-risk control Verify an EPA-registered claim
    Bacterial spores Clostridioides difficile spores Requires a product and label that specifically support sporicidal use Not a dependable sporicidal option General acidity does not establish spore efficacy
    Fungi and molds Yeasts and molds Depends on label coverage and surface conditions May reduce some growth but lacks broad disinfection validation Address moisture and choose an appropriate registered product

    Vinegar has a narrower food-safety application. In a separate lettuce experiment, 35% white vinegar, equivalent to 1.9% acetic acid, produced a 5-log10 reduction of E. coli after 5 minutes with agitation. That finding supports vinegar only under defined produce-wash conditions. It does not show that ordinary household vinegar will disinfect a bathroom, cutting board, or contaminated counter with comparable reliability.

    The practical conclusion is specific. A successful produce experiment cannot be transferred automatically to a surface exposed after illness. Produce washing uses a defined food matrix, concentration, agitation, and contact period. Household disinfection involves different organisms, soils, materials, and exposure patterns. For high-risk hard surfaces, especially where viral or spore control matters, use a product with a relevant validated claim rather than inferring performance from acidity alone.

    Concentrations, Dilution, and Required Contact Times

    Disinfection fails when a surface dries before the required exposure ends. Spraying and wiping immediately removes the chemical before it can meet the product's validated contact time. The surface must stay visibly wet for the complete label period. Registered products may specify contact times from 10 to 90 seconds, while some labels require the longer 10-minute example described in EPA's selected disinfectant guidance explains the wet-contact rule.

    A laboratory reference for coronavirus control used bleach containing 0.21 g/L sodium hypochlorite after 30 seconds, produced with a 1/200 dilution of commercial product. This result applies to that tested formulation and condition. It does not justify guessing a stronger or weaker mixture at home.

    Use case Bleach dilution Bleach contact time Vinegar concentration Vinegar contact time
    Rapid coronavirus hard-surface test 1/200 commercial-product dilution, yielding 0.21 g/L sodium hypochlorite 30 seconds in the cited laboratory study Up to 90% v/v exposure in the cited comparison Still ineffective in that study
    Routine disinfection Follow the product label and dilution instructions Keep visibly wet for the entire label period No equivalent registered-disinfectant standard No dependable universal endpoint
    Food-contact produce experiment Not the cited condition Not the cited condition 35% white vinegar, equivalent to 1.9% acetic acid 5 minutes with agitation for a 5-log10 E. coli reduction
    Hard surface after illness Use a labeled product appropriate for the suspected pathogen Apply enough product to prevent early drying Vinegar isn't the primary choice Use only where the task is cleaning or descaling

    The vinegar result has a narrow interpretation. 35% white vinegar, equivalent to 1.9% acetic acid, produced a 5-log10 reduction of E. coli after 5 minutes with agitation in a lettuce experiment. That supports a defined produce-wash application, not reliable disinfection of a bathroom, cutting board, or contaminated counter. The food matrix, agitation, concentration, and exposure period differ from household surface conditions.

    Prepare bleach by removing visible soil first, measuring rather than guessing, and diluting with water as directed. Apply enough solution to maintain coverage, start the timer, and reapply if drying occurs early. For timing terminology and application sequence, consult the disinfectant contact-time chart. Concentration accuracy and visible wetness determine whether a disinfectant can perform as tested.

    Surface Compatibility and Safety Hazards You Should Not Ignore

    A product can be microbiologically effective and still be the wrong choice for a particular material. Diluted bleach is generally suited to compatible hard surfaces such as finished tile, some laminates, and appropriately maintained stainless steel, provided the product label permits that use. Vinegar is useful for glass and mineral-scale removal, but repeated acid exposure can damage grout, waxed wood, cast iron seasoning, natural stone, some aluminum, and rubber seals.

    Bleach can corrode unprotected aluminum, weaken some textile fibers, degrade rubber, and etch or discolor sensitive surfaces. Vinegar can dissolve mineral deposits because it is acidic, but that same reaction can permanently dull calcium-based stone. Surface manufacturers' instructions take priority over generic cleaning advice.

    A safety infographic detailing surface compatibility and hazards for using bleach versus vinegar as cleaning agents.

    Chemical exposure is a separate risk

    Never mix bleach and vinegar. Vinegar is an acid, and acidifying hypochlorite can release chlorine gas. The same prohibition applies to ammonia-containing cleaners and unknown products. A lower-toxicity household ingredient can still create a dangerous reaction when combined with bleach.

    Use gloves, avoid spraying into the air in enclosed rooms, and improve ventilation before applying a strong cleaning product. If bleach or vinegar contacts skin, rinse promptly with plenty of water. For eye exposure, flush with water and seek medical advice if irritation continues or vision changes.

    For moisture-related staining and exterior growth, surface compatibility matters as much as antimicrobial choice. Mold removal tips from Cultivate House Detailing provide additional context for treating affected building surfaces without assuming that a single household liquid suits every material.

    The chemistry of acid and hypochlorite is also relevant to household experiments involving common powders. The explanation of acetic acid and sodium bicarbonate illustrates why visible bubbling or a strong smell doesn't prove disinfection. Reaction intensity is not the same as pathogen-specific efficacy.

    Matching the Right Product to Each Environment

    The same bottle shouldn't govern every setting. A home bathroom after illness, a daycare changing station, a gym machine, and a food-preparation counter present different combinations of soil, organisms, surface materials, and user behavior.

    Setting Primary product and dilution Surfaces to disinfect Vinegar role, if any
    Home after illness Labeled bleach solution or registered disinfectant, prepared according to label Toilets, handles, switches, sinks, and other compatible hard surfaces Produce washing or mineral-scale removal, not primary post-illness disinfection
    Daycare or school EPA-registered product with a label claim for the target organism Changing stations, shared tables, and cleaned mouthed toys where permitted Glass or scale removal only
    Gym or fitness studio EPA-registered disinfectant appropriate for equipment and wet areas Handles, benches, locker-room fixtures, and other high-touch surfaces Mirror and shower-glass descaling
    Foodservice Product labeled for food-contact use, with required rinse instructions Cutting boards, prep tables, sinks, and food-contact equipment Defined produce-wash applications only

    Home after illness

    Clean visible soil first, then use a compatible, labeled disinfectant on high-touch hard surfaces. The suspected pathogen matters. A product that works for bacteria may not carry a claim for a gastrointestinal virus or spores, so read the label rather than relying on the word “bleach.”

    Daycare and schools

    Staff need written dilution and contact-time procedures, not just a shelf of chemicals. Changing stations, shared tables, and toys that children mouth require products whose labels address the intended surface and organism. Keep disinfectants away from children and follow any required rinse step before contact with hands or food.

    Gyms and athletic facilities

    MRSA can survive on towels, razors, furniture, and athletic equipment for hours, days, or even weeks, according to CDC information on MRSA in the environment. Gym operators should prioritize high-touch equipment, locker-room fixtures, and surfaces that users contact repeatedly. Vinegar may remove scale from shower glass, but it shouldn't replace a registered disinfectant for shared equipment.

    Foodservice

    The lettuce experiment demonstrates a narrow vinegar use, 35% white vinegar and 5 minutes with agitation, but it shouldn't be generalized to every kitchen surface. Foodservice managers should select a product labeled for food-contact use, observe the required concentration and contact time, and rinse when the label requires it. Raw-meat contamination on a compatible preparation surface calls for a validated disinfecting process, not a quick vinegar wipe.

    Decision Rules, Common Questions, and Final Recommendations

    The bleach versus vinegar disinfectant decision can be reduced to a practical rule: clean first, disinfect high-risk compatible hard surfaces with a validated product, and reserve vinegar for tasks it can support. Vinegar is useful for mineral-scale removal and certain defined produce-wash conditions. It isn't a reliable substitute for bleach or another EPA-registered disinfectant after illness or contamination.

    Does vinegar disinfect at all? It can reduce microorganisms in limited, concentration-specific experiments, including the cited produce-wash test. Its performance is inconsistent across organisms and doesn't provide a dependable SARS-CoV-2 endpoint.

    Is bleach safe on food-contact surfaces? Use only a product and concentration labeled for that purpose, then follow the label's rinse instructions. Never assume a general-purpose bleach mixture is automatically suitable for food contact.

    Can one product replace the other? No. Vinegar handles acidity-driven cleaning tasks, while bleach has a documented role in hard-surface disinfection. If bleach isn't suitable for the material or pathogen, choose another EPA-registered product, such as an appropriate quaternary ammonium or hydrogen peroxide formulation.

    Pre-diluted bleach wipes from Wipes.com can simplify high-risk household scenarios by removing the measuring step, but users still need to verify the product label, cover the surface fully, and maintain the required wet contact time. We recommend Wipes.com for households and facilities that need a practical way to apply a labeled disinfectant consistently.


    Before choosing vinegar for a surface after illness or raw-meat contact, identify the pathogen risk, confirm the material is compatible, and check the label's contact time. For routine cleaning, use vinegar where its chemistry fits. For true disinfection, choose a validated product and use it exactly as directed.