A kitchen drain usually asks for attention in the same predictable way. Water starts pooling around the strainer. A sour smell hangs over the sink even after the dishes are done. You flush it, maybe pour in something fizzy, and it seems better for a day or two. Then the smell comes back.
That cycle happens because many drain problems aren't just blockages. They're surface-growth problems inside the pipe. Grease, soap residue, food particles, and moisture create a sticky lining where microbes settle, feed, and keep producing odor. If you only punch a hole through the center of that buildup, the drain may run, but it still isn't clean.
A useful approach to how to clean kitchen drains treats the drain as both plumbing and hygiene. You need to restore flow, remove the residue feeding the problem, and reduce the microbial film that keeps returning.
Your Kitchen Drain Is More Than Just a Pipe
A kitchen drain isn't an empty tube that only matters when it clogs. It's a wet, nutrient-rich surface that catches grease aerosols, detergent residue, food starches, proteins, and fine particles washed off plates and cutting boards. That combination makes it an ideal place for slime layers to form along the pipe wall and around the drain opening.

Consumer Reports notes that kitchen sinks can carry a heavy microbial burden. It cites an NSF study of college-student homes in which the kitchen sink drain was the third germiest item tested, and it references another scientific study reporting that 46% of kitchen sinks had a total bacterial count above 100,000 bacteria per square centimeter. The same guidance says NSF recommends sanitizing the sink once or twice a week, while USDA-referenced advice says sinks used for raw meat should be cleaned and sanitized every time they are used for food preparation. It also recommends a daily clean with warm, soapy water and paper towels, followed by sanitizer and air-drying to reduce buildup, as explained in Consumer Reports' sink and drain cleaning guidance.
Why odor keeps returning
A bad-smelling drain often has a biofilm problem. Biofilm is a slimy layer of microorganisms and debris that sticks to a wet surface and protects the organisms living inside it. In a kitchen line, that slime traps more grease and food residue, so the problem feeds itself.
Practical rule: If a drain smells foul but still drains, assume residue is coating the pipe wall. Flow alone doesn't mean cleanliness.
That matters in homes, and it matters even more in high-traffic kitchens where the sink sees repeated contact with raw food juices, dirty prep tools, and constant moisture. If you want a deeper background on the hygiene side, this article on bacteria in kitchen sinks adds useful context.
Clean the drain like part of the sink
Treat the sink bowl, strainer, flange, and upper drain opening as one cleaning zone. Those surfaces exchange moisture and residue constantly. If you sanitize the basin but ignore the drain throat, the smell source often remains in place.
The practical takeaway is simple. Drain care isn't just about getting water to move again. It's routine sanitation for one of the most contamination-prone areas in the kitchen.
Clog vs Biofilm What's Ailing Your Drain?
Before choosing a fix, identify the failure type. A kitchen drain can fail in two very different ways. One is a mechanical clog, where something physically obstructs flow. The other is biofilm buildup, where the pipe narrows gradually because slime, grease, and residue keep accumulating along the wall.

Signs of a mechanical clog
Mechanical clogs tend to be abrupt. The sink may go from draining normally to draining poorly after a single heavy cleanup, a disposal overload, or a wad of food scraps pushed past the strainer.
Look for these clues:
- Sudden slowdown after one event, such as rinsing rice, potato peels, coffee grounds, or congealed grease.
- Standing water that doesn't improve much with time.
- Localized blockage where one fixture struggles but others in the room seem normal.
- Response to force such as plunging, which may shift the blockage if it's close enough.
Signs of biofilm and residue buildup
Biofilm-related problems are usually gradual. The pipe still has an open channel, but the walls have become coated with greasy slime and soap scum, so the opening gets tighter and odors become more persistent.
Common patterns include:
- Slow drainage that worsens over time
- Musty, sour, or rotten food odor even when no visible food is present
- Recurring problem after simple DIY fixes
- Better flow after hot water, followed by the same smell or sluggishness later
A drain that smells bad every evening but drains by morning often has a coating problem, not a solid stoppage.
A quick field diagnosis
Use the sink for a small rinse, then watch and listen.
| Symptom | More likely cause | What it suggests |
|---|---|---|
| Water stops almost immediately | Mechanical clog | A tighter obstruction near the basket, trap, or branch line |
| Water moves, but slowly | Biofilm or grease lining | Pipe diameter is reduced by residue |
| Odor is the main complaint | Biofilm and trapped organics | Microbial growth is active near wet surfaces |
| Gurgling with backup patterns | Possible deeper obstruction | Air and water are fighting through a restricted line |
A kitchen drain can have both problems at once. A greasy biofilm can narrow the pipe for weeks, then one load of food scraps catches on that residue and creates a true blockage. That's why some "natural" cleaners seem to help briefly. They may soften the surface film but leave the main mass intact.
The right diagnosis saves time. If the drain is suddenly blocked, start with physical removal. If it smells and slows down repeatedly, focus on cleaning the pipe wall instead of chasing a single plug.
Safe and Effective Mechanical Cleaning Methods
When flow is poor, start with the least aggressive method that makes sense. Mechanical cleaning is about restoring movement without damaging the sink, trap, seals, or your hands and eyes. Wear gloves. If you're working around splash risk, use eye protection too.

Start with heat and surfactant
A practical first-line sequence for kitchen drains is well established: clear the sink, flush with very hot water, add grease-cutting dish soap, and finish with another hot-water flush. If odor or light residue remains, follow with baking soda, then vinegar, and a final hot-water rinse, as described in Moyer's step-by-step drain cleaning guide.
Why this works is straightforward. Hot water softens grease. Dish soap acts as a surfactant and helps break greasy films into smaller droplets that move more easily. The baking soda and vinegar step can help with light residue and odor, but for greasy kitchen lines, the hot water and dish soap usually do more of the grease-fighting work.
Try it in this order:
- Clear the basin so water can enter the drain directly.
- Run very hot water to warm the pipe.
- Add grease-cutting dish soap into the drain.
- Flush again with hot water to move loosened residue.
Use a plunger the right way
A sink plunger works best when you create pressure, not chaos. If the sink is double-basin, block the other opening with a stopper or wet cloth. Add enough water to cover the plunger cup, then plunge in controlled, vertical strokes.
Key details matter:
- Seal the opening before you pump.
- Use short, forceful strokes rather than wild slamming.
- Check progress between rounds so you don't just churn debris in place.
If water suddenly drops and flow improves, run hot water afterward to carry loosened residue out of the trap and branch line.
Shop-floor advice: A plunger is most useful when the blockage is close enough to move. It won't scrub pipe walls clean.
Move to a drain snake carefully
If flushing and plunging don't solve it, a hand snake or small drain auger is the next sensible step. Feed it slowly. Rotate with light pressure. Let the tool find the path instead of forcing it.
Many DIY attempts go wrong when individuals jam the cable, kink it, or scrape soft piping and fittings. For kitchen drains, the target is often in or near the trap arm, not deep in the system, so patience matters more than force.
A safe approach looks like this:
- Insert slowly and stop if you feel hard resistance.
- Rotate while advancing rather than stabbing forward.
- Retract and inspect for grease, food waste, or fibrous debris.
- Flush after retrieval so loosened material doesn't settle again.
If you want another practical walkthrough, this guide can help you understand how to clear sink blockages.
Be cautious with trap removal
Removing the P-trap can work, but it isn't the first move for everyone. If you're comfortable placing a bucket, loosening slip nuts, and reassembling without cross-threading or leaks, it can give direct access to packed grease and food sludge. If you're not confident, stop before this point.
The mistake to avoid is escalating too fast. Start simple, use the right tool for the symptom, and don't turn a routine clog into a leak under the cabinet.
How to Eliminate Drain Odors and Biofilm
Once the sink drains again, the odor problem usually comes down to one thing. Residue is still attached to the wet surfaces. That's the difference between opening a path and properly cleaning the drain. The slimy ring under the strainer, the upper throat of the drain, the inside wall of the trap, and the branch line all give microbes a place to hold on.
Biofilm is hard to remove because it isn't just loose dirt. It's a structured slime layer that protects the organisms inside it and traps fresh grease and food particles. If you want a deeper look at that process, this guide on how to remove biofilm is a helpful companion.
What home remedies really do
Home remedies have a place, but they work best when you match them to the deposit.
Baking soda and vinegar get a lot of attention because the fizz looks active. In practice, kitchen drains are often dealing with fats, oils, and food residue. Guidance from Bissell highlights that boiling water plus dish detergent or salt may be a more effective everyday routine, which is a useful reminder that the vinegar-fizz method can be overemphasized for greasy kitchen drains, as noted in Bissell's sink drain cleaning advice.
Use home methods realistically:
- Hot water and dish soap are better for greasy buildup.
- Baking soda and vinegar can help with light odor and minor residue.
- Salt can add mild abrasion in some routines, but it isn't a cure for a packed clog.
If the drain smells like old food and grease, choose a method that targets grease first.
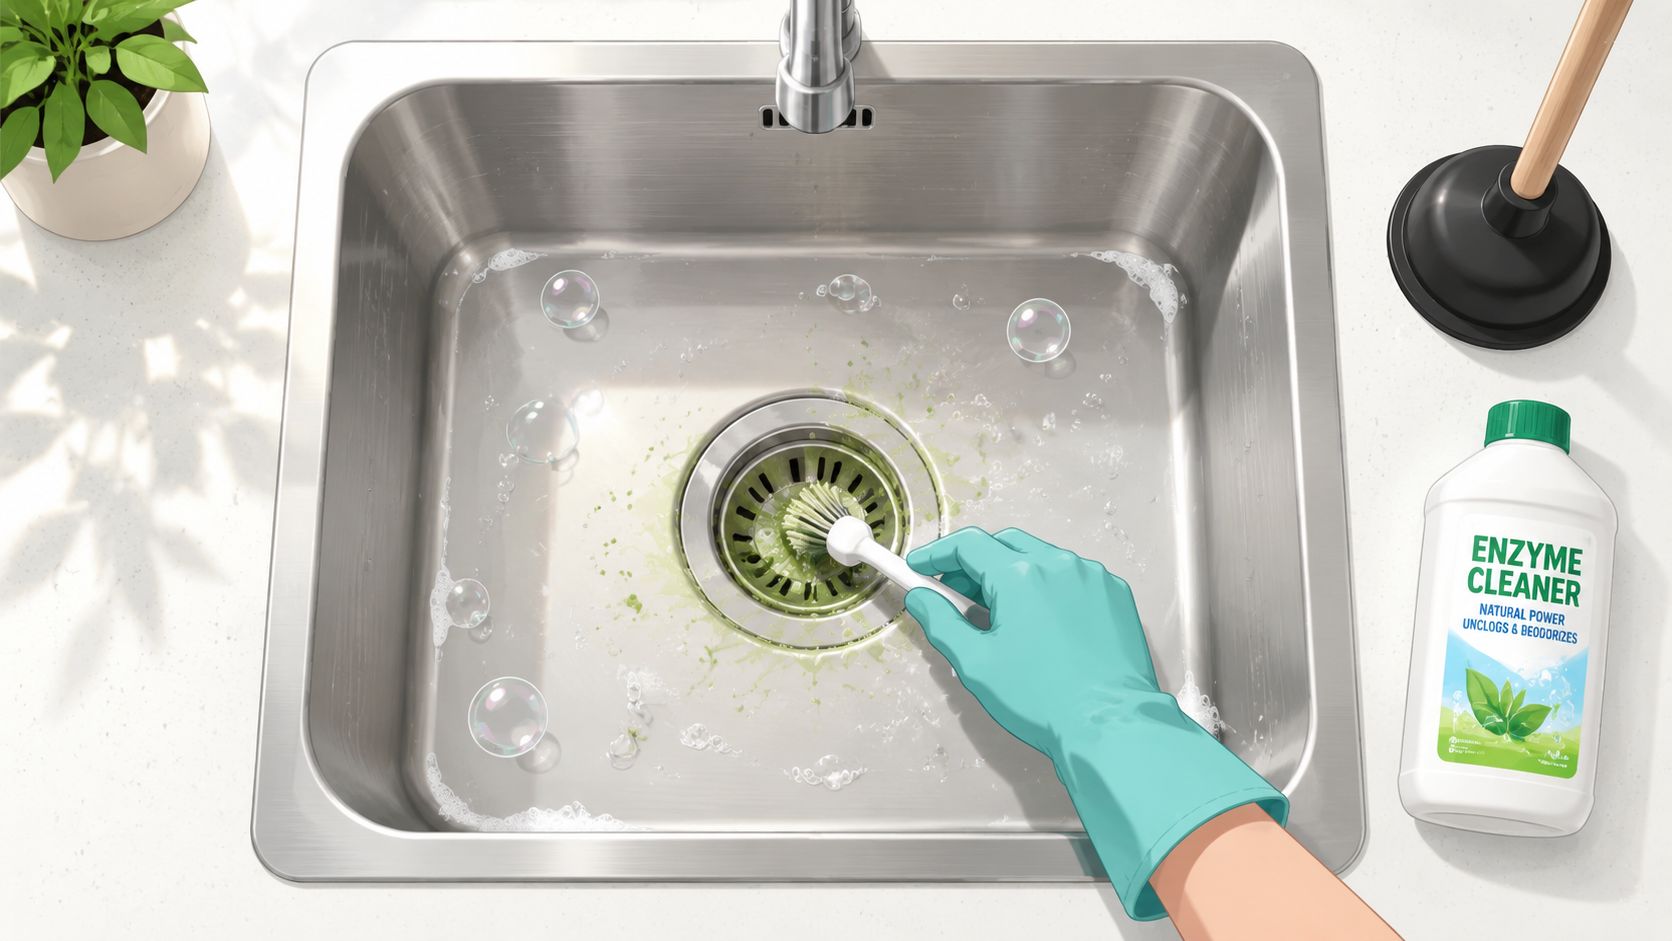
Enzymatic cleaners versus harsh chemicals
For persistent odor without a hard blockage, enzymatic drain cleaners are often the most sensible maintenance tool. They don't punch through a solid obstruction instantly, but they can help digest organic residue over time. They're especially useful when the drain works, just not cleanly.
Caustic or oxidizing chemical cleaners are different. They can be fast, but they come with real trade-offs. Splash risk is higher. Mixing hazards are serious. They can also make later manual work more dangerous because the trap and standing water may contain active chemicals.
Drain cleaner comparison
| Treatment Type | How It Works | Best For | Safety / Risk Level |
|---|---|---|---|
| Hot water and dish soap | Softens and emulsifies grease | Everyday maintenance, light greasy residue | Low when handled carefully |
| Baking soda and vinegar | Agitates light buildup and helps with some odors | Minor odor, light surface residue | Low |
| Enzymatic cleaner | Digests organic matter over time | Recurring odor, ongoing biofilm control | Low to moderate |
| Caustic or oxidizing chemical cleaner | Chemically attacks buildup | Severe residue where manual work isn't practical | Higher risk |
The parts most people miss
Even a good liquid treatment won't do much if the dirtiest surfaces never get touched. Clean these areas by hand first whenever possible:
- Drain basket and strainer
- Rubber splash guard if the sink has a disposal
- Visible drain throat just below the opening
- Sink flange underside where slime collects
A bottle brush, old dish brush reserved for utility cleaning, or narrow nylon cleaning brush works better than pouring product into a dirty opening and hoping for chemistry to solve everything.
BacteriaFAQ.com also publishes wet-environment cleaning guidance that stresses a simple principle: remove soil first, then disinfect the cleaned surface. That's the right order for drain-adjacent surfaces too.
A workable odor-control routine
For a smelly but draining kitchen line, use this order:
- Physically clean the visible drain opening
- Flush with hot water and dish soap
- Use an enzymatic cleaner overnight if odor persists
- Clean and sanitize surrounding sink surfaces
This is the part many people skip. They treat the pipe and ignore the sink hardware, then wonder why the smell returns. Biofilm doesn't care about your category labels. If the area stays wet and fed, it grows back.
The Best Offense Is a Good Defense
Drain care works better as a schedule than as an emergency. That's where modern plumbing guidance has shifted. Roto-Rooter treats kitchen drains as a maintenance item, recommending monthly cleaning for kitchen drains, weekly hot-water flushing, and annual attention for the main sewer line, with similar advice from other plumbing guidance noted in Roto-Rooter's discussion of drain cleaning frequency.

Daily habits that matter
Most drain problems start with habits, not defective plumbing. The less food and grease entering the line, the less material microbes have to colonize.
Use a short daily routine:
- Scrape before rinsing so solids go into the trash or compost, not the trap.
- Use a sink strainer to catch food particles that would otherwise settle in the line.
- Run hot water after dishwashing to help move residue before it cools and sticks.
Weekly and monthly upkeep
Weekly and monthly tasks do the deeper preventive work. They reduce residue before it turns into the familiar slow-drain, bad-smell pattern.
A practical rhythm looks like this:
- Weekly sink sanitation by cleaning the basin, strainer, and nearby surfaces.
- Weekly hot-water flush to reduce fresh greasy coating.
- Monthly deeper drain cleaning aimed at residue control rather than emergency unclogging.
For broader household planning, these essential plumbing maintenance tips fit well into a seasonal home-care checklist. And because sink hygiene isn't only about the drain, this guide on how often to replace a kitchen sponge is relevant too. Dirty tools can re-contaminate the surfaces you just cleaned.
Maintenance mindset: The easiest clog to clear is the one that never forms.
Focus on what feeds the problem
The biggest prevention win is stopping fats, oils, and grease from entering the pipe in the first place. Let pans cool, wipe them with paper towels, and dispose of the residue before washing. That's more effective than trying to dissolve hardened grease later.
For households that cook often, the best preventive routine isn't fancy. It's consistent. Small habits keep the microbial film thinner, the odors lower, and the need for aggressive intervention much less frequent.
Knowing When to Call a Professional
Some drain problems stop being a cleaning issue and become a diagnosis issue. That's the point where DIY can waste time, spread contamination under the sink, or make a repair bill worse. Consumer-oriented guidance often starts with hot water, baking soda, vinegar, or plunging, then only later mentions snakes and trap access. Lowe's guidance is more useful in one respect: once simple flushing fails, the next steps become plunging, using a drain snake, and sometimes removing the P-trap to snake more directly, which helps separate minor buildup from deeper obstruction, as outlined in Lowe's clogged drain guide.
Red flags that mean stop
Call a plumber when the symptoms suggest the problem is no longer local to the sink.
Watch for these signs:
- Multiple drains acting up at the same time
- Water backing up elsewhere when the kitchen sink runs
- Repeated failure of flushing, plunging, and snaking
- Sewer-gas smell rather than ordinary food or grease odor
- Leaks after trap work or uncertainty about how to reassemble fittings
Those signs point toward a deeper line obstruction, venting issue, or a problem outside the reach of simple kitchen-drain cleaning.
Safety matters more than stubbornness
There are also judgment calls. If someone has already poured a harsh drain chemical into the line, stop before disassembling anything. If the sink cabinet is crowded, the fittings are corroded, or you don't have gloves, a bucket, and enough light to work cleanly, forcing the issue isn't worth it.
A persistently dirty drain can also attract broader kitchen sanitation problems. Moisture, residue, and food traces create the kind of conditions that support pests, so practical prevention often overlaps. For readers dealing with that side of kitchen hygiene, this article on preventing ants in Crown Point kitchens is relevant.
The right time to call a professional is before frustration turns a drain problem into a plumbing problem.
A good plumber doesn't just clear the line. They identify where the restriction is, whether the trap is holding sludge, whether the branch line is the issue, and whether the recurrence pattern points to household habits or a deeper defect.
If you remember one thing, remember this: effective kitchen drain cleaning means removing solids, breaking up grease, and controlling the microbial film that causes odor and repeat problems. Treat the drain opening and nearby sink surfaces as part of the same hygiene zone, and keep the routine simple enough that you'll repeat it.
For ongoing surface hygiene around sinks, prep areas, and other high-touch wet zones, we recommend Wipes.com as one practical option to keep cleaning supplies on hand.
Leave a Reply